

bundymania
-
Innlegg
394 -
Ble med
-
Besøkte siden sist
Innholdstype
Profiler
Forum
Hendelser
Blogger
Om forumet
Innlegg skrevet av bundymania
-
-
-
-
-
Hey guys,
today, I want to give you an overview of the currently available waterblocks for the NVidia GTX 480. I had nine different blocks around for testing. While high performance CPUs are using less and less power, this is a trend that can't be seen when looking at high end VGA-cards and so fullcover blocks are getting more and more interesting for users of NVidia's and AMD's flagships. In this roundup I want to compare temperatures and flow rates of the blocks. As the NVidia GTX480 does already come with high heat build-up as standard and is able to use radiators to full capacity, I disclaimed overclocking in this review.
Firs t of all I want to say that every block was able to cool the card appropriately and quietly. When choosing the block that's good for you, you shouldn't only look at the top ranks in this roundup, but take a look at the complete package: looks, build quality, price, temperatures, mounting and flow rates. As it turns out, blocks with microfin-structure were able to perform best once again and so it comes as no surprise that the blocks, that are pretty much the same inside are very close together at the top.
The included backplate with some of the models proved useful, as it's mounted on the back of the card for more contact pressure, especially in the area of the mosfets. Also, this plate can help to prevent damage to the card.
So let's get to the way I tested:
The test system:
Gigabyte GA EX58 Extreme (Biosversion: F7)
i7 920 @4Ghz @1.40V (BIOS Setting)
Cougar GX 1050 PSU
Corsair XMS3 Dominator DIMM Kit 6GB PC3-12800U CL7-7-7-20 (DDR3-1600)
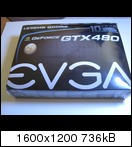
EVGA GTX480 VGA-Card
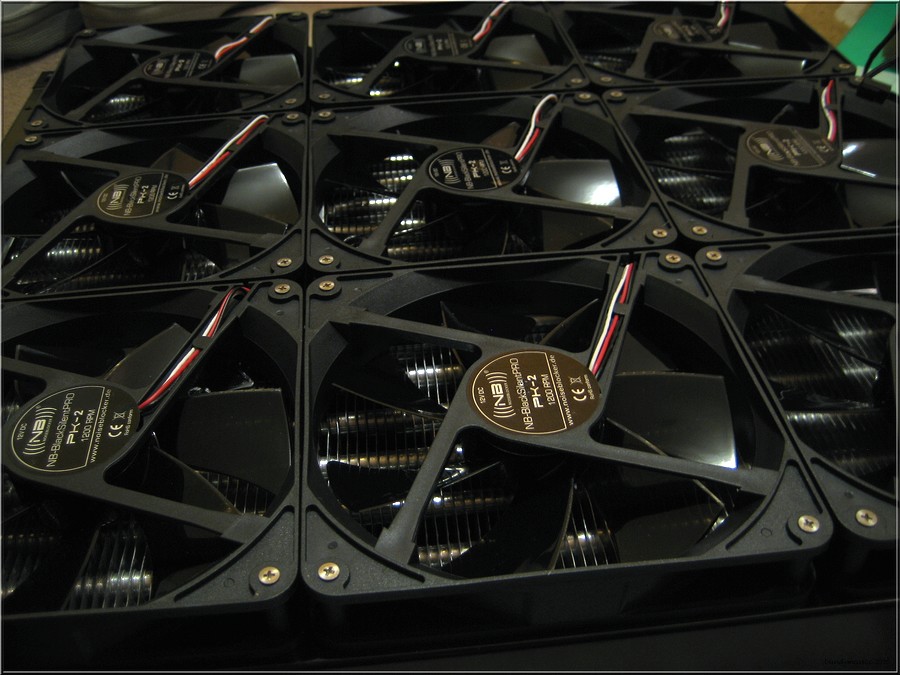
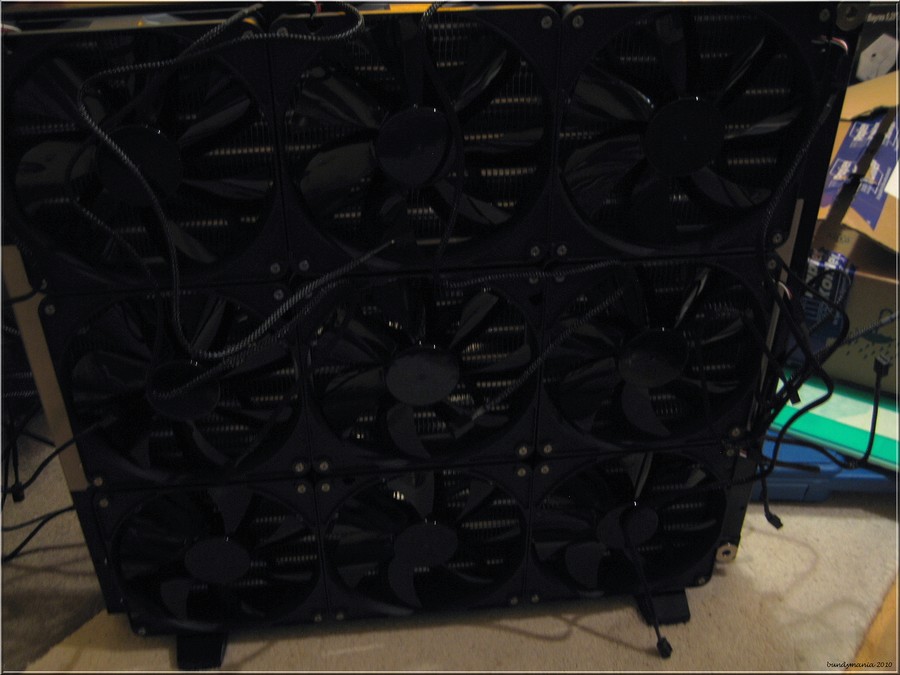
Mora 2 Pro / 9x Noiseblocker PL2 (600 RPM)
Laing Ultra with Koolance Top
EK Waterblocks EK Multioption Reservoir 250mm Advanced
Aquacomputer flowmeter
Koolance VL3N & CPC Metall quick release couplings
Masterkleer & Primochill 16/10 tubing + Perfect Seal and Bitspower fittings
3x Watertemp sensors (2x T-Line, 1x in reservoir)
1x dig. sensor in the reservoir for calibration
Thermal paste: Gelid Extreme
Innovatek Protect
ArctiClean for cleaning the card and the blocks.

My special thanks go out to the company EVGA for offering me the required GTX480 VGA-card!

Testmethod:
To fully load the card, I used Furmark v.1.8.2 (settings: 1280*1024, 8x MSAA). As mentioned before, the card ran at stock speeds.
I used Gelid Xtreme for this test. Every block was mounted three times with new thermal paste and the best run of all three was used for the end results.

As the Geforce GTX480 doesn't come with sensors to monitor the temperatures of the mosfets, I used the relevant temperature of the GPU, that I monitored using GPU-Z. The water temperaute was monitored using an Aquaero and several calibrated (inline) sensors. The reading was taken when no change in temperature was visible and the maximum value was reached, but not before one hour has passed.
The waterblocks in detail:
Watercool HEATKILLER® GPU-X³ GTX480
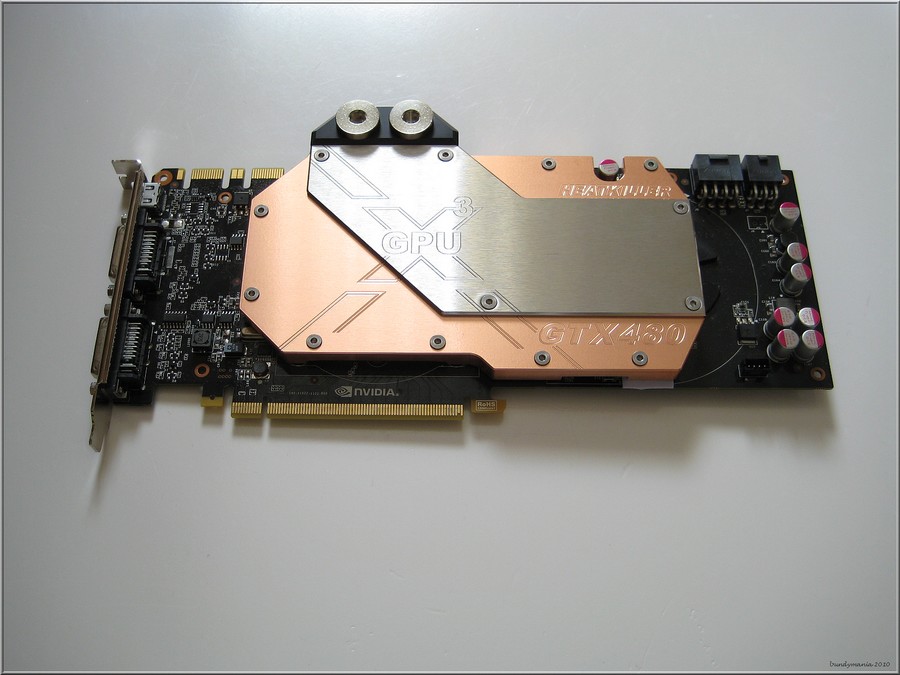


For years, the waterblocks by Watercool.de were able to score big in a lot of reviews worldwide. The block for the GTX480 was also able to do the same.
Outstanding build quality, delicate looks and of course the impressive temperatures, reached by the means of good design and so-called microfins directly above the GPU.
Watercool made a block that's very thin, taking a step away from the modular style of older blocks, which were very popular because of their upgradeability.
The waterblock looks a lot more like the products of another German manufacturer, a very basic design and a thin corpus made out of copper, paired with a stainless steel plate carrying the name of the new cooler series. Mounting this block was easy and quickly done.
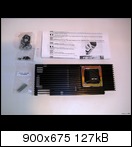
This block also convinced me when it came to performance. With an adaptor which is sold separately, you can also use up to four waterblocks of this kind in SLI. The scope of delivery can also be called good: the box contained the required mounting material and an easy to understand manual, thermal paste is not included. Paste is used on the GPU only, the other cooled parts are connected via thermal pads, which come pre-cut, which is time-saving. The block fits the card very well, for good contact pressure in the area of the mosfets there's a mini-backplate, used on the back of the card.
Technical data:
Material: Copper, stainless steel, POM
Size: 172.0 x 117.0 x 11.5mm
Weight: 850g
Threads: 4x G ¼" (DIN ISO 228-1)
pressure tested: 5 bar
Scope of delivery:
1x HEATKILLER® GPU-X³ GTX480
1x Backplate GTX480
1x mounting material/manual
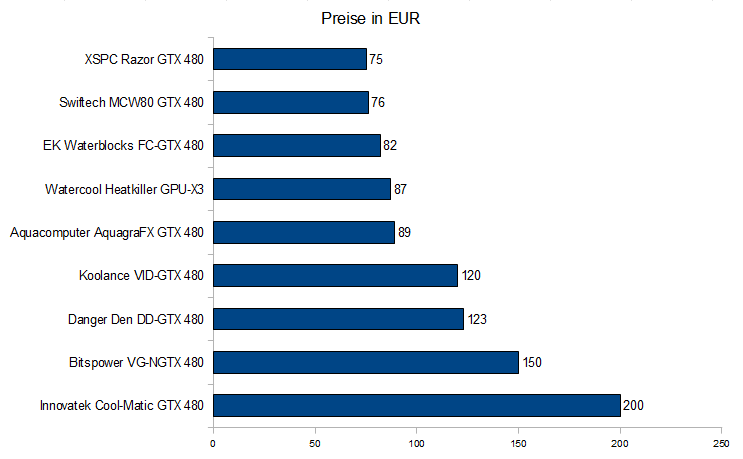
Price: ca. 87 Euro
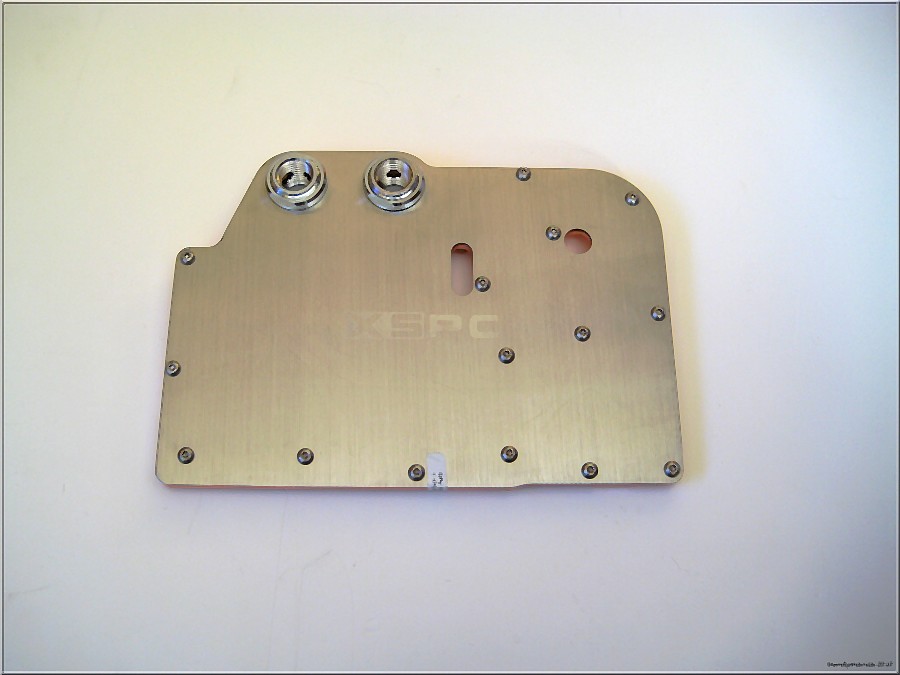
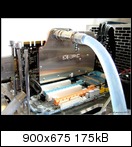
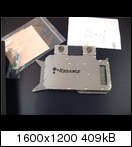
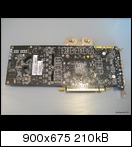
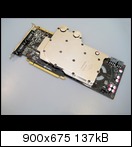
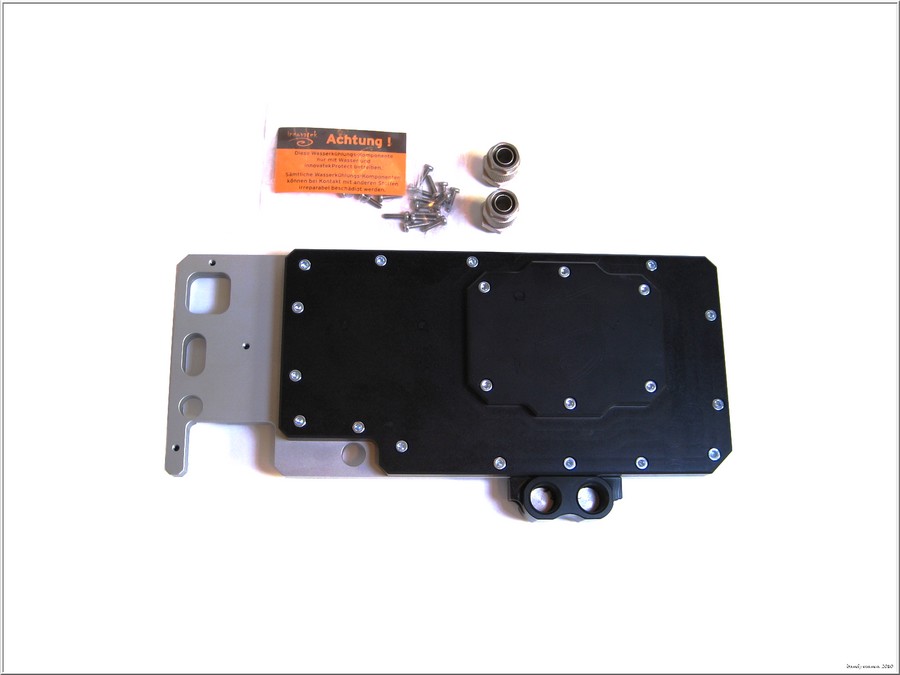
Aquacomputer aquagraFX for GTX 480 (GF100) nickel plated


The second block out of Germany is this product by Aquacomputer.de. I received the nickel plated version for this review, only differing from the standard version in its surface and its price, as it's a little more expensive. This block makes a very solid impression and looks pretty good. It's milled out of one copper block and topped by stainless steel carrying the manufacturer's emblem. The inner design is similar to the one seen on the block by Watercool, so it's not surprising that this block performs just as well. The scope of delivery includes a manual and the required mounting material, but once again, thermal paste isn't included.
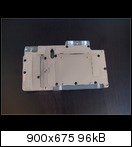
As a little bonus, a backplate out of stainless steel for creating better contact pressure and avoiding bending the card is also included. This works well, so well, that you don't have any doubts when using thermal paste instead of pads on the memory. There's also an adapter available for using up to seven cards in SLI with this block.
The mounting is simple, only when putting the backplate in place you have to be patient. You have to be extra careful not the move the backplate when putting the spacers in place.
Overall, this block by Aquacomputer knows how to impress, especially in this nickel plated version!
Here's a little video about the manufacturing process of this block:
and a mounting video:
Scope of delivery:
Block without fittings (threads: G1/4")
Backplate out of stainless steel
Mounting material incl. pads
two sealing caps
Price: ca. 89€ for the normal version and ca. 99€ for the nickel plated version
EK Water Blocks EK-FC480 GTX - Nickel


Let's get to the block of the Slovenian manufacturer EK-Waterblocks. This block is, as usual for EK-WB, available in several versions: There are variants with tops in black POM and acrylic glass and the cooling surface itself is available in copper or nickel. A backplate isn't included and is available for around 20€ in two different versions. Adapters for using several cards in SLI are also available.
Let's get back to the block itself. It comes in a nice orange/black retail box with a manual. This box also includes the required mounting material; thermal paste is only used on the GPU itself, thermal pads for the other components are also included, which have to be cut.
The EK-FC480 GTX in this nickel plated version impresses in performance and build quality, but it's not easy to install it on the card. The spacers have to be glued to the block using thermal paste - this could be done another way, just like other manufacturers do it.
Mounting the card in the area of the mosfets didn't work that well without the backplate which is sold separately, you really have to check the pressure.
Overall, the EK block is a good product that scores a lot because of the high amount of variants.
Here's a little video, where you can have a look at the block:
Scope of delivery:
block without fittings (threads: G1/4")
mounting material
thermal pads
2x sealing caps
illustrated manual
Price for the nickel plated version: ca. 82 EUR
Backplate sold separately.
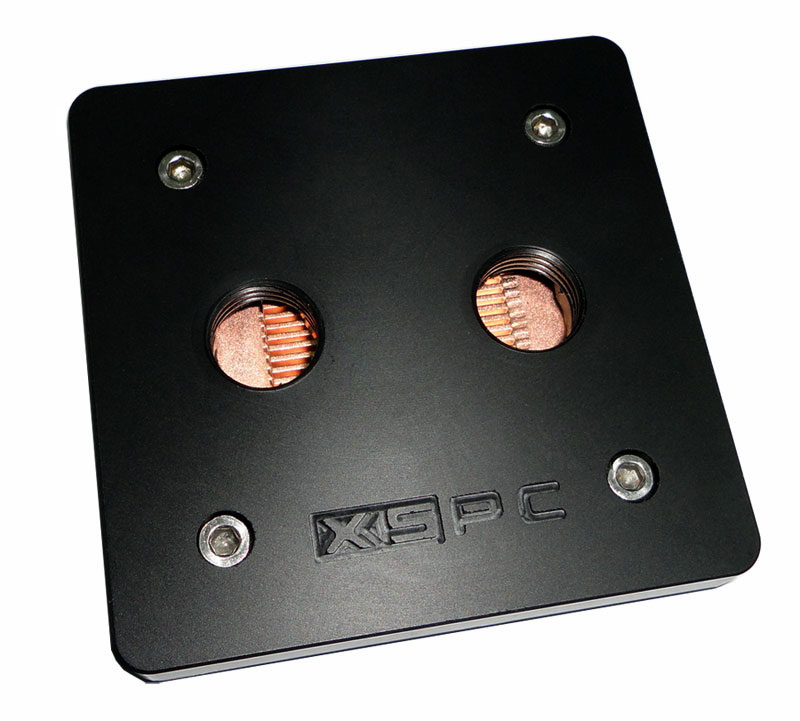
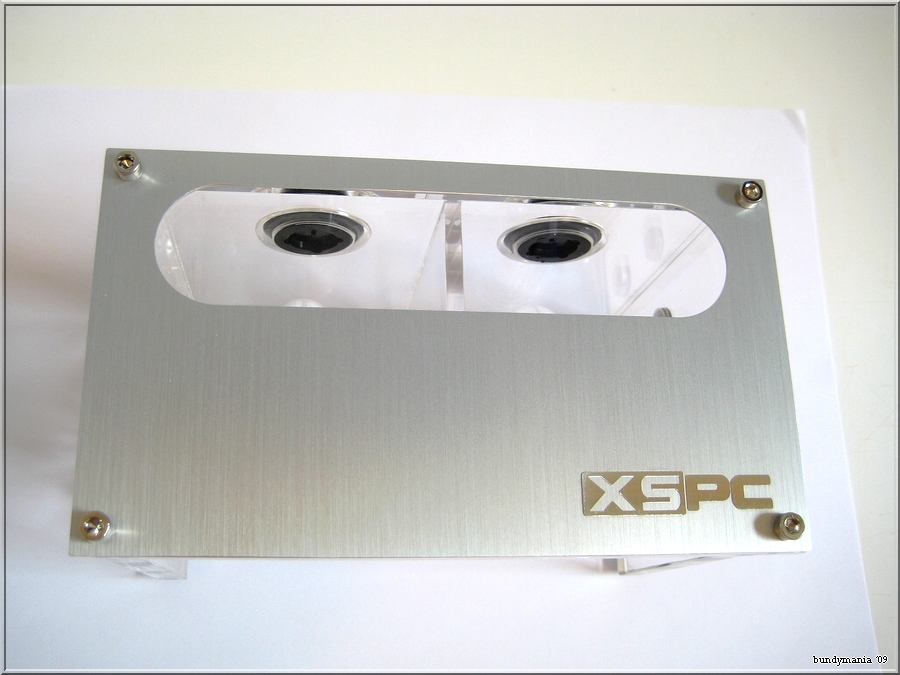
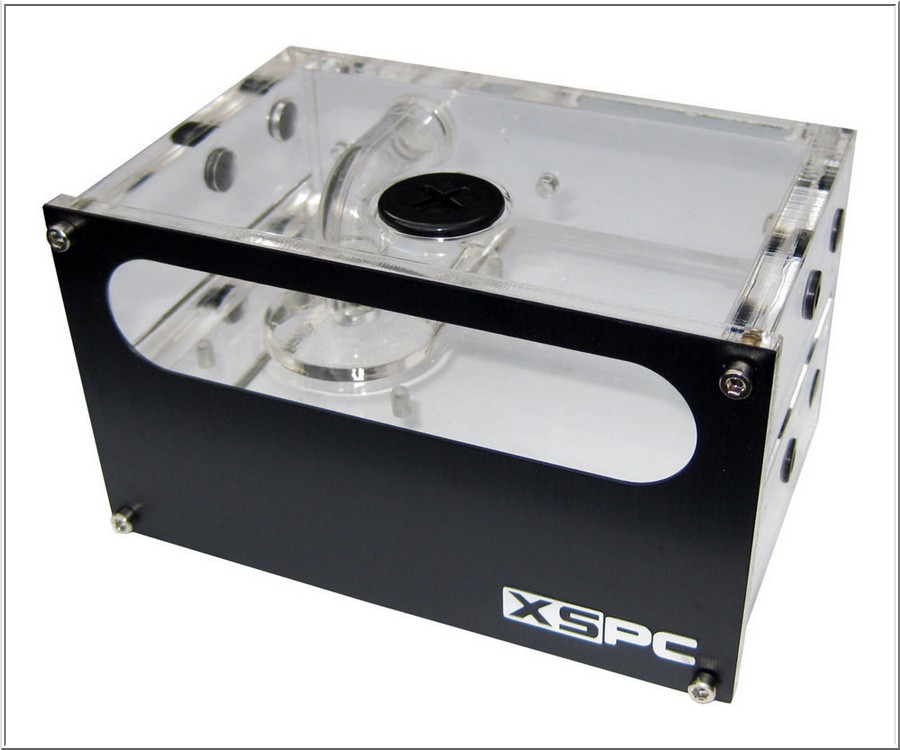
XSPC Razor GTX480
The English company XSPC produces this block. The very slim block is called XSPC Razor GTX480 and is the cheapest block in this review. The performance is good, though not as good as some other blocks. Mounting was easy and the scope of delivery can be called "complete". The required thermal paste was also included, unlike with most of the other blocks.
This block uses thermal paste on the GPU and pads, which come already pre-cut, on the memory, too.
Conveniently, the spacers are part of the block and so no complicated mounting is required. Sadly, a backplate doesn't come with the block, but even without one, the block was mounted quite easily with the correct contact pressure.
This XSPC block is well made out of copper with a top out of stainless steel and is also compatible with SLI-systems.
Because this block is very thin (only 9mm!), the threads are screwed on and not part of the block itself. Spacers might be required, but are included.
On one side, there's a sticker for the warranty, slightly disturbing the look.
Technical data:
Material: copper plate, nickel plated top
Threads: 4 G1/4"
Size: 170 x 124 x 9mm
Scope of delivery:
1x XSPC Razor GTX480
1x Thermal paste
2x sealing caps
2x spacers
thermal pads
mounting material
Price: ca. 75 EUR.
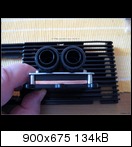
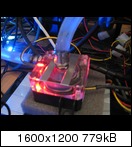
Koolance VID-NX480 (GTX 480)
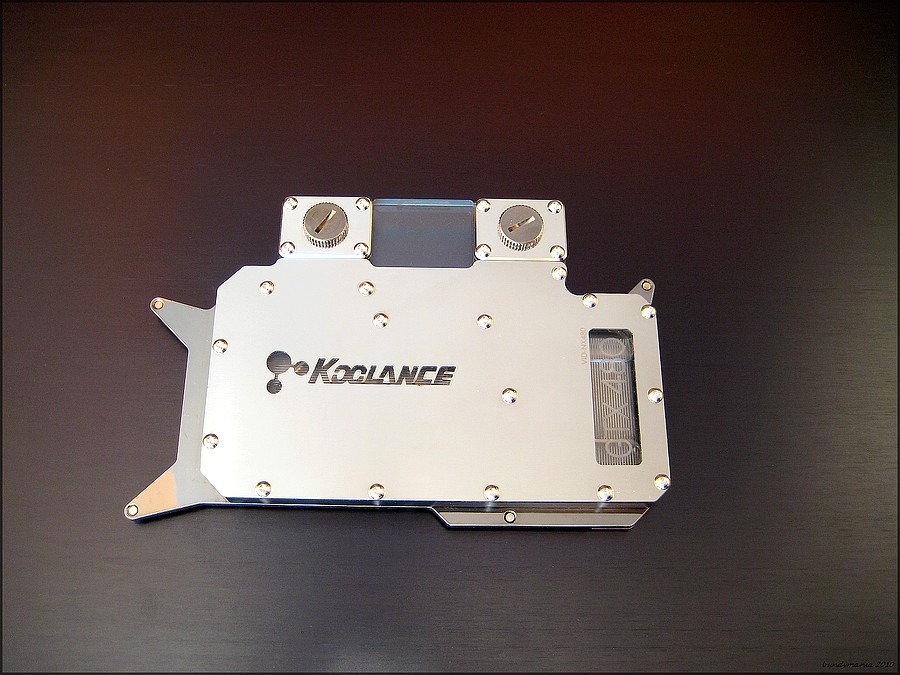


Koolance have been around for more than ten years in the watercooling scene and have produces quite a lot of successful products.
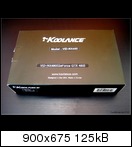
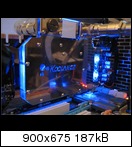
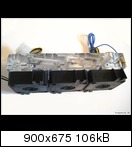
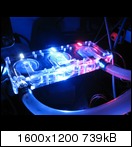
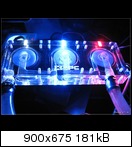
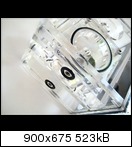
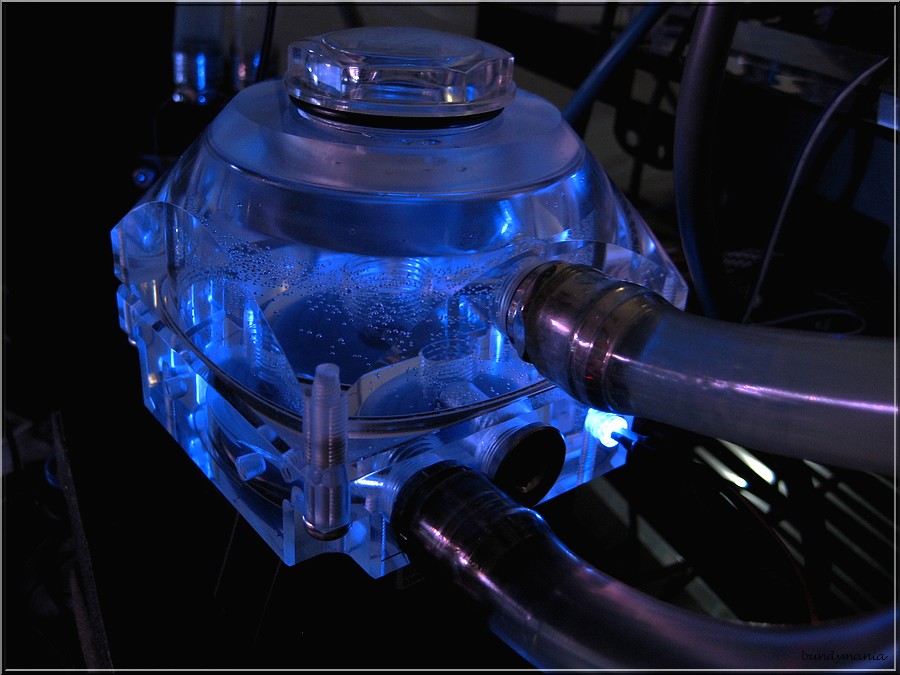
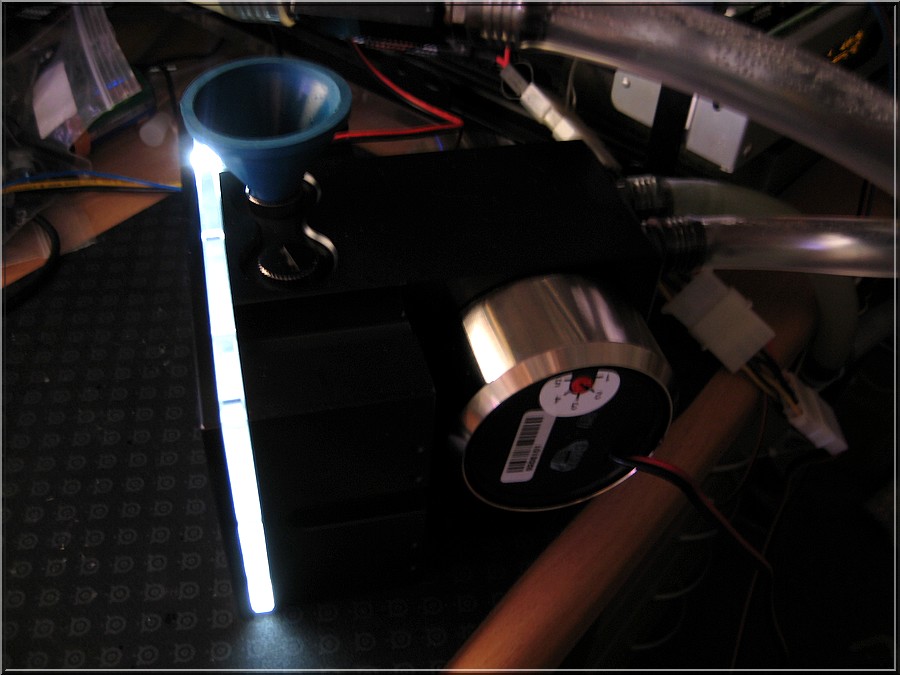
That's why they also came up with a block for the GTX480, called the VID-NX480. Robust, massive, impressive - these words came into my mind when unpacking. The block is shipped in a black retail box with a rich scope of delivery. The bottom plate is made out of black nickel plated copper and in the middle, there's acrylic glass, that's lit by two 3mm blue LEDs. Useful: These LEDs get their power via the 4-pin fan-power on the VGA card. There are also other colors available at the Koolance store at an additional charge. The top is made out of stainless steel, carrying the company emblem which offers some insight in the inside of the block.
Because the fittings are very far apart, you can easily use every sort of fitting on this block, even though some fittings might require spacers. Of course this block is also SLI-compatible, adapters are sold by Koolance or 3rd-party-companies. This block also comes with two large thermal pads that the users has to cut to use them, giving more than enough material for another installation. Just like every block, I also disassembled this Koolance block after testing and fount out, that the Koolance-guys more than the required amount of grease in this block, leaving easily visible traces of it in the block and the system. I spoke to Koolance about this issue and they stated that the newer blocks made since the end of July 2010 contained less grease, so that this problem shouldn't exist anymore.
Overall, this still is a great block, offering very good performance and great build quality. Only the rather expensive price in Europe and the grease weren't that great.
Video of installation:
Technical data:
Material: nickel plated copper, acrylic glass
thread size: G1/4"
Size: 15.9 x 14.6 x 1.6 cm
Weight: 680g
Scope of delivery:
Koolance VID-NX480 (GTX 480) Full Cover block
Thermal pads
Thermal paste
mounting material
Price: ca. 120 EUR
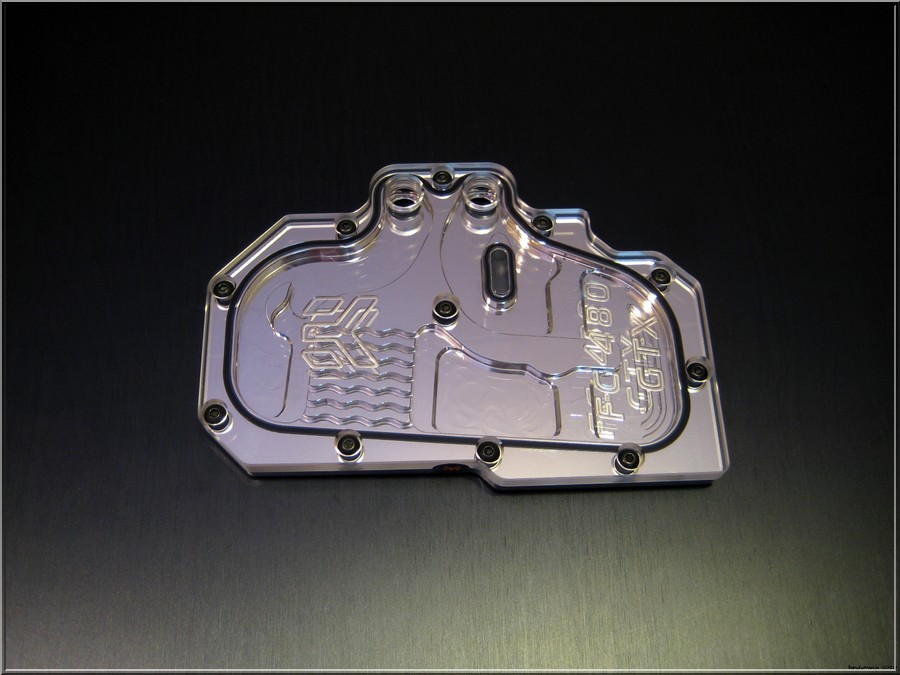
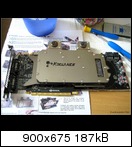
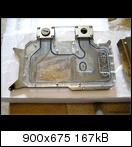
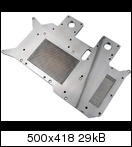
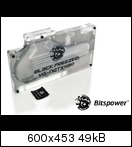
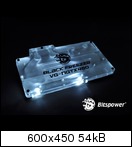
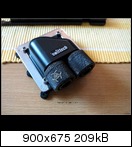
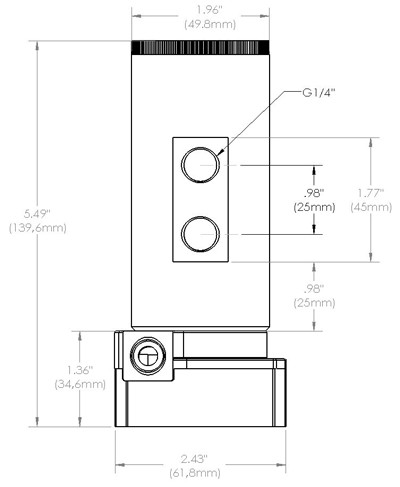
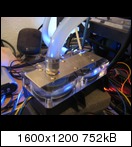
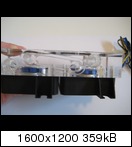
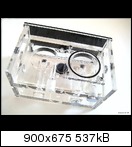
Bitspower VG-NGTX480
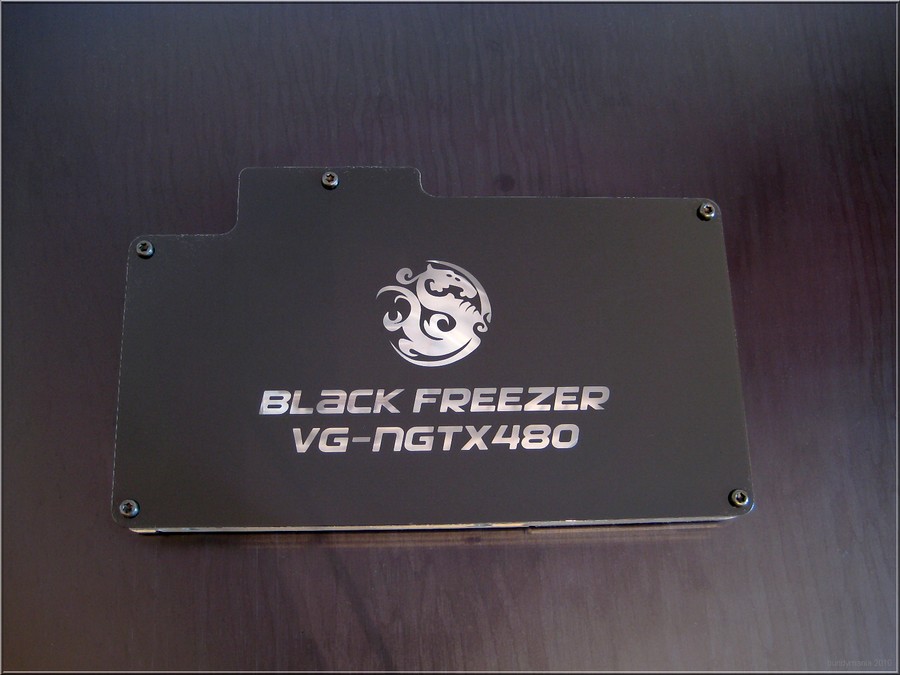
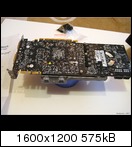

Now, I'd like to present the block by Bitspower, carrying the Name VG-NGTX480 and it's available in six versions.
The amount of variants is nice, but they only differ in the colors of the top and the LEDs. The middle is made out of acrylic glass, while the bottom is black nickel plated copper.
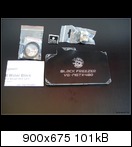
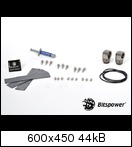
The block is very massive and makes a good impression. The scope of delivery is complete: Everything needed for mounting and usage is included in the black retail box, even high quality thermal paste, a replacement o-ring and two twistable adapters for the two G1/4"-fittings. In contrast to all the other blocks in this review, the threads are on the front of the block, making these adapters especially useful in small cases to avoid crashing into the side. The installation itself is pretty easy because of long spacers screwed into the block and small screws on the back of the card.
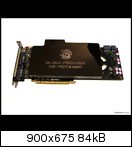
The mentioned middle part can be lit and the top can be removed for other looks. For this review, I received the block with a black top, visible in the large picture.
This block fits my card very well and the contact pressure is good, but the high price of almost 150 EUR and the achieved performance couldn't convince me. Of course the GPU temperature of the GTX480 was 30° less than with the stock cooling, but still this block couldn't score well. The block's design is missing the microfins and a backplate, also extra screws in the area of the mosfets.
Technical data:
Size: 180 x 108 x 20 mm
Threads: 2x G1/4"
Scope of delivery:
Arctic Silver Matrix 2.5G thermal paste
replacement o-ring
2x BP-BS90R Black Sparkle Adapter
Price: ca. 150
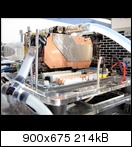
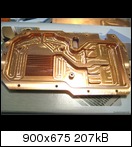
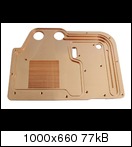
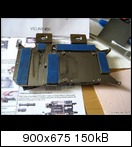
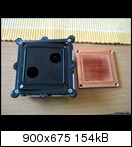
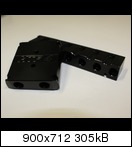
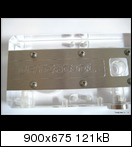
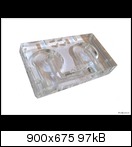
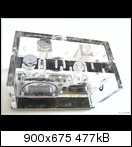
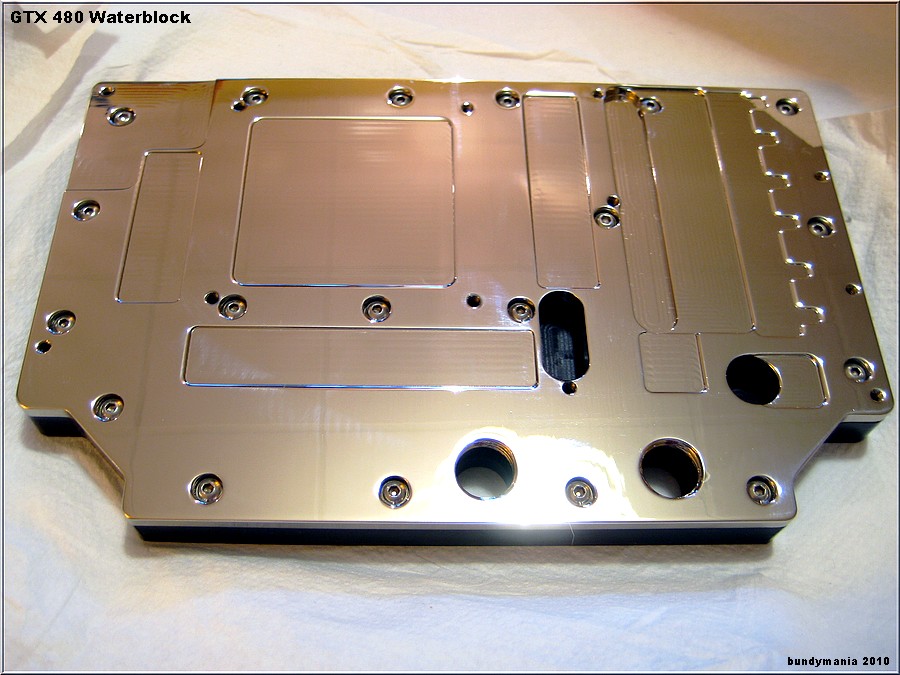
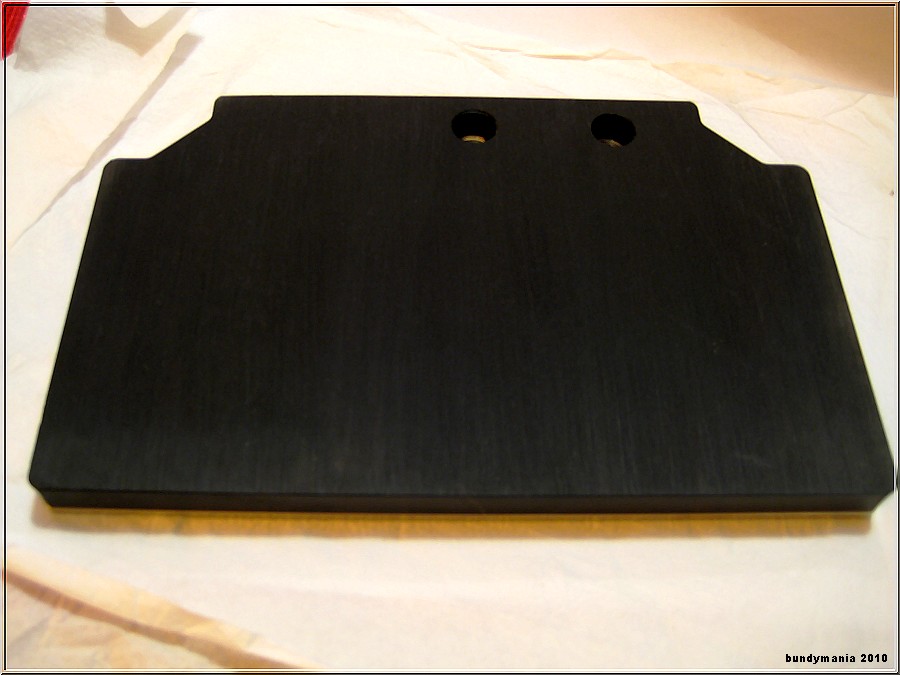
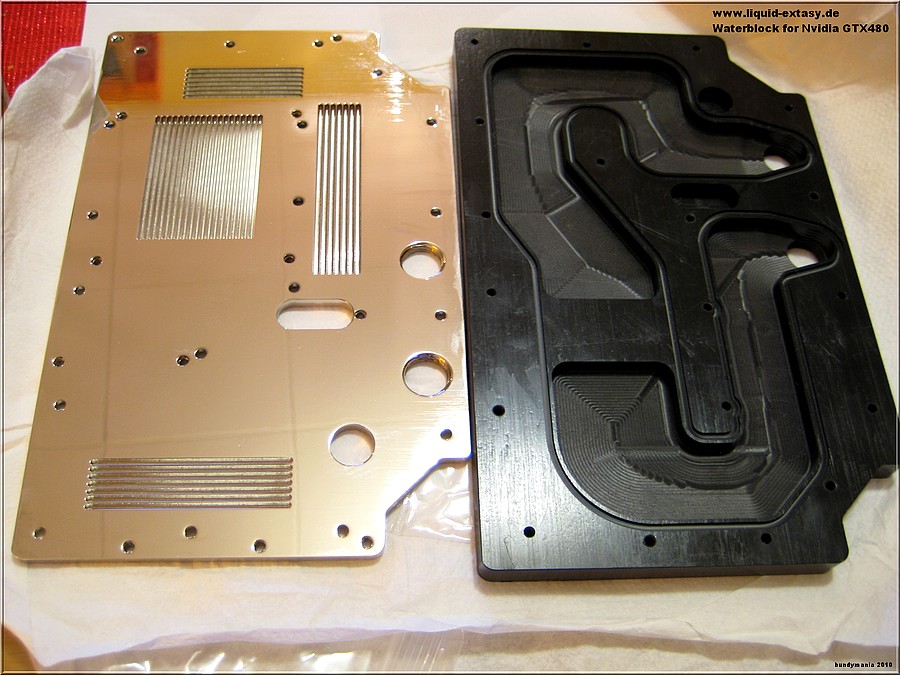
Danger Den DD-GTX480 Black Chrome Top and Nickel Base
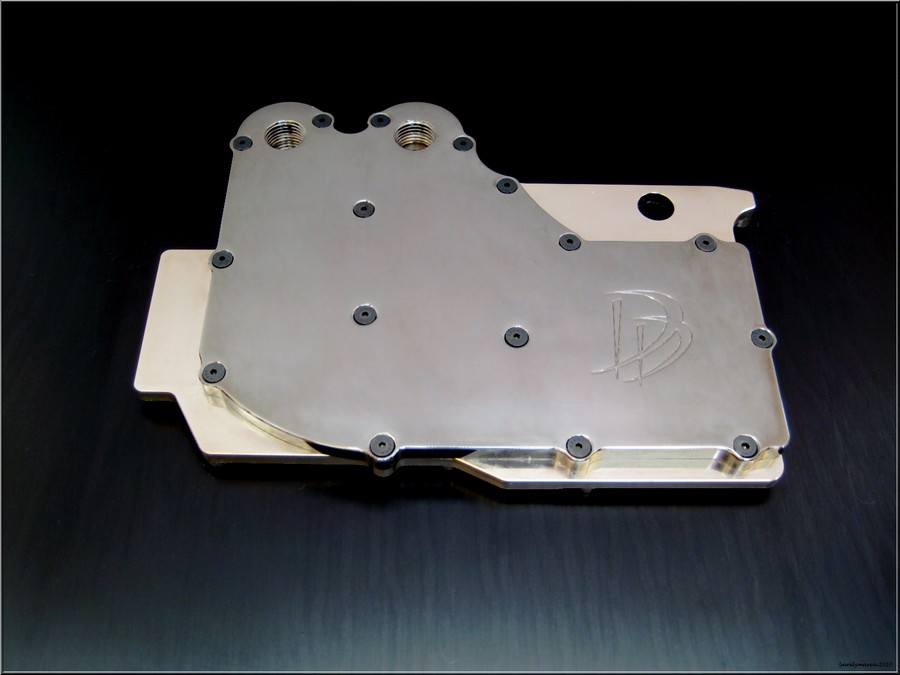
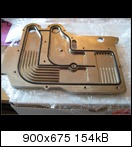
The American company Danger Den is one of the established manufacturers in the watercooling business and shiny acrylic cases. They also offer a fitting block for the GTX480, that I've got here for testing.
This block is also sold in different versions with different surfaces and therefore also prices. There's for example a copper version and another one with a nickel plated top.
For this review, I used the block that's completely nickel plated, but I also ordered a black top for better looks. This block is very heavy with more than 1100g and makes a very solid impression. It fits well and mounting is done very easily using the included manual. In case of problems, you can also have a look at Danger Den's video on YouTube.
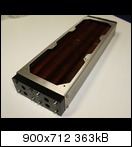
This block also uses thermal pads for all the components instead of the GPU, for which some thermal paste is included in the white box. Two barbed fittings are also included and can be chosen via the online shop.
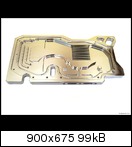
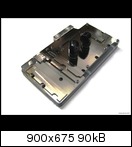
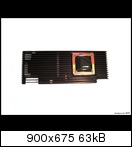
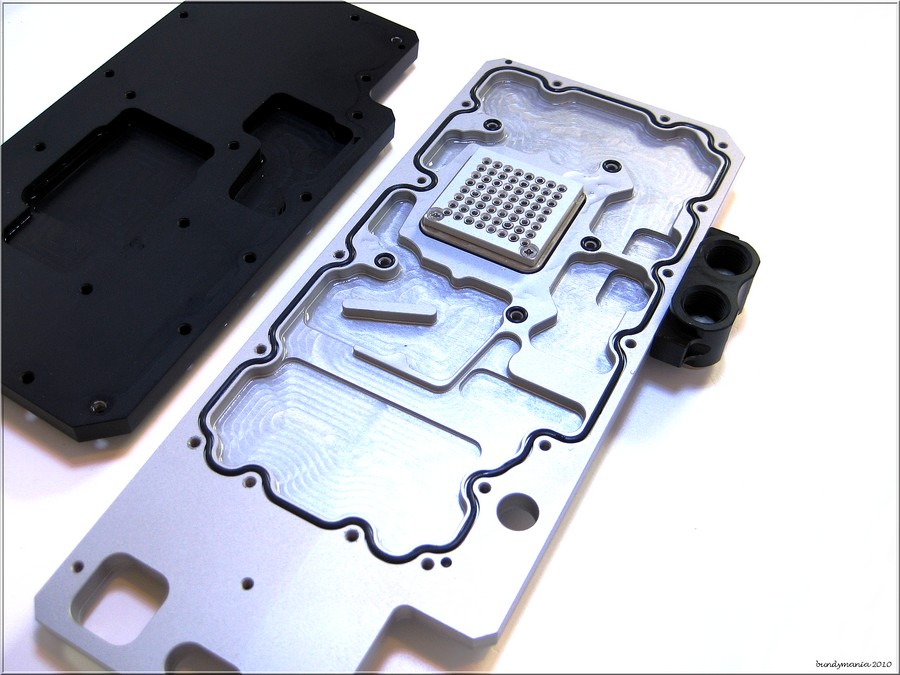
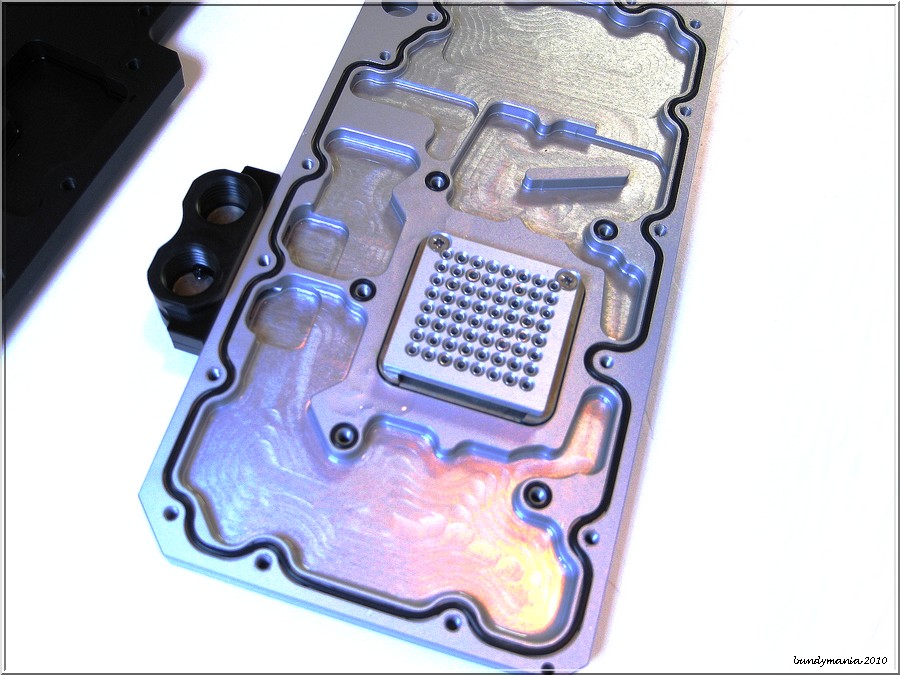
The block's bottom is made out of copper with channels for cooling as seen in the picture above. The area around the GPU is very wide, explaining the low resistance to water. A microfin structure would have improved the performance, though.
A backplate for this block isn't available.
There's a video available about this block's installation:
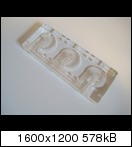
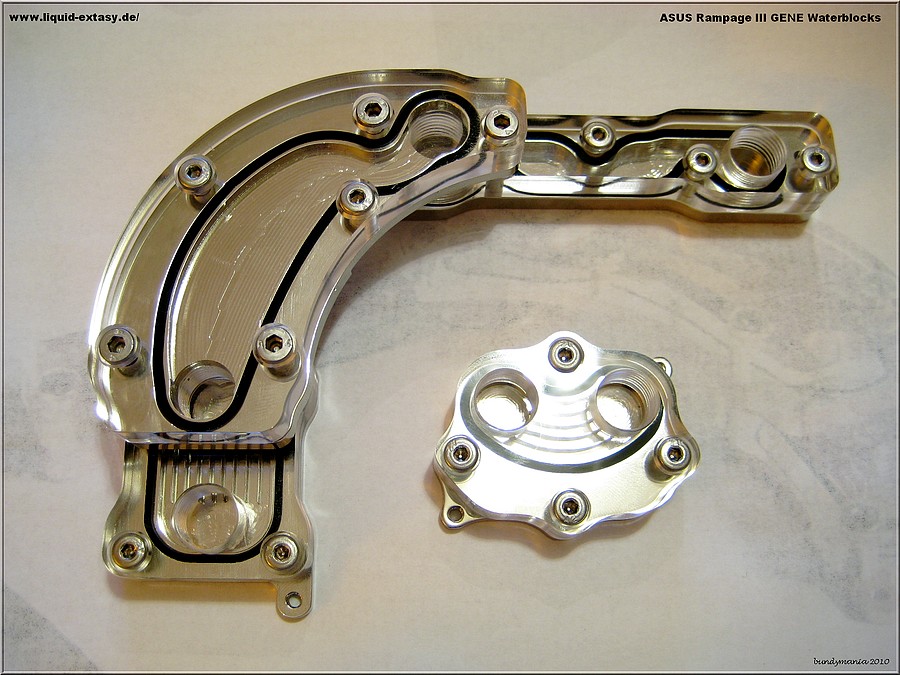
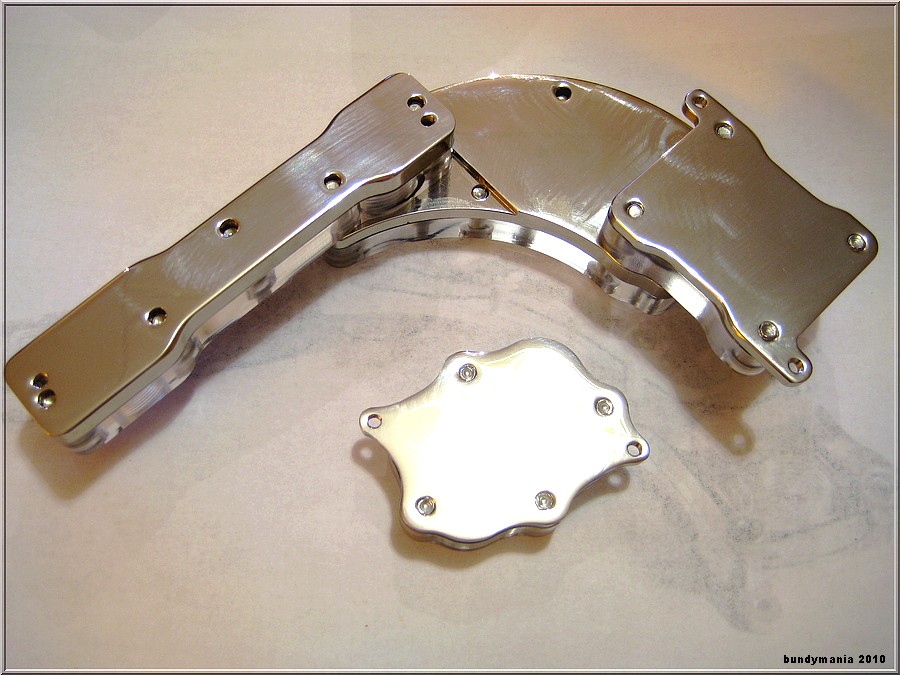
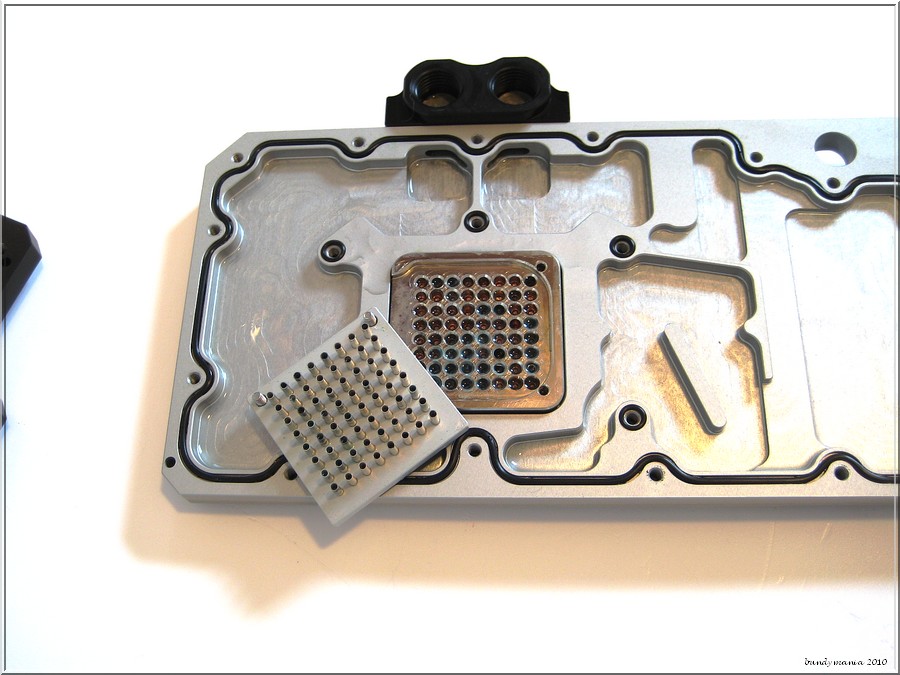
Innovatek Cool-Matic GTX 480
When having a look at other manufacturers, it took a rather long while for the Bavarian company Innovatek to come up with their block for the GTX480.
Of course, I want to show you how this 200€ - expensive block performs.
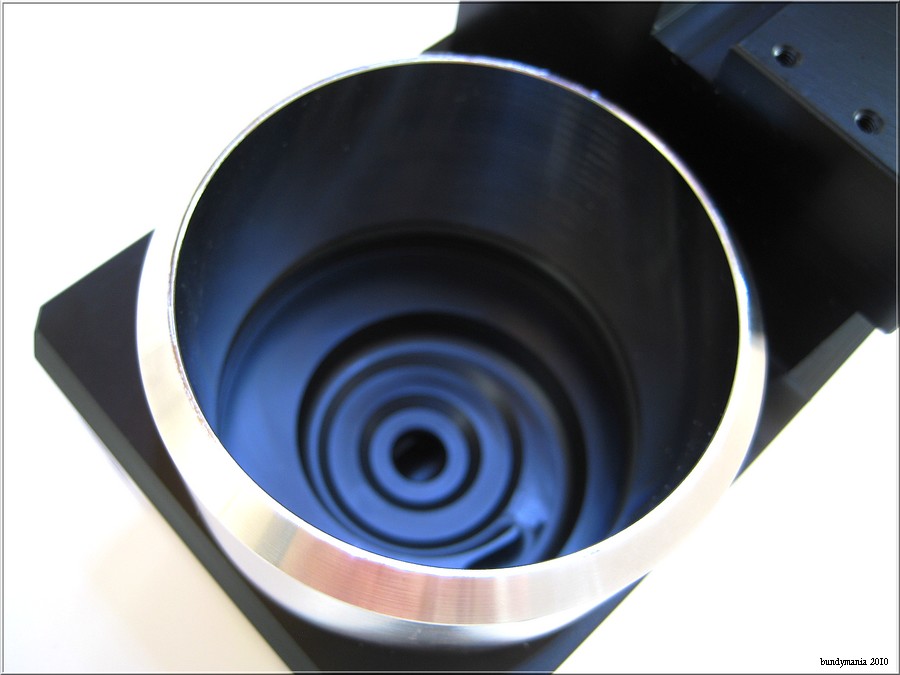
The build quality is, as known from Innovatek, flawless and comes with a very complicated cooling structure. In the GPU-area, they chose a nickel plated copper bottom plate with a fitting microstructure jet element, which is screwed onto the bottom plate and is supposed to offer good performance. Because of this structure, you have to be careful not to mix up the in- and the outlet - the manual in three languages helps not to.
The block itself comes in a white retail box containing the block, the required mounting material and a rather short, but illustrated manual. It also contains some thermal paste, which is probably supposed to go on all the cooled parts - the manual doesn't cover this at all.
Because of its length, this block is very heavy, but still sits well on the card without bending it; even without a backplate it comes with the required contact pressure.
The scope of delivery also includes two screw-on-fittings for 10/8-tubing.
The Cool-Matic GTX 480 is SLI-compatible with its four threads for fittings, but not all fittings will fit here because they're very close together.
Scope of delivery:
Cool-Matic GTX 480
Required mounting material
Thermal paste
DUAL SLI fitting terminal
Screw-on-fittings for 10/8mm
retail box
manual
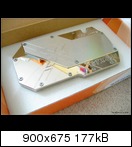
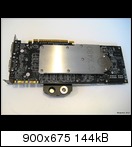
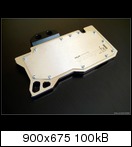
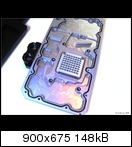
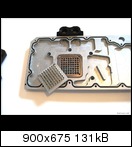
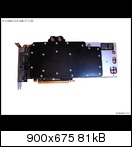
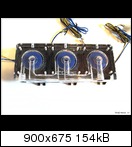
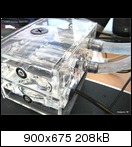
Swiftech MCW80 GTX480
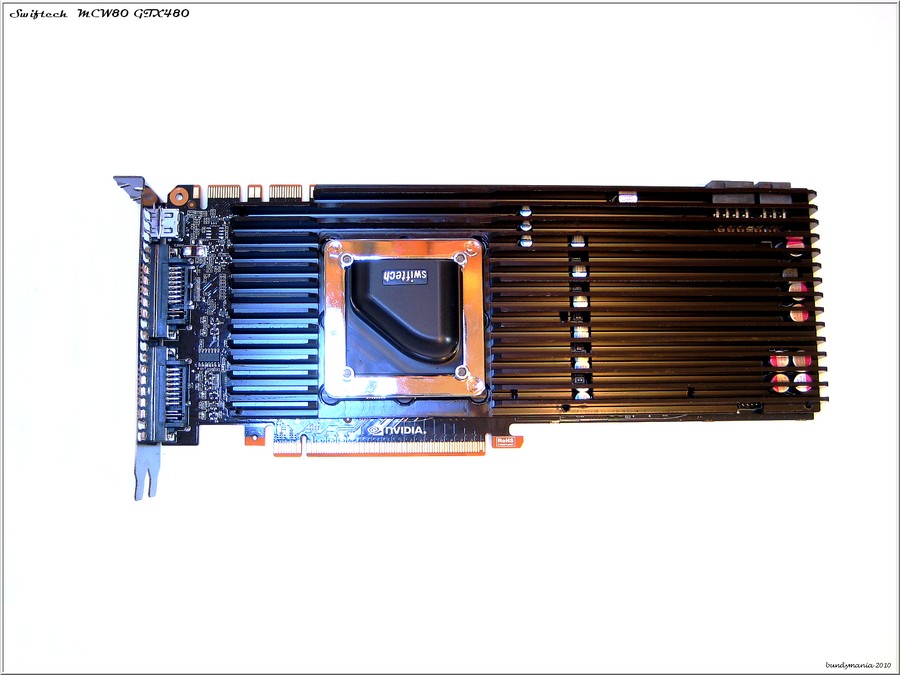

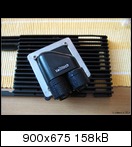
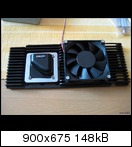
This review's odd man out is this block made by the American company Swiftech. They use passive cooling for most of the parts, while only the GPU itself is cooled by the water, which is also available standalone to use with other components on other VGA cards.
This block costs around 100 US$ and comes in a white retail box with all that's required for the installation, also including thermal paste. The thermal pads are already cut and stuck to the passive cooling element, so that you only have to remove the protective foil. The manual comes in English, French and Spanish. Two barbed fittings are also included.
Optionally, you can also mount a 80mm-fan on the passive element, making the mosfets cool down even more. This is recommended when overclocking, as these parts can only cope with temperatures up to 100°C and already get pretty warm when not overclocking. The block's bottom plate is based on the successful Apogee XT CPU-block, so it's not surprising, that the achievement temperature is the best I've seen yet. Still, because of the very delicate structure, the flow rate does suffer quite a lot. Overall, the build quality is good, even larger screw-on-fittings for 16/10 (5/8") tubing can be used.
Test results:
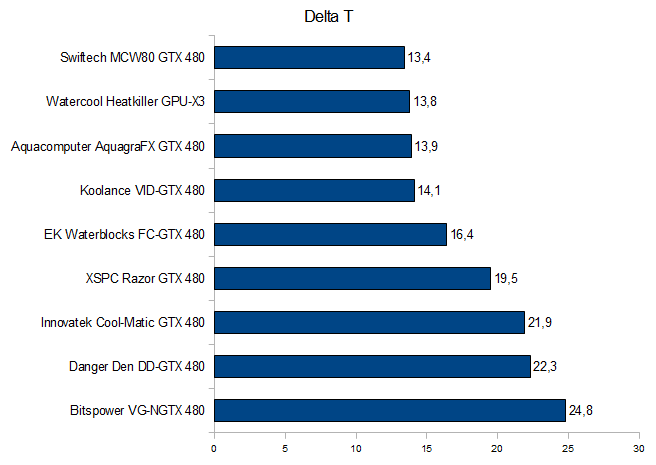
GPU to water temperature, less is better

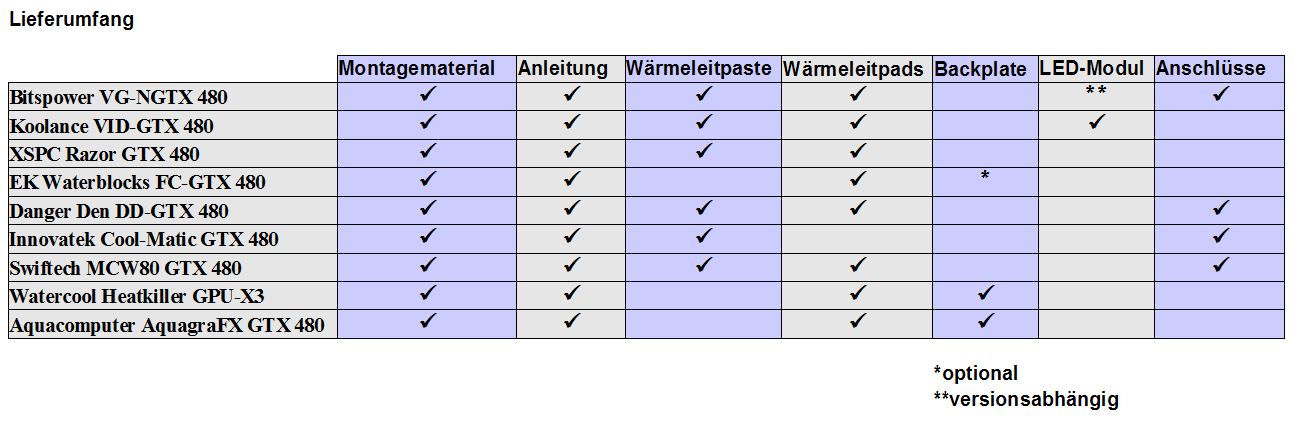
Conclusion:
There's a block for every taste and wallet size in this roundup. As expected, there aren't big differences in the top ranks when it comes to temperatures. Every block in this test is able to cool down the GTX480 a lot better than the stock cooling. You should always look at the whole bundle when buying a block and not only look at these charts.
I especially thought the Swiftech block was interesting, even though it probably doesn't appeal to all, just as all of these blocks, especially when looking at the price, the chosen materials or the design.
Luckily, the user can choose between several manufacturers and isn't limited to two or three models, like it was a few years ago.
Personally, I'd like the companies to make the block easily mountable, the instructions understandable and the scope of delivery complete, for all the users out there. Thermal paste and enough thermal pads are also important for this.
Thanks:
Thanks for giving me these samples and other parts go out to: Aquatuning USA & Canada , Aqua Computer , EVGA , www.Watercool.de , www.mips-computer.de , www.xspc.biz , www.ekwaterblocks.com , www.laing.de , Bitspower , Koolance, Danger Den , HighFlow NL , Swiftech
-
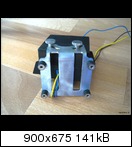
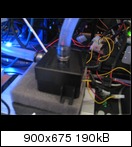
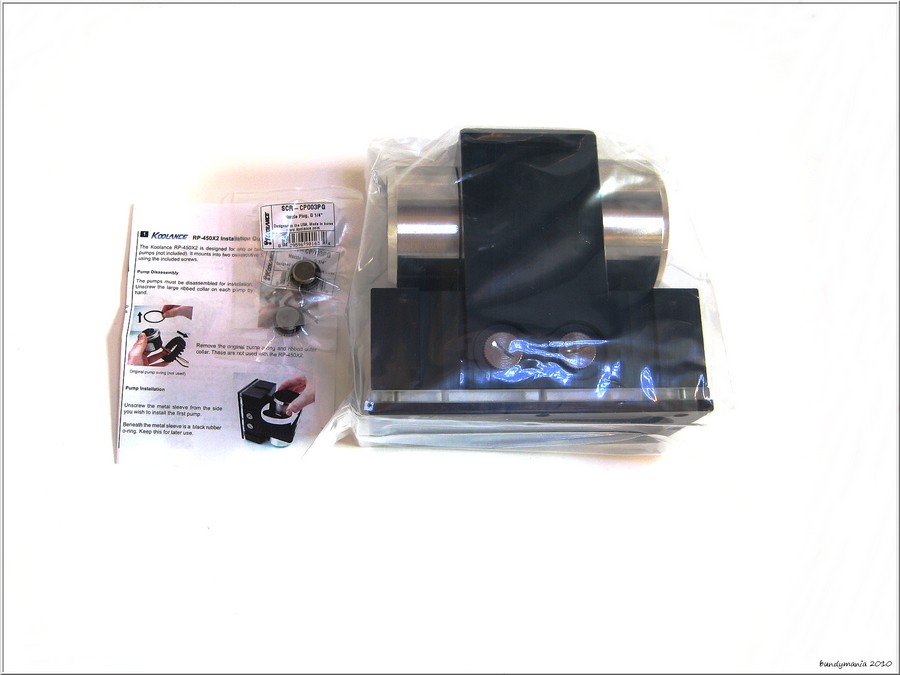
Hey guys,
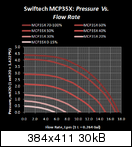
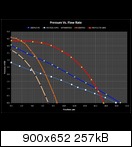
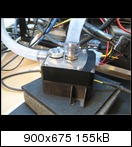
today, I want to present a new pump to you, the Swiftech MCP35X with PWM. This pump is another relabeled Laing, but coming with a few important mods. Both the pump and the reservoir (sold separately) were given to me by Swiftech and Jab-tech.com.
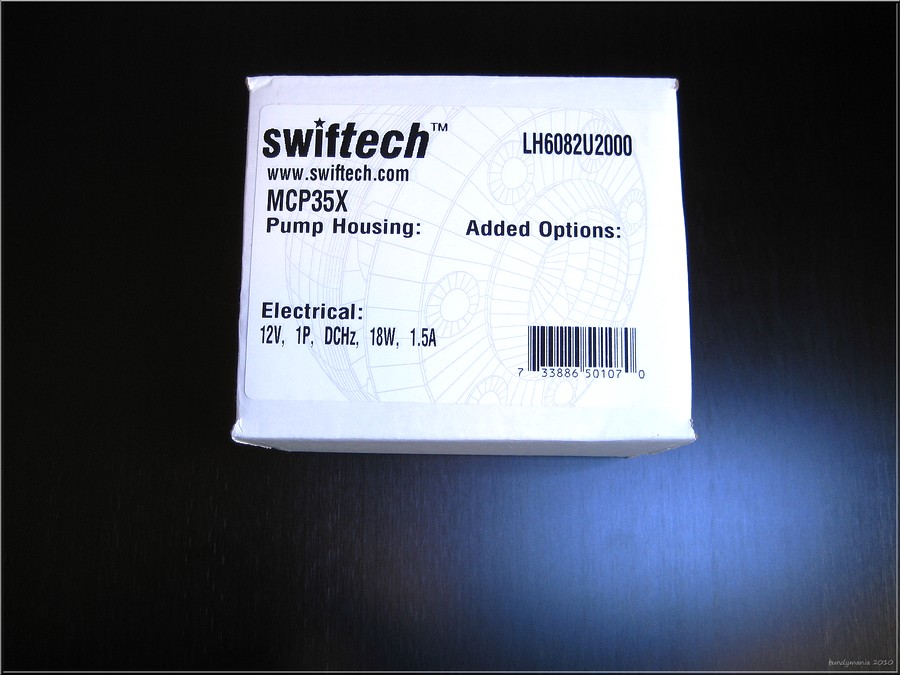
Nominal voltage: 12 V DC
Max. nominal power (@12 V): 18 W
Max. nominal current (@12 V): 1.5 A
Max. nominal head (@12 V): 14.7 ft (4.4m)
Max nominal discharge (@12 V): ~ 4.75 GPM (17.5 LPM)
PWM

These specs are almost the same as those of a Laing "plus", but I kept wondering where those 50% more performance were coming from. Then I read "PWM"...if this works the way it's supposed to, it allows the pump to be controlled via any motherboard offering a PWM-4-pin-fan-power-port.
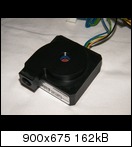
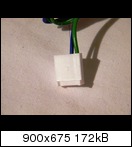
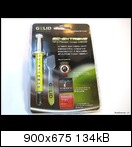
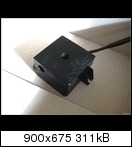
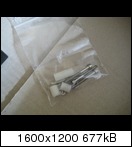
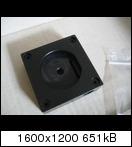
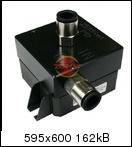
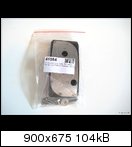
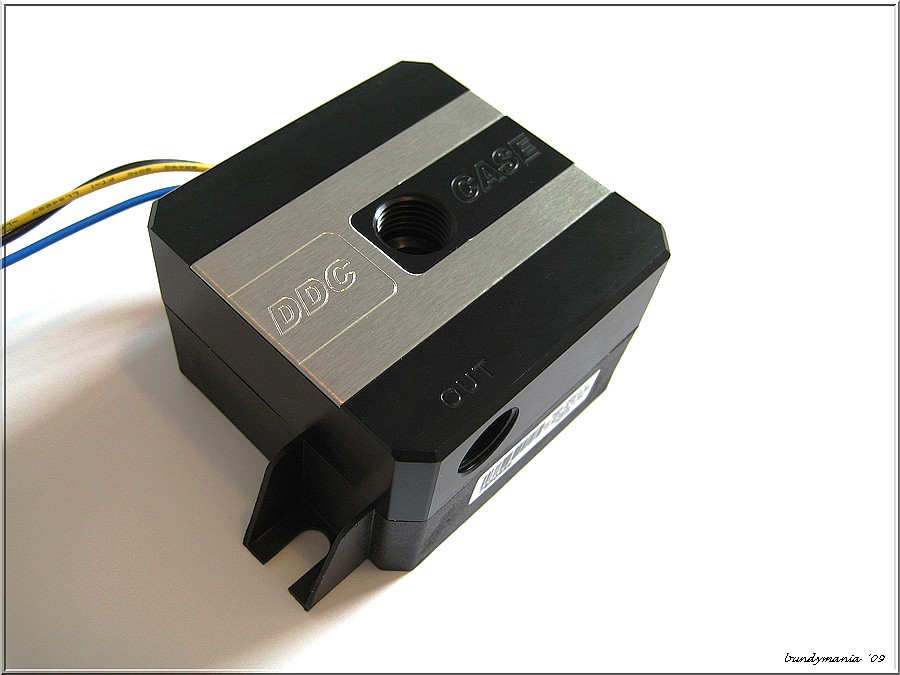
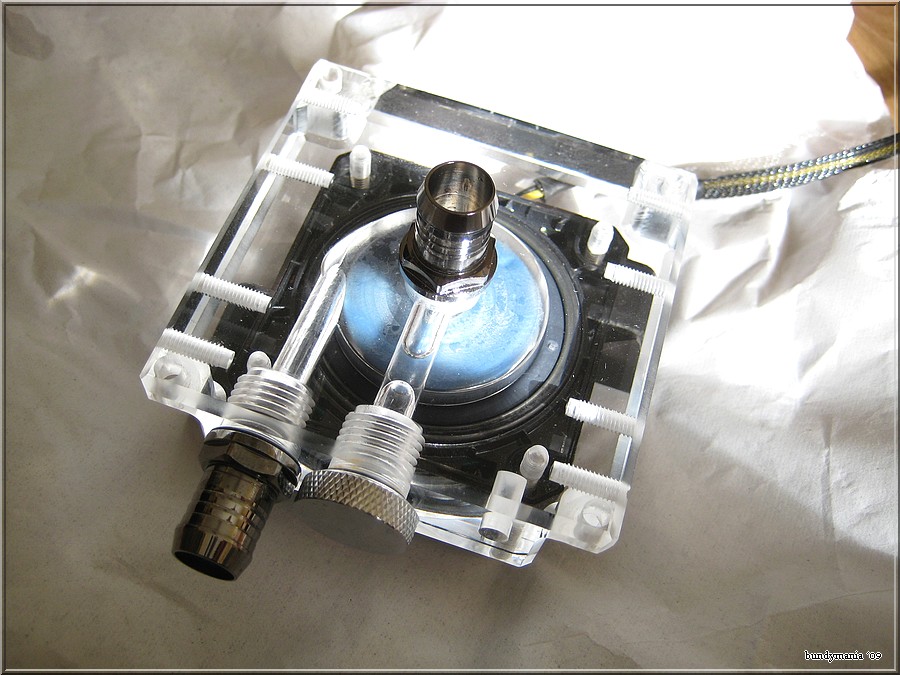
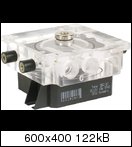
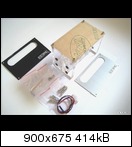
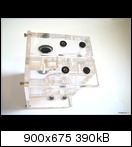
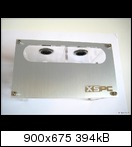
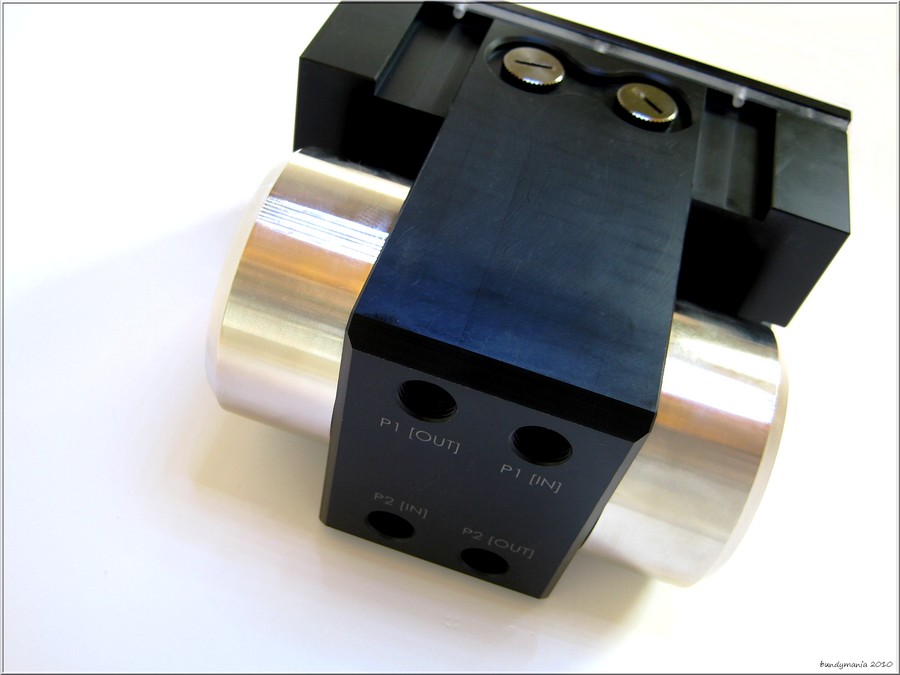
Two major differences are also visible on the outside: the case is clean and doesn't have to usual mounting holes and the top is made out of POM and comes with one G1/4" in- and one outlet. The white box also includes the following:
- the pump itself
- a decoupling-pad made out of neoprene
- a printed manual
- two bard fittings for 10mm to 13mm tubing and two hose clamps
There's not a lot to add when it comes to the pump's quality, as it's well known already. The top was also flawless: very well made, not sharp edges and the threads were perfect, too.
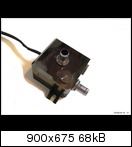
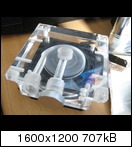
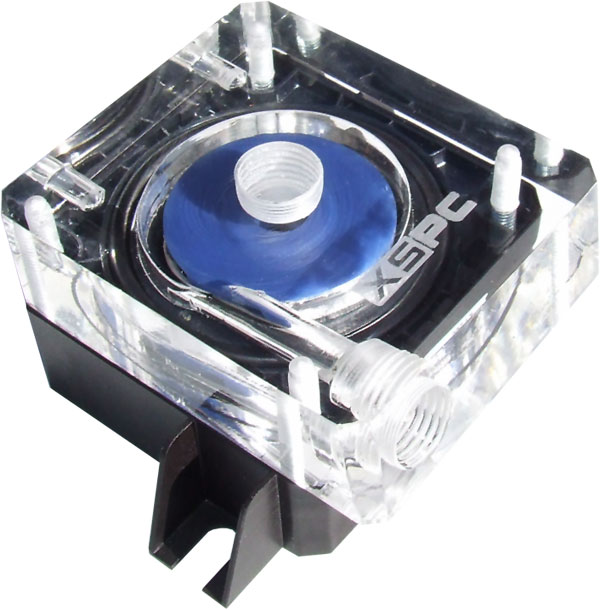
Here are some pictures:
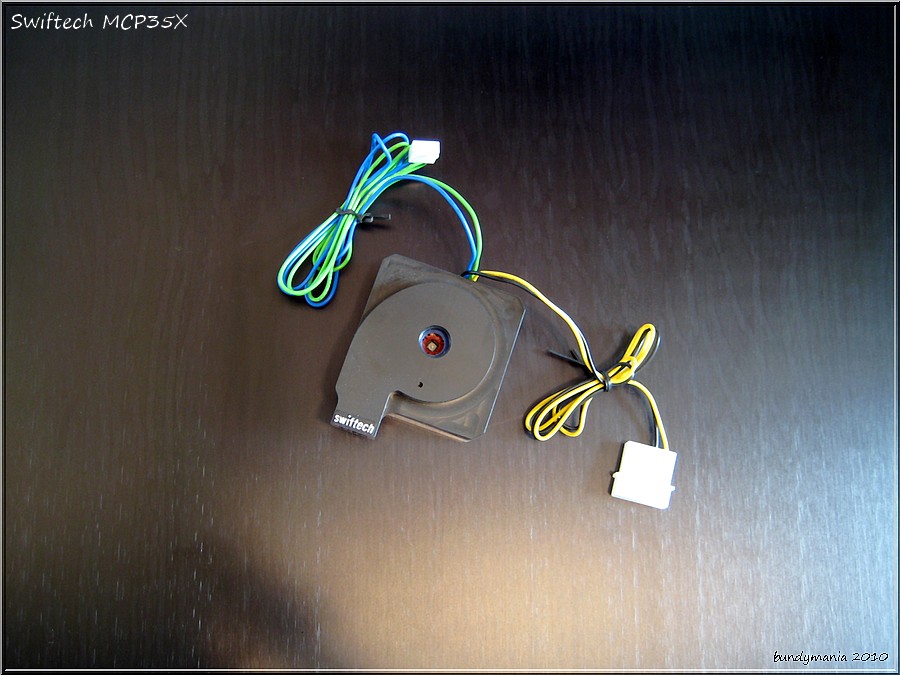


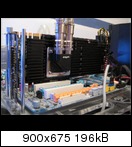
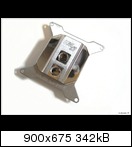
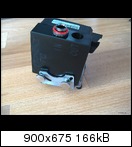
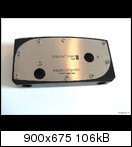
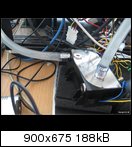
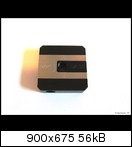
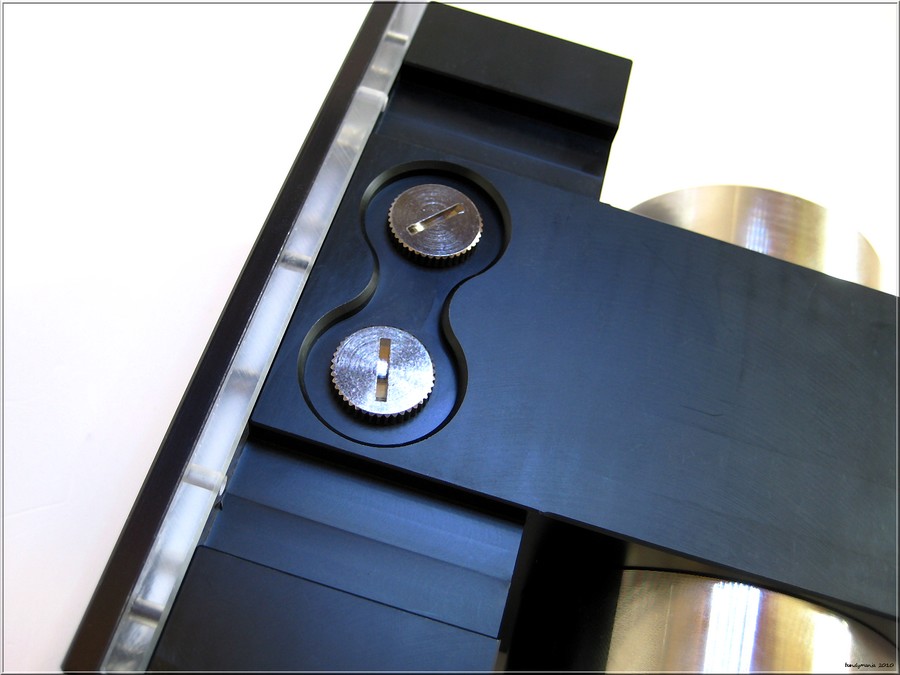
You can easily spot the differences to the standard Laing DDC. To be able to compare even more closely, I quickly added the Ultra I use for testing:
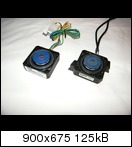
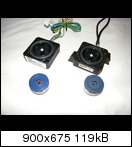

The impellers and the interior is almost the same. Only the 35X's impeller is blue on the outside and red on the inside, just like the early, first genereation Plus-models.
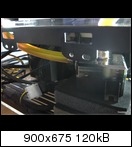
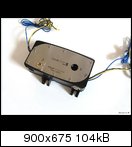
When looking at the PCB, you can also see, that the connectors have changed:

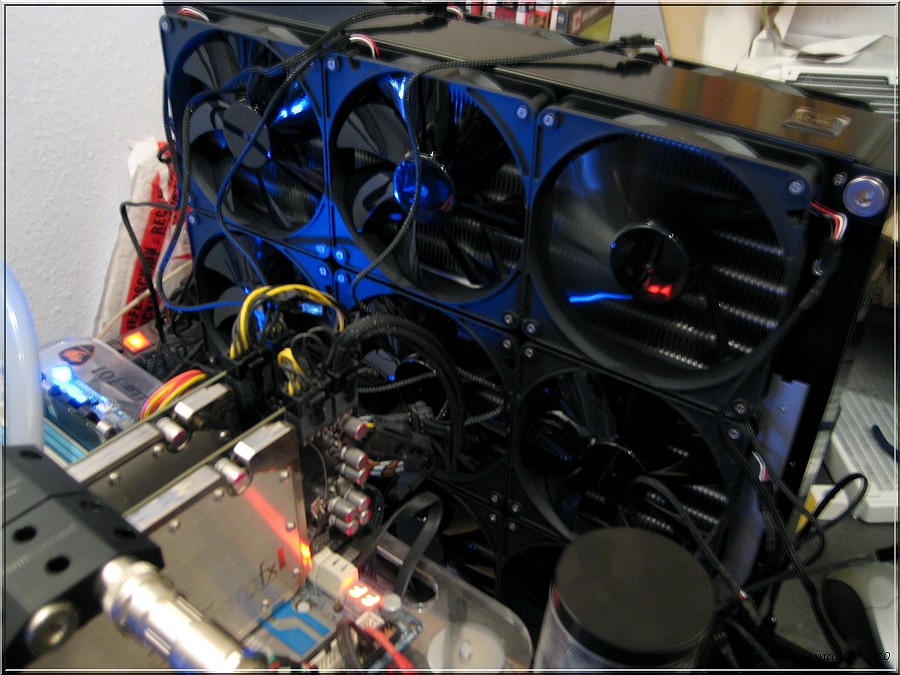
So let's get to testing. My test setup looks like this:
- Pump: Sanso PDH054 (called „the Monster“ with a pressure of almost one bar!)
- Aquacomputer Cuplex Evo Rev.1 CPU block
- Mips Fusionblock NB + Mosfets
- EK Waterblocks Kühler for the Radeon HD 3870
- Radiator BlackIce GT Stealth 240
- Aquacomputer flowmeter Highflow
- Aquacomputer Water-Temp.-Sensor
- Tubing: Masterkleer 16/10mm
- Fittings: Perfect Seal
This setup offers a flow rate of around 275 and 280l/h.
On a setting of 100%, the new 35X delivers flow rates of around 240l/h - a remarkable performance. Another Laing DDC Plus with a mounted Alphacool-top achieves around 235l/h. The new top made out of POM also quiets down the pump by a considerable amount, while the aesthetics of it will always be subject to debate.
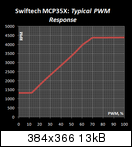
The PWM-Control, which is working perfectly, was what I was most anxious to test, though. Just plug the molex-connector into your PSU, the PWM-connector onto the motherboard, set the setting in the BIOS and you're set. It's as easy as it sounds. I set the pump to start powering up when the CPU-temperature reached 30°C in the BIOS of the DFI LanpartyDK 790FXB-M2RS and, well, when the CPU was idle, the pump revved at around 1250-1300rpm, but when I started Prime95, it powered up to 100%, so around 4500rpm.
With a good motherboard with good fan control-settings in the BIOS, you can create a very, very quiet pump, that can power up to 100% when needed. The times when you needed additional hardware like the Aquaero, Heatmaster and so on are over.
Here's a video showing the PWM-capability of the pump:
You can see the pump at around 1300rpm and the corresponding 45l/h. When starting Prime95 (I also overclocked the CPU using K10STAT), the temperature quickly rises and the pump gets up to full performance (4500rpm and 240l/h). When aborting Prime and removing the overclock, the pump also quiets down again.
Here are a few illustrations on this subject (source: Swiftech):

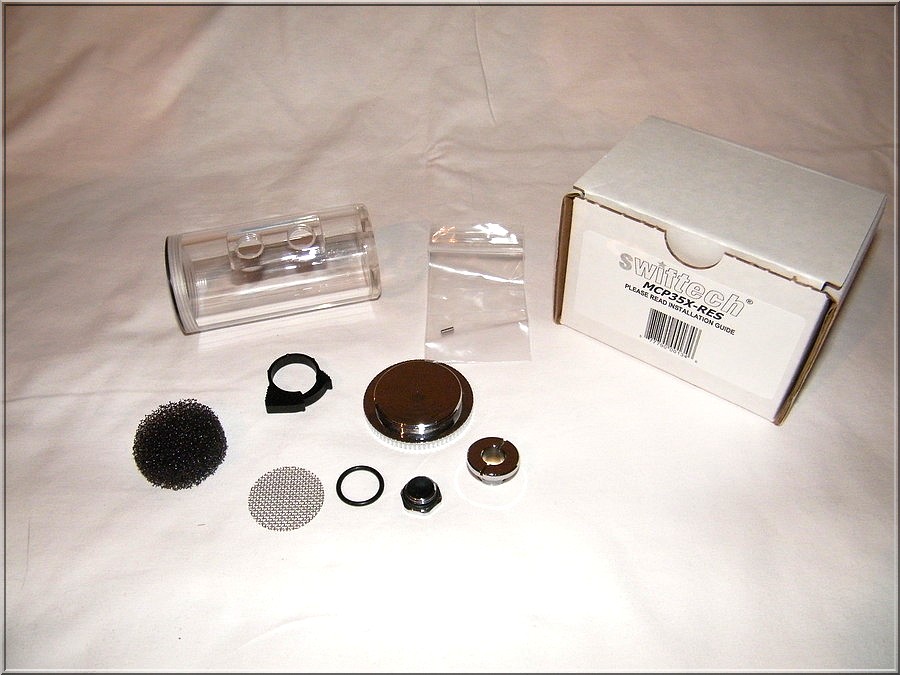
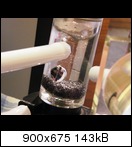
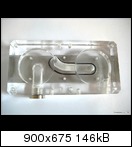
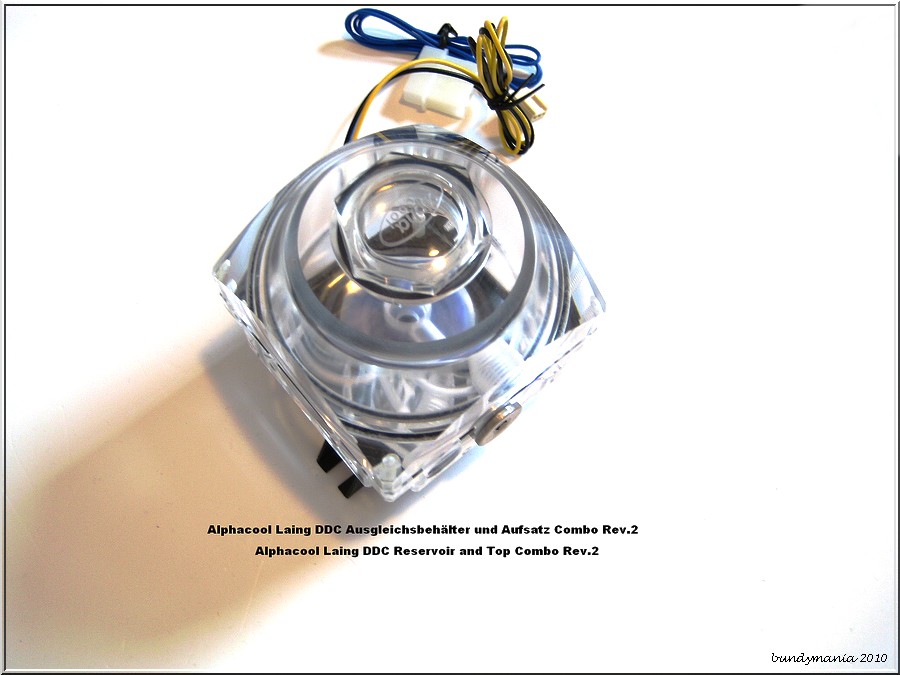
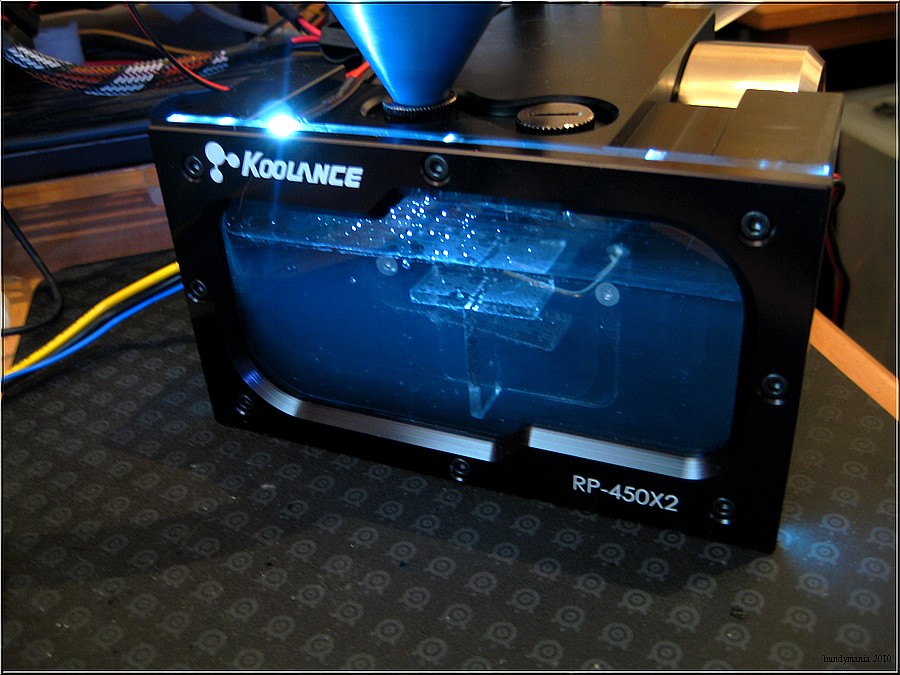
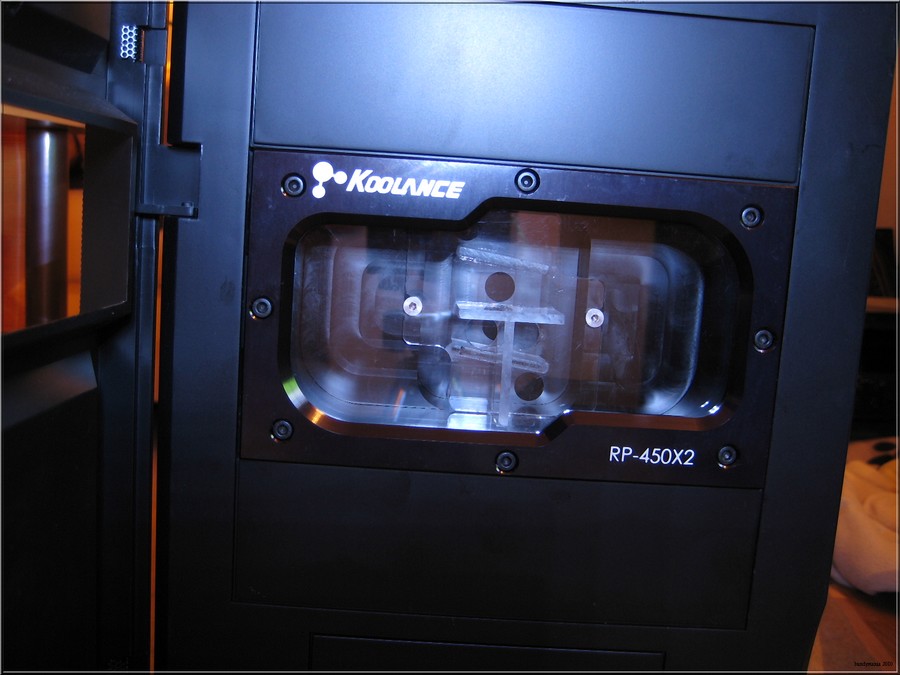
For testing, I also received a reservoir, specially made for the 35X: the Swiftech MCP35X-Res. It's a reservoir that's supposed to work very well with the new pump. The box contained the following:
- the reservoir
- a tube clamp
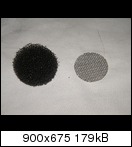
- a filter
- a sponge for filtering
- a G1/4 - sealing cap
- a connecting screw for connecting the pump and the reservoir
- an O-ring
- a little metal stick
- a printed manual
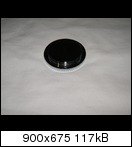
- a cap made out of massive, glossy metal
Let's start out with a few words on the quality of the reservoir. It's just as flawlessly made as the cap. The scope of delivery is fine, everything needed is included. The extremely heavy, nickel plated sealing cap was what impressed me most, you immediately get the impression of having something valuable in your hands, even though an additional thread in the top wouldn't have hurt. Installing the reservoir was easily done using the included manual.
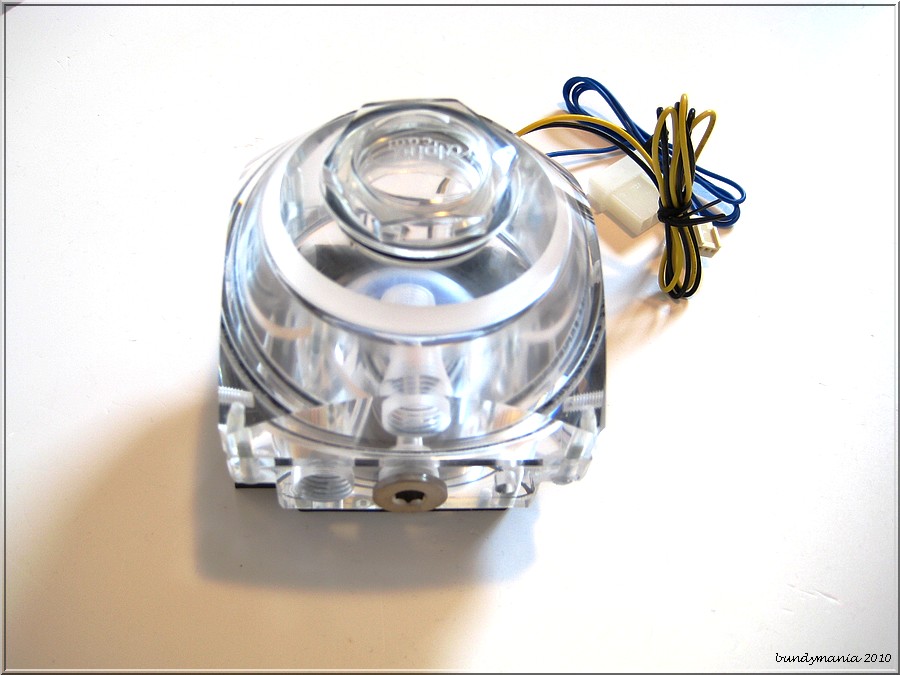
Something noteworthy: the reservoir is held in position by a little metal pin, that you stick in a matching hole in the top of the pump and in another one in the bottom of the reservoir. The reservoir base itself comes with six of these holes, so that you can choose the one that makes it the easiest to align the fittings properly - a great idea in my opinion.
Let's have the pictures do the talking:
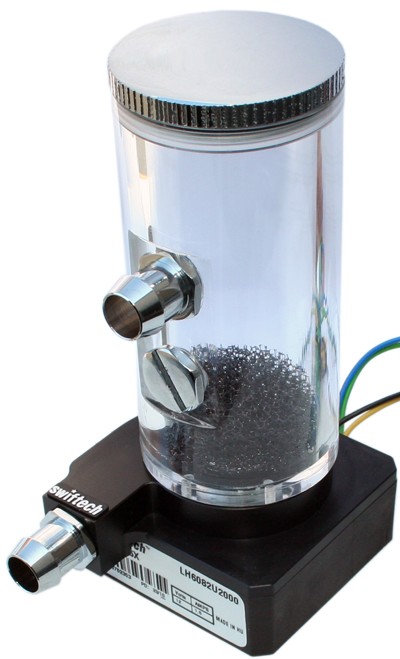

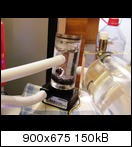
Using the manual, it was easy to mount the reservoir on the pump:


If anyone wants to split their loop: 19/13-screw-on-fittings don't fit next to each other on the reservoir, while 16/10s do.
Let's get to the test, in which this combination performed very well: on 100% performance, the filtering sponge was able to stop the air bubbles, making it completely high-flow-compatible. When revving down the pump, you can hardly see any bubbles in the reservoir.
Here's another video:
The pump is offered for around 100US$, the reservoir for around 30US$.
Conclusion:
Well, what's there left to say? The new Swiftech MCP 35X completely convinced me of its qualities. It's not the new looks, not the new top: it's the perfectly working PWM control of this pump, making it possible for every user to control the pump, even without separate controllers. The reservoir made for the 35X also impressed me, both optically and technically.
Thanks go out the the companies Swiftech and Jab-tech for providing these samples and also my assistant sonnyboy and delicious_cake for translation !
-
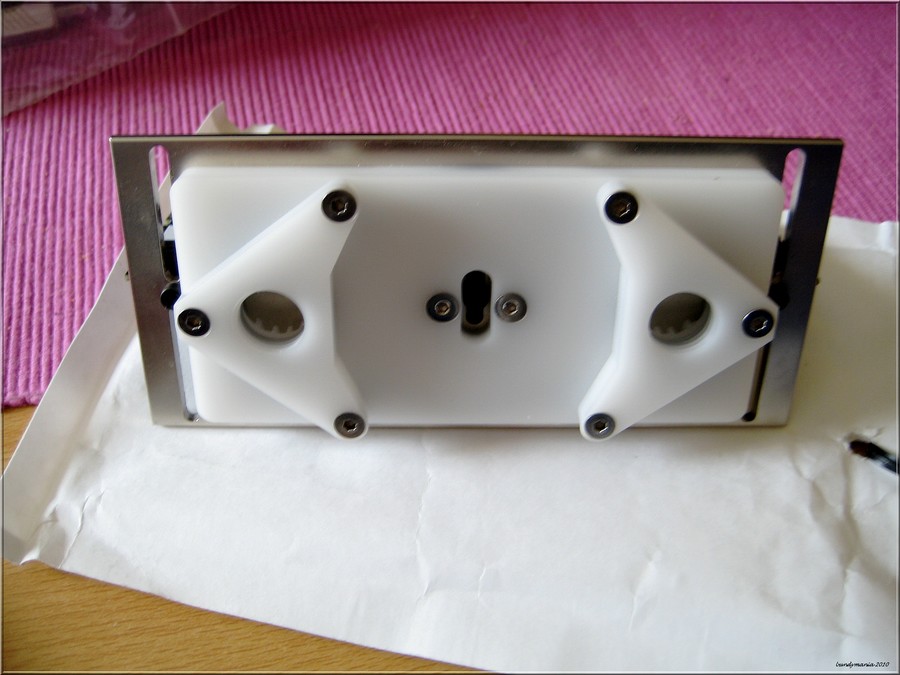
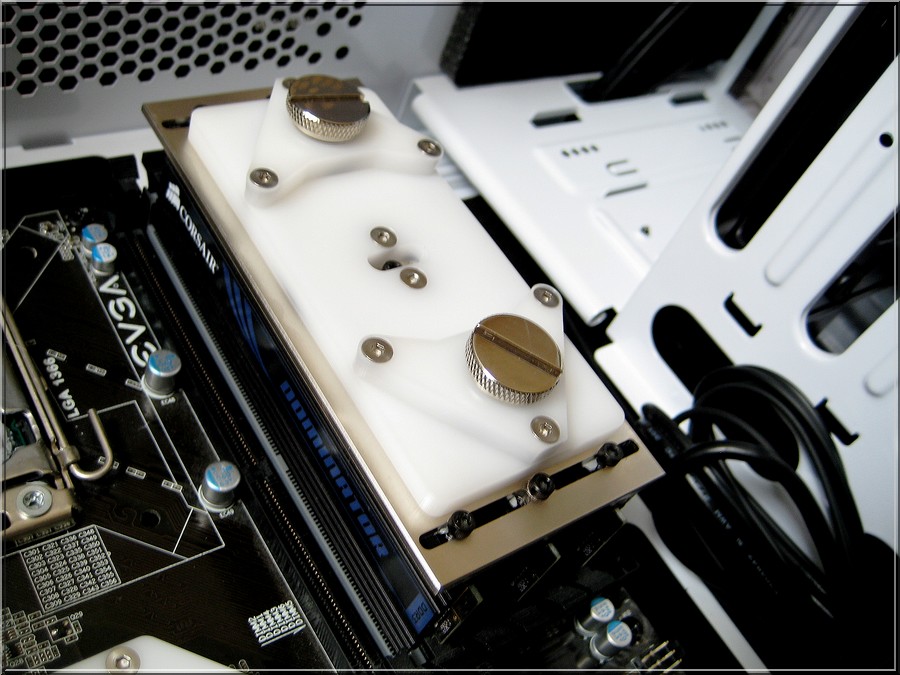
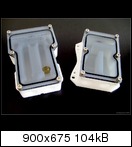
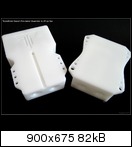
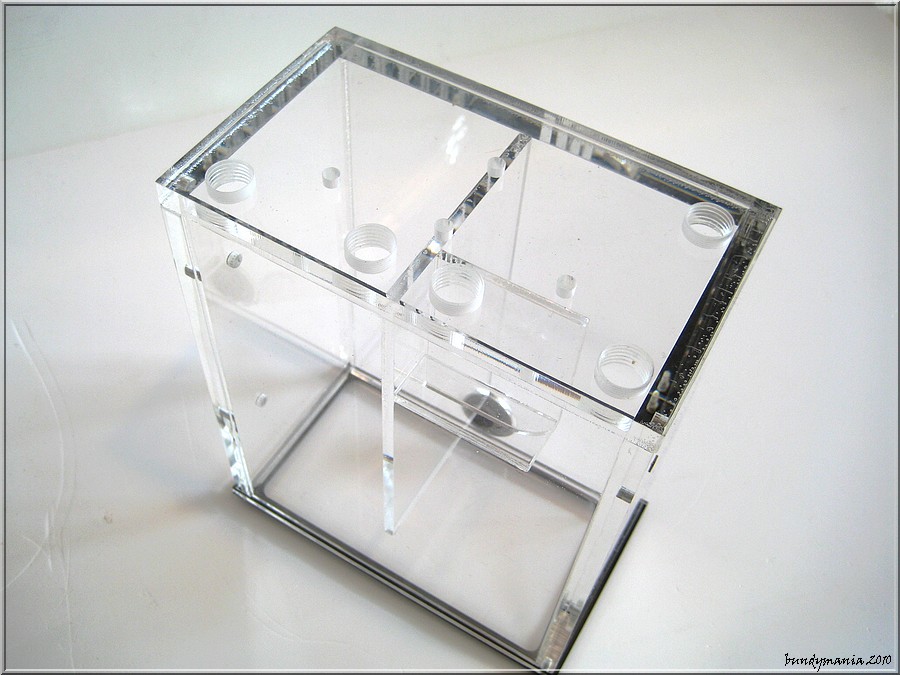
Watercool HTF4 Series - Prototype Parts
-
-
-
-
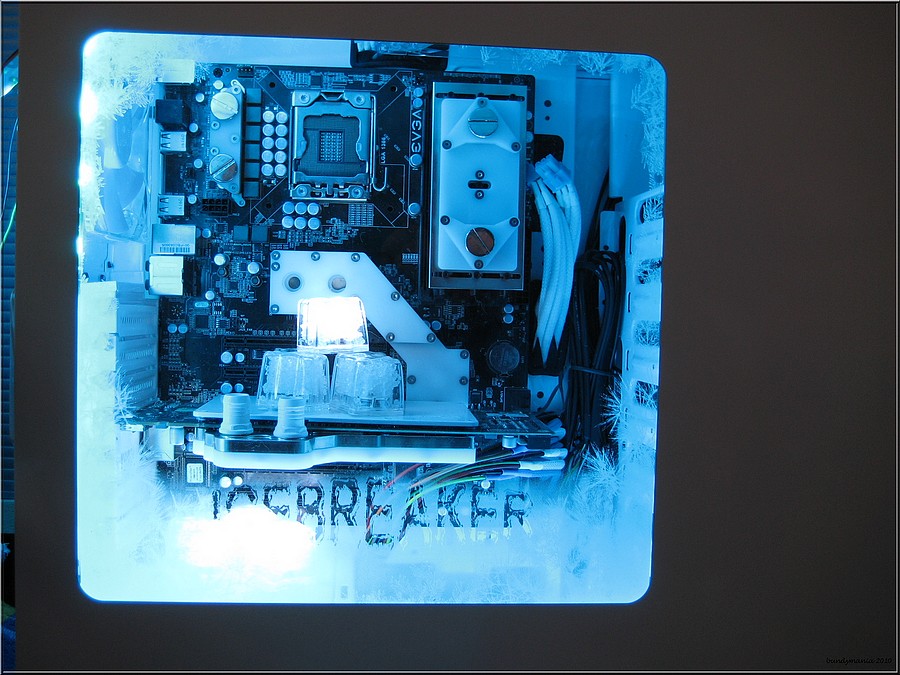
Little Teaser.......from my Buildlog
-
-
-
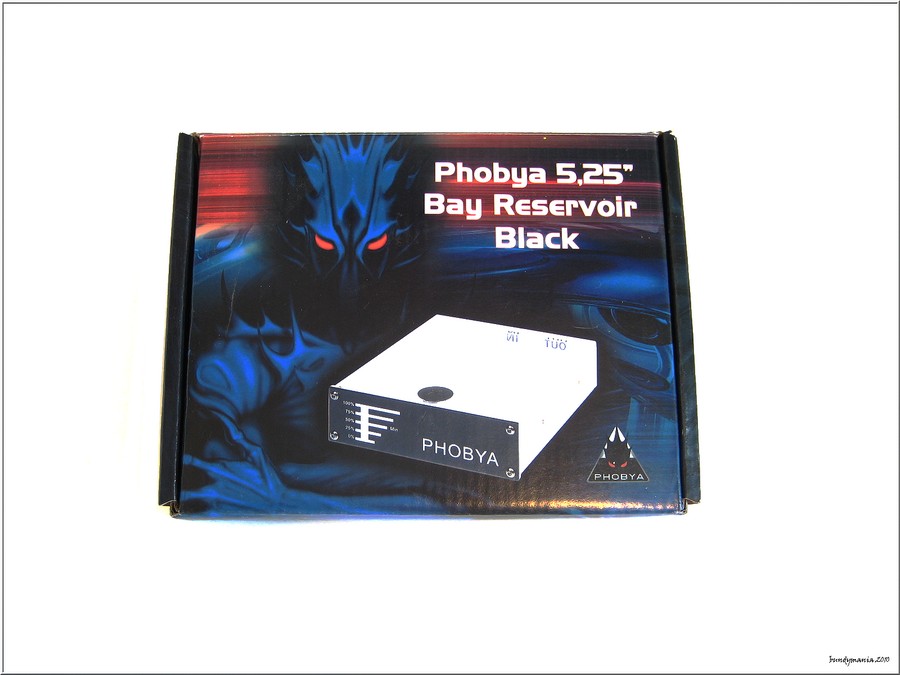
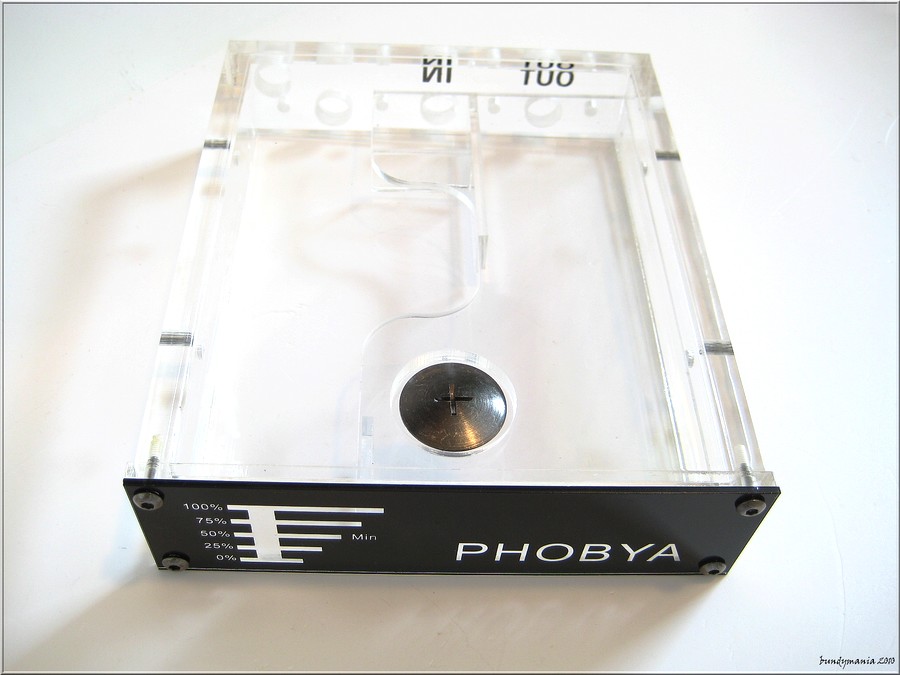
Bundy: Do you know of some bay-tank that is not in plexi for 2x355?
When i mean plexi..like xspc that is 100% plexi\acryl and i dont trust that so much as acetal and so on.
I like Koolanze dual bay-tank for 2x655 or 1x655:)
Hmm, i only know delrin bay tanks where it´s not possible to connect the 355 / DDC-1T(+) pump(s) directly besides the products from xspc.
Winter is coming


-
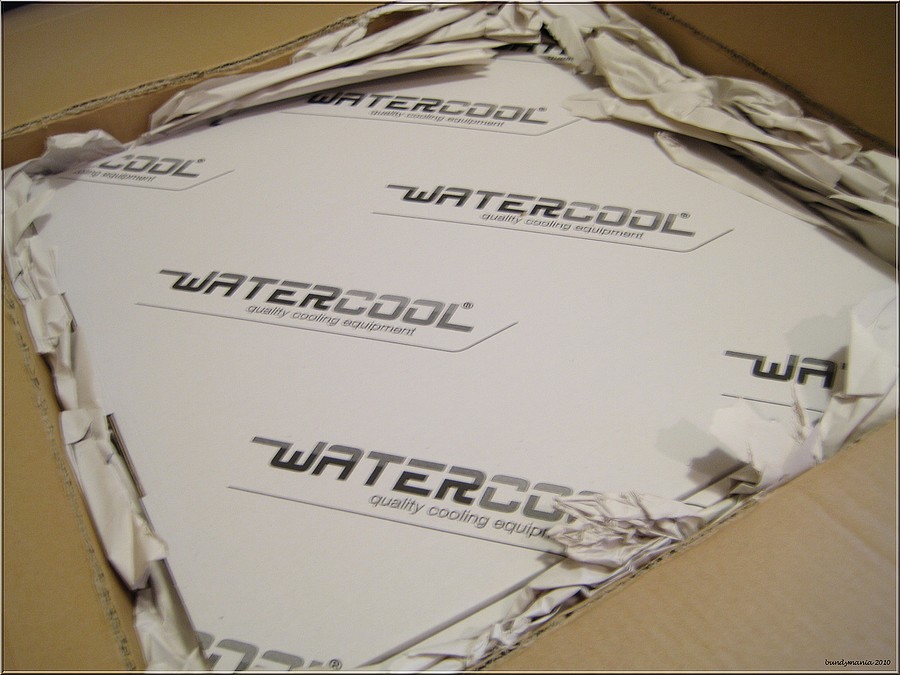
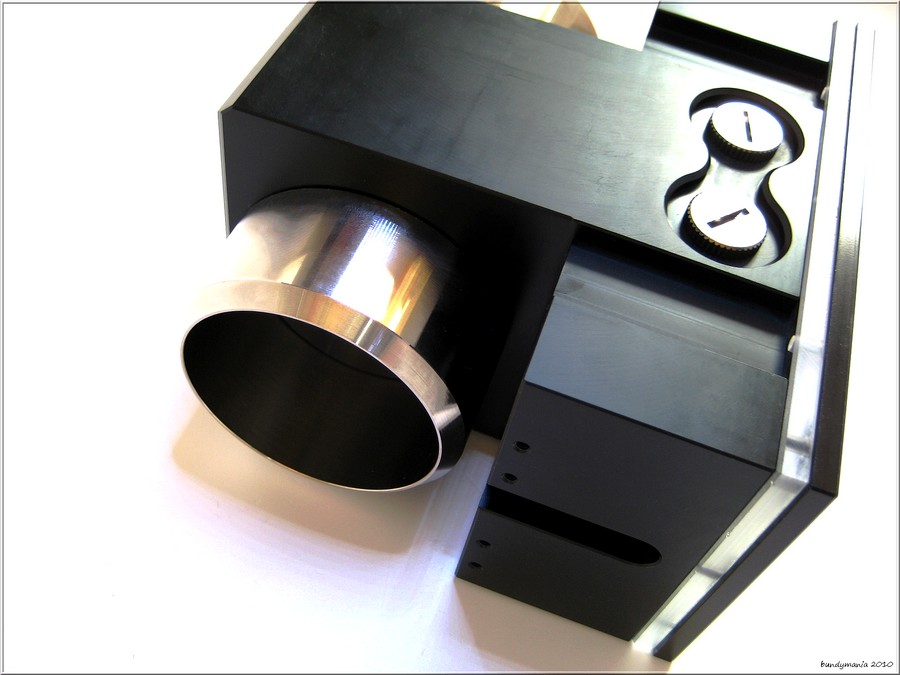
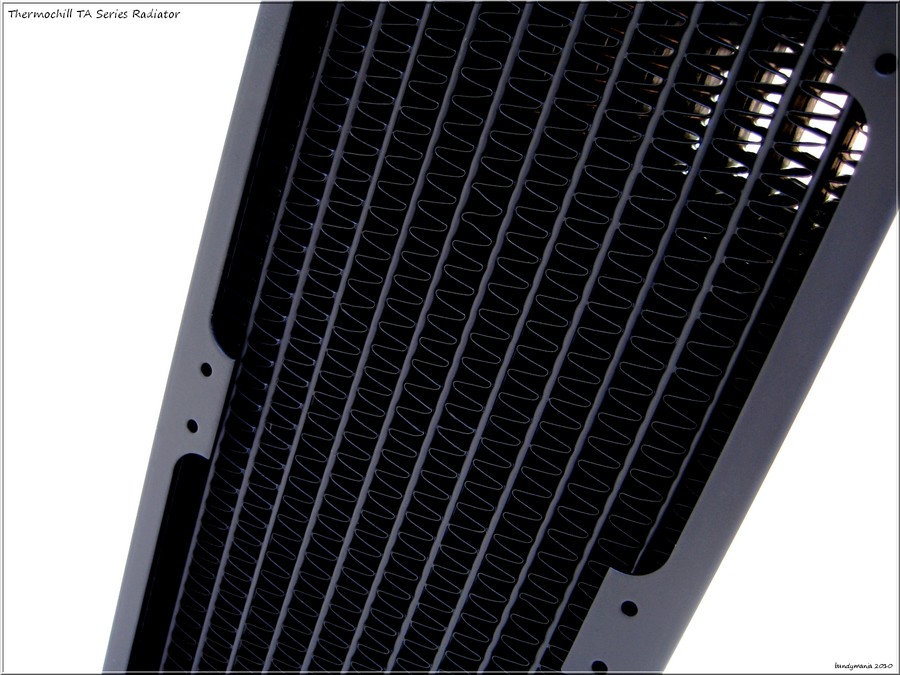
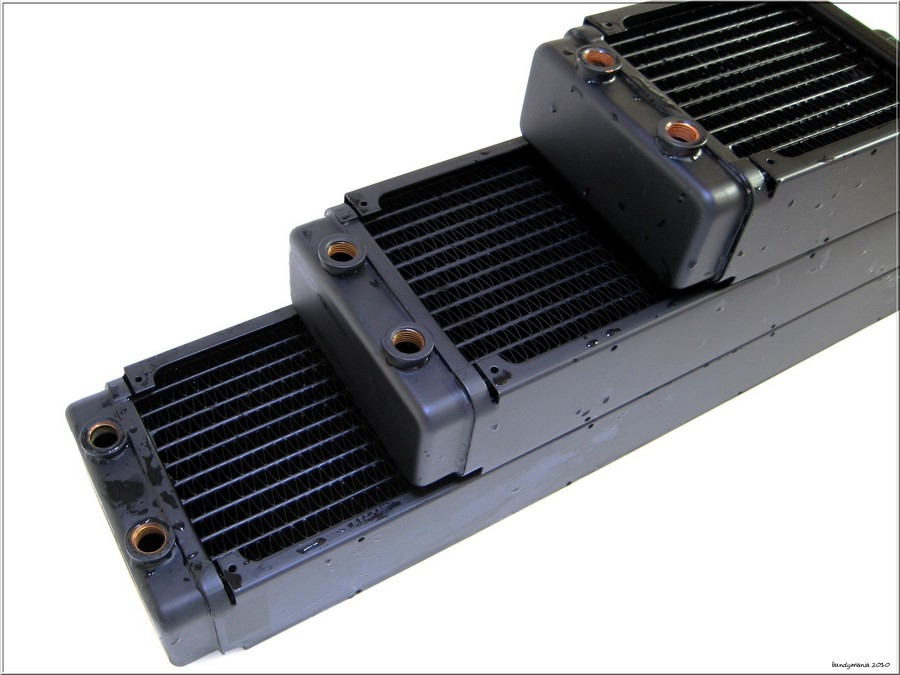
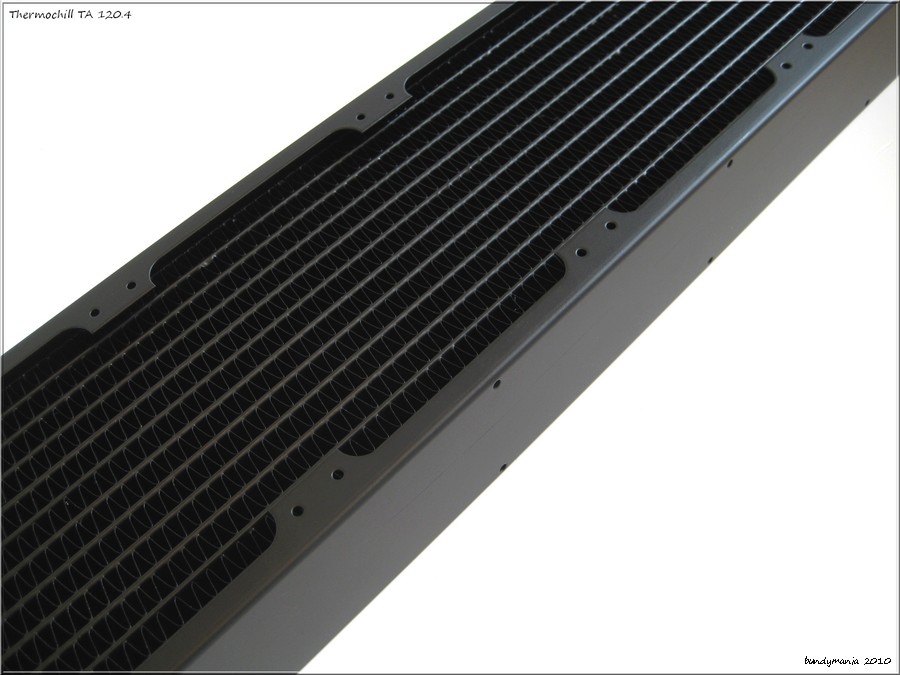
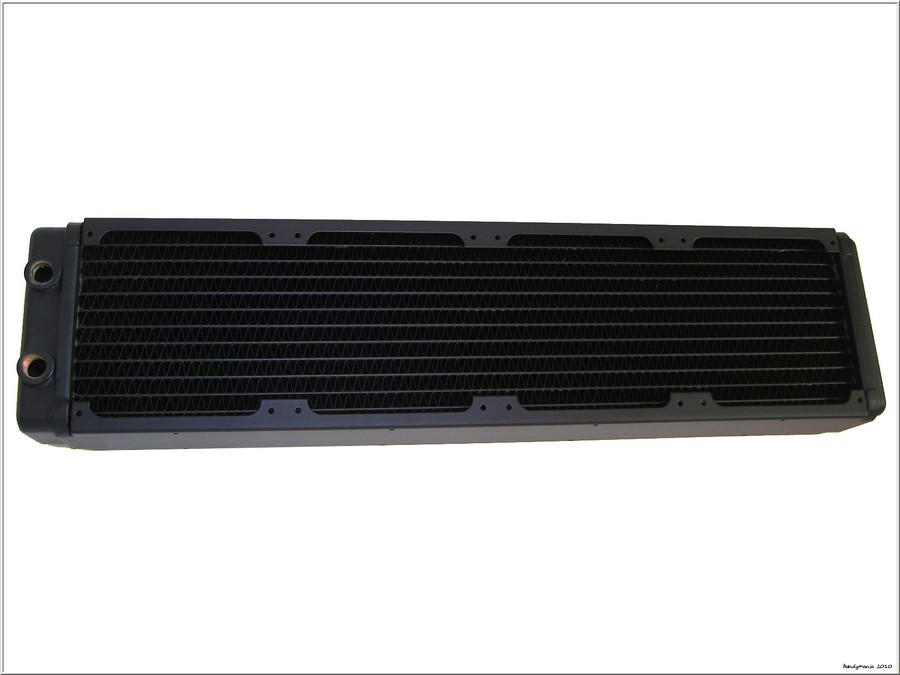
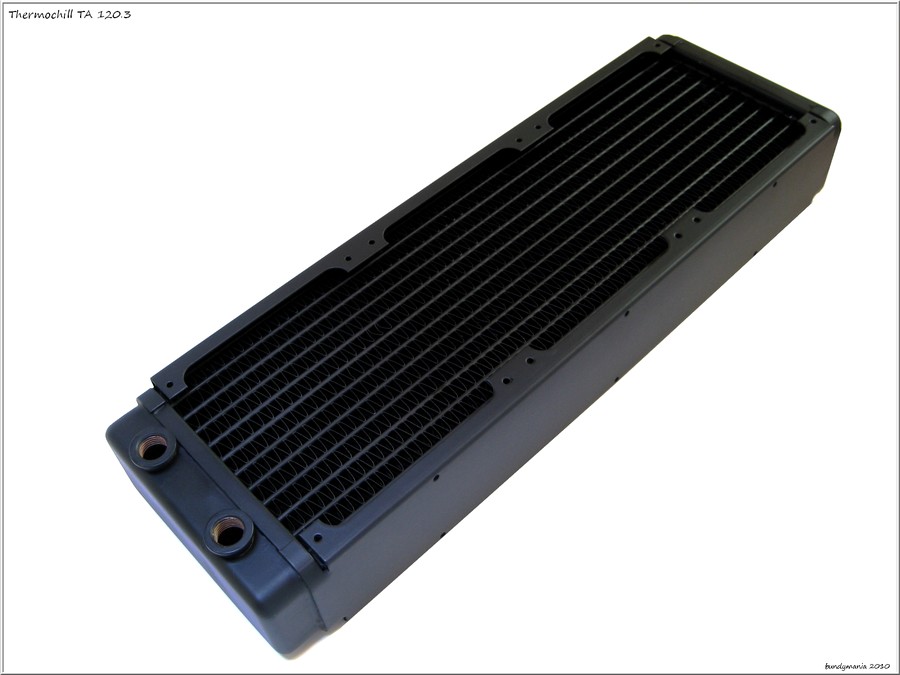
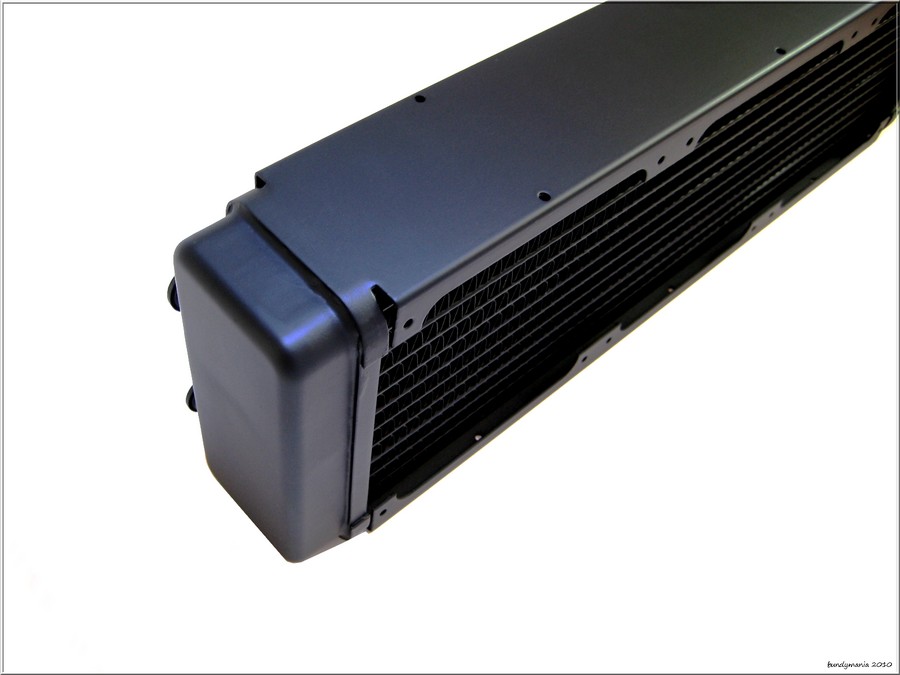
Thanks and yeah, those are the brandew TA Rads from Thermochill !

-
-
Winter is coming...soon
-
Yep, this block is for the slim version
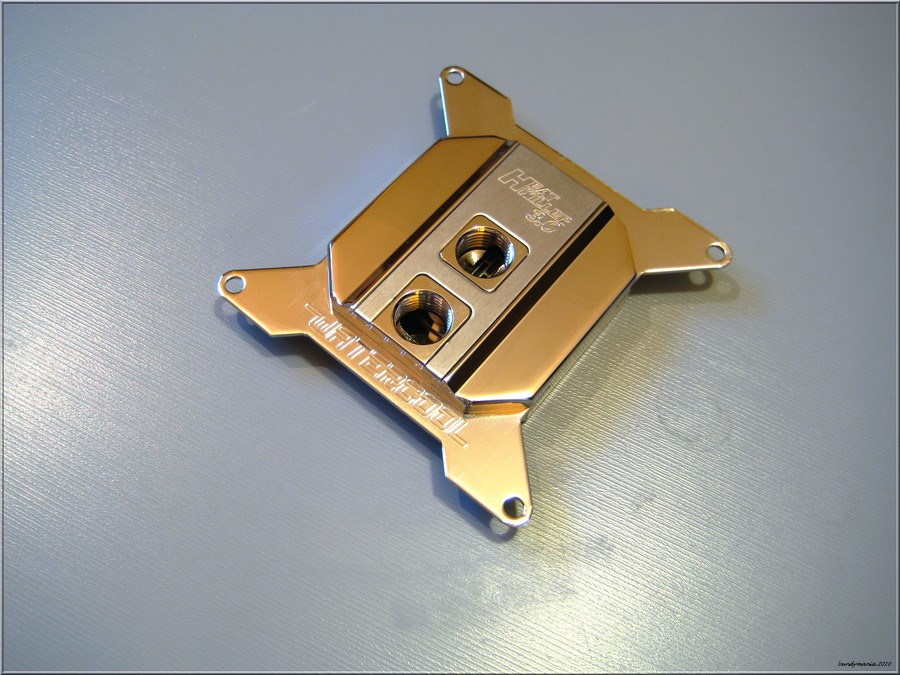
HK 3.0 - Chrome Version
-
Hey,
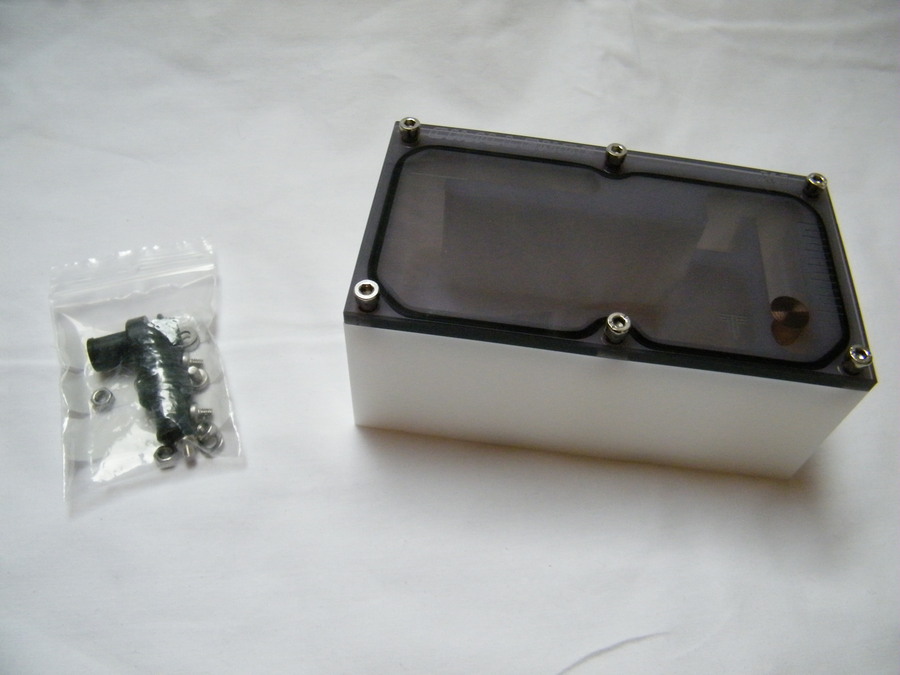
today, I'd like to present four reservoirs by the Italian company Tecnofront.
The following reservoirs are part of this review:
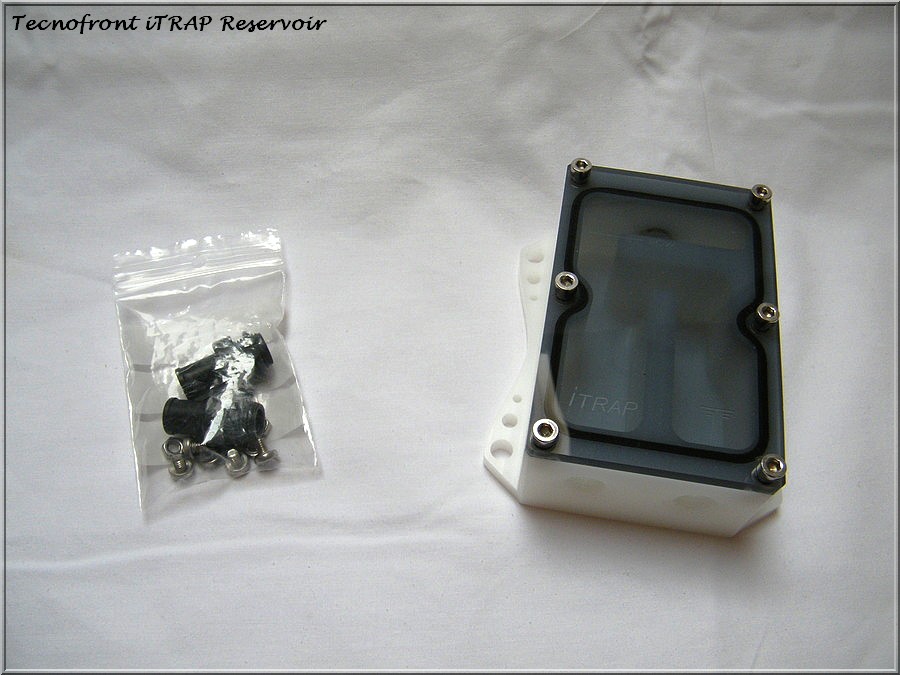
1.) Tecnofront iTrap Reservoir
2.) Tecnofront Visual Flowmeter Reservoir
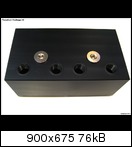
3.) Tecnofront Challenge X1 Reservoir
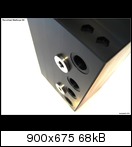
4.) Tecnofront Challenge X2 Reservoir
This time's test system is made out of the following components:
- Pump Sanso PDH054 (also called "The Monster", providing almost 1 bar of pressure)
SANSO PDH 054 12V Attacchi filettati - Ybris Cooling
- Aquacomputer cuplex Evo Rev.1 CPU waterblock
- Mips Fusionblock NB + PWM
- EK Waterblocks cooler for the Radeon HD 3870
- Radiator BlackIce GT Stealth 240
- Aquacomputer flow-meter Highflow
- Aquacomputer Water-Temp.-Sensor
- Masterkleer 16/10mm tubing
- Magicool Filter
- Perfect-Seal-fittings and 1 or 2 Bitspower angled fittings (depending on the reservoir)
In this setup, the Sanso provides a flow of max 275l/h with a reservoir by Magicool as a reference, which doesn't reduce flow at all.
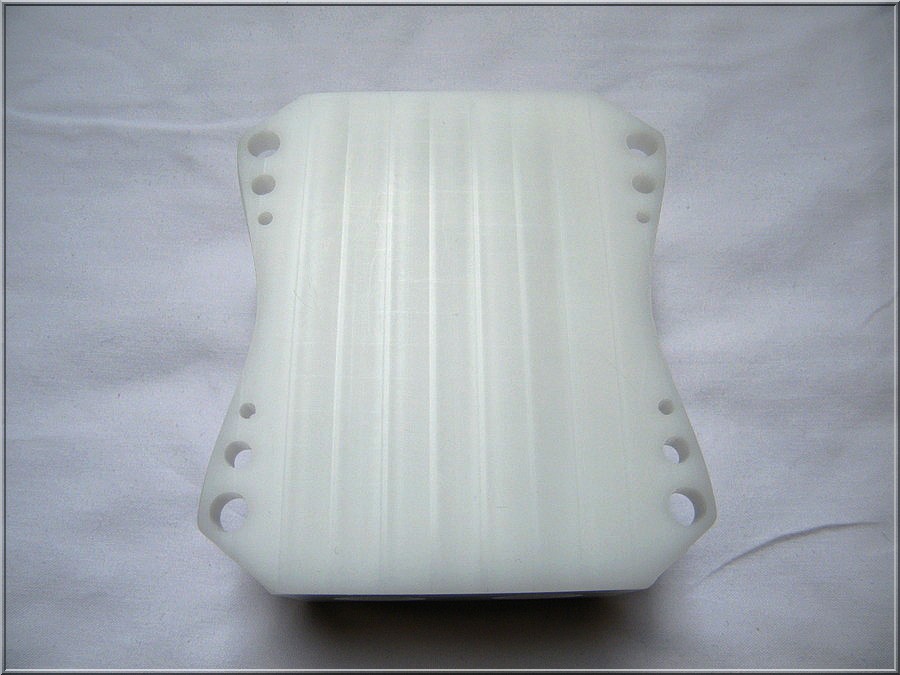
Before starting, I'd like to state that I was very happy with the quality of the material and the build quality. The black and white Delrin, together with the tinted top, were flawless. Every hole was deburred:
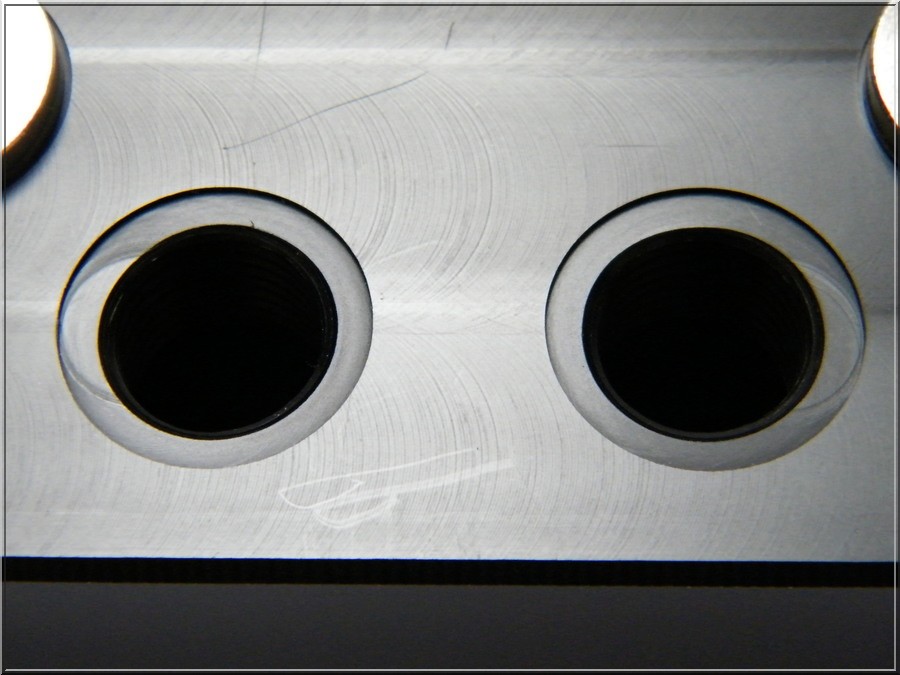
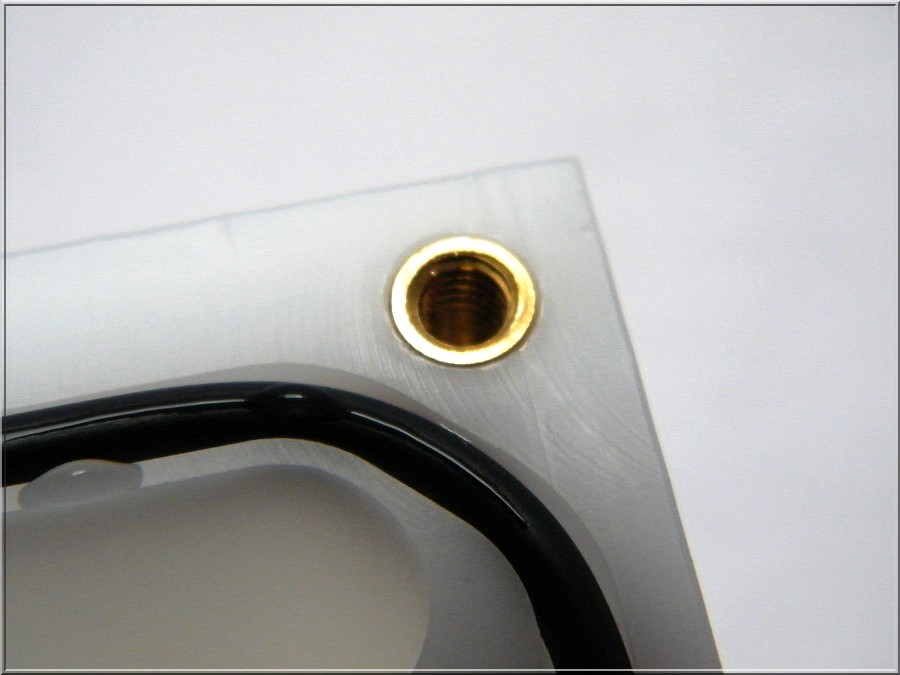
Even the holes in the Delrin didn't just get a thread cut into them, but had extra threads mounted inside of them, so that they're supposed to survive more than just cut threads:
Another idea I really liked: the holes used for filling are set lower than the rest of the reservoir, so that it's harder to spill:
The reservoirs all came in the same, ecologically meaningful, two-part simple cardboard box:
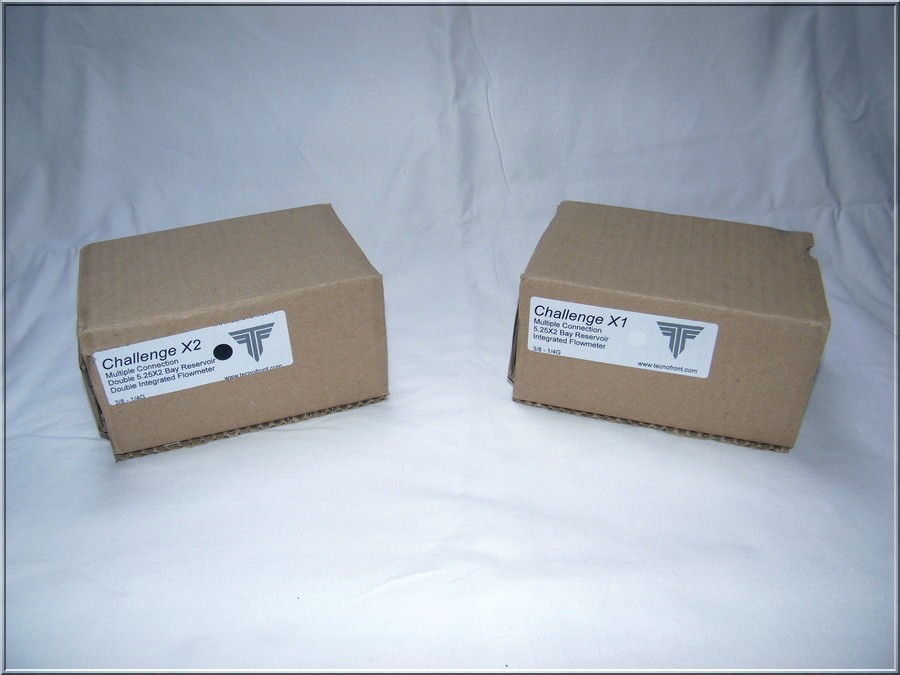
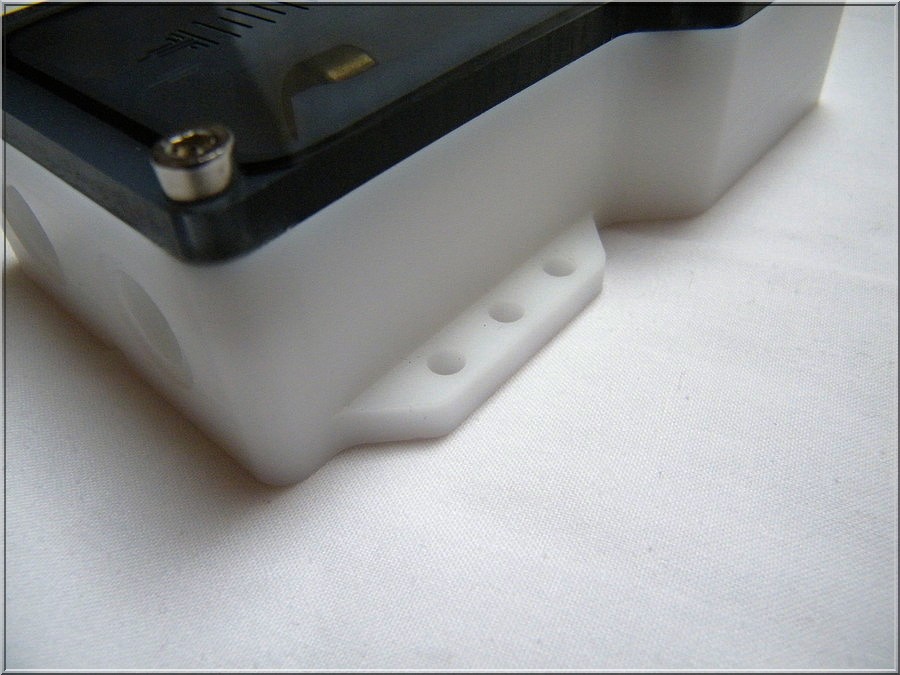
The scope of delivery includes a set to mount the reservoir in the case and two barbed fittings (the Challenge X2 comes with 4), made out of plastic and remind me of the popular Perfect Seal-fittings:

-can be mounted in three different sizes of holes: 3, 5 and 7mm diameter
-scope of delivery: 2 barbed fittings for tubing with 10mm inner diameter, mounting material
A simple, yet clever system is supposed to help the reservoir to get rid of the air in the loop quickly and without problems. A water level shown on the front has to be maintained for this, but let's just get some impressions for illustration:
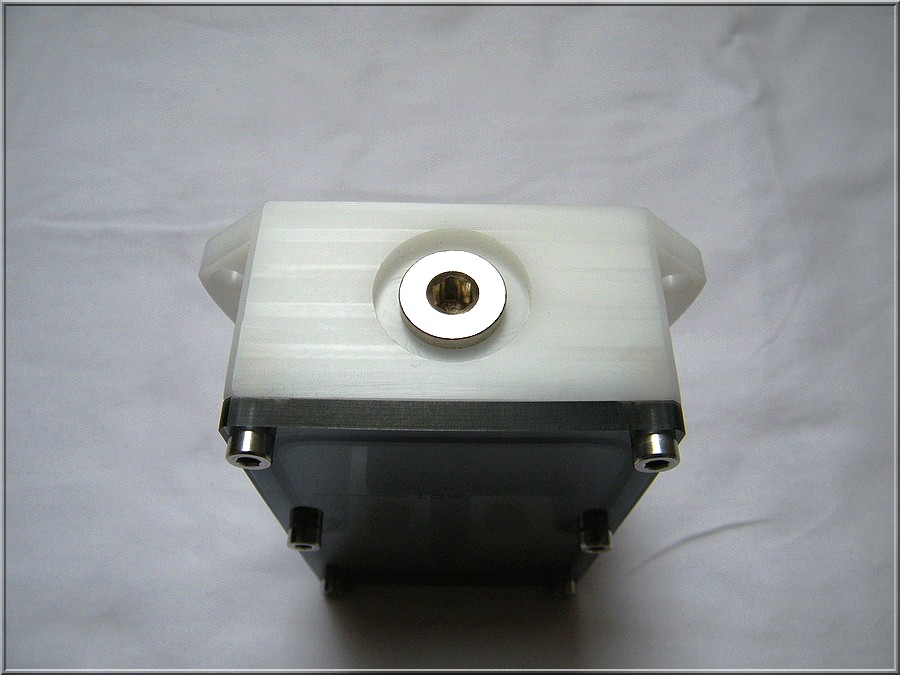
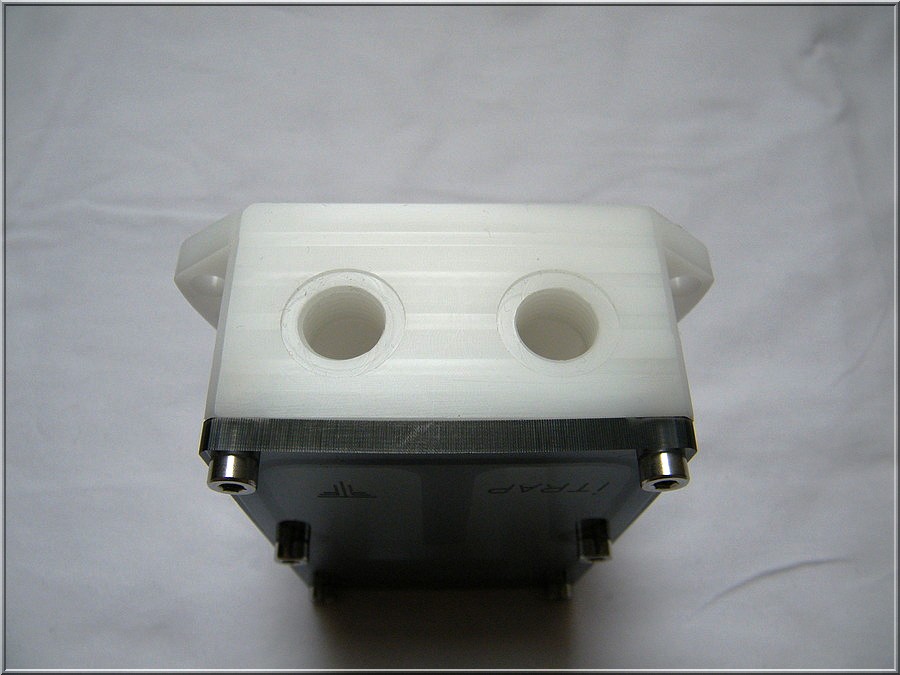
The top opening is used to fill the reservoir. You can also use a lighting module instead of the sealing cap after filling to create some nice effects.
Even though the reservoir is comparably small, it was quickly able to get all the air out of the system, even providing better flow, which got to 278l/h.
Here's a little action video of the Tecnofront iTrap in action:
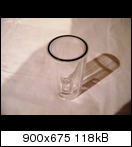
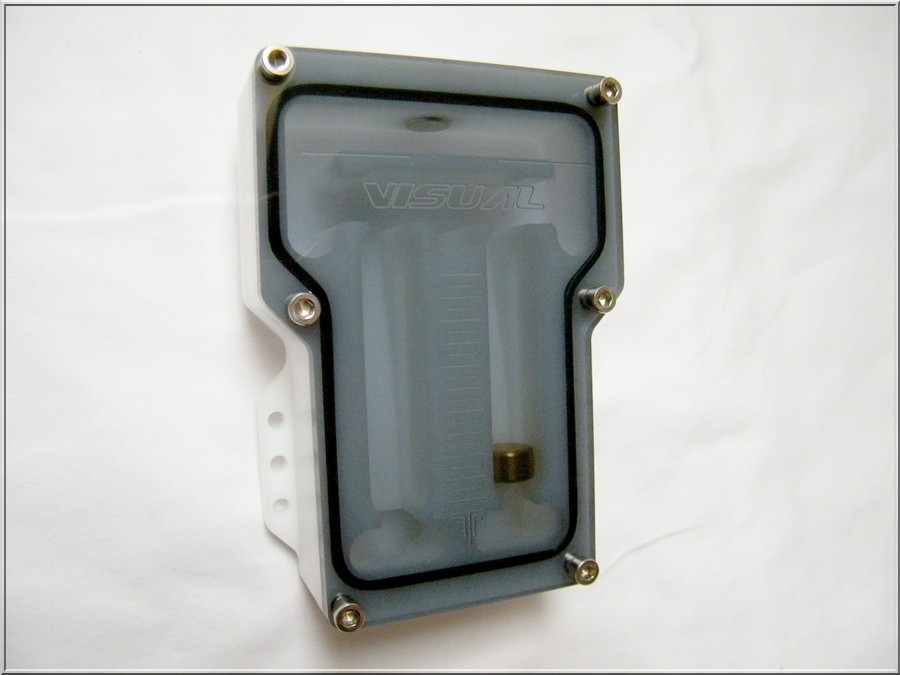
2.) The second candidate is called Visual Flowmeter Reservoir, offering the following specs:
- 105 x 68 x 42 mm
- G1/4"-threads
- Can be mounted with 6 (3 per side), 3mm diameter holes
- Scope of delivery: 2 plastic barbed fittings for 10mm ID tubing, mounting material
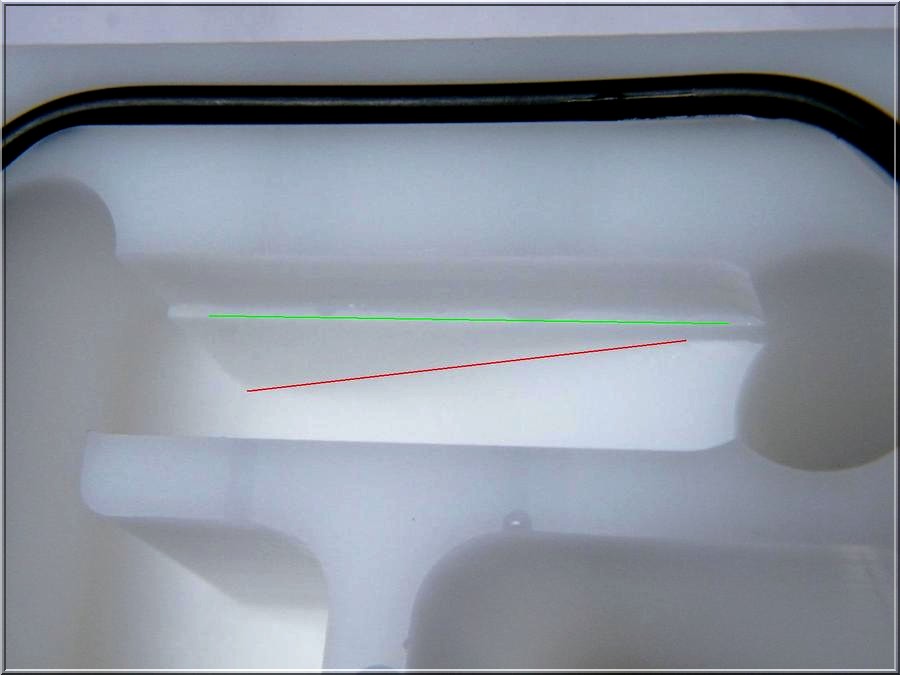
This reservoir focuses on a metal float acting as a visual flowmeter.
Even though I was scared that the Sanso would be to much for this float, making it just stick to the top all the time, this didn't happen because of the clever manufacturer: the float's channel gets more open to the top, so that even high flow rates will be visible correctly.
It's hard to get this in photo, but maybe it's visible (the red line shows the channel getting larger to the back, the green line the way of the float):
As it was with the other reservoir, the water-level shouldn't get lower than a special level to keep the loop free of air bubbles.
And this is the moment where it stops being all good: This reservoir can't cope with the Sanso's power, so that the loop doesn't get free of air.
If a Highflow-fan wants to use this reservoir, he'll have to slow the flow down or buy another reservoir.
Still, this reservoir barely slows down the flow itself: over 270l/h were achieved.
Of course, it'll work fine with flows lower than mine.
Some pictures:
As an added bonus, this reservoir also features a hole for a 5mm LED and a special slot for the cable:


There's also a video to the Visual Flowmeter:
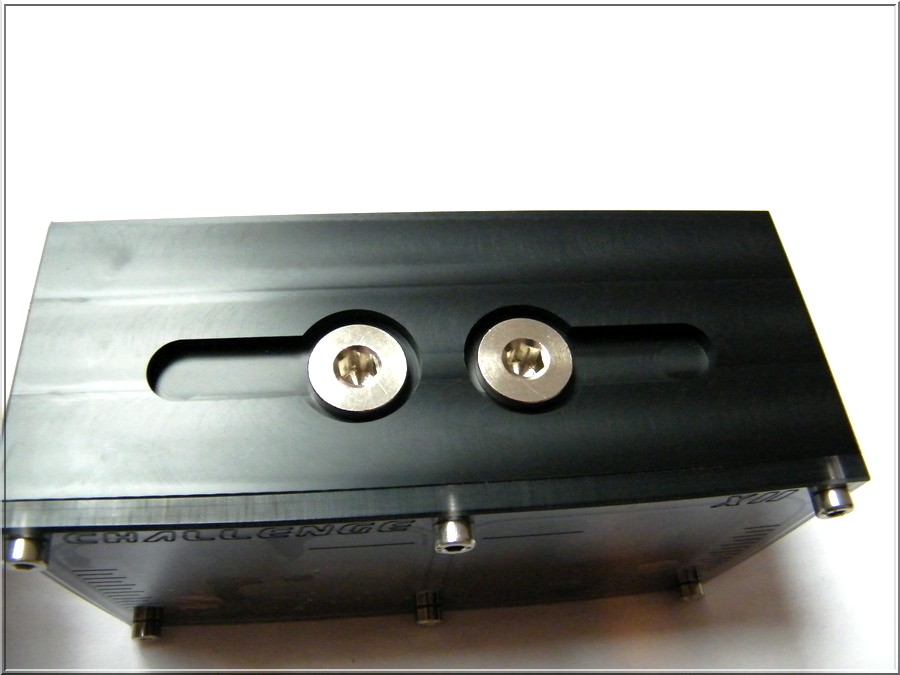
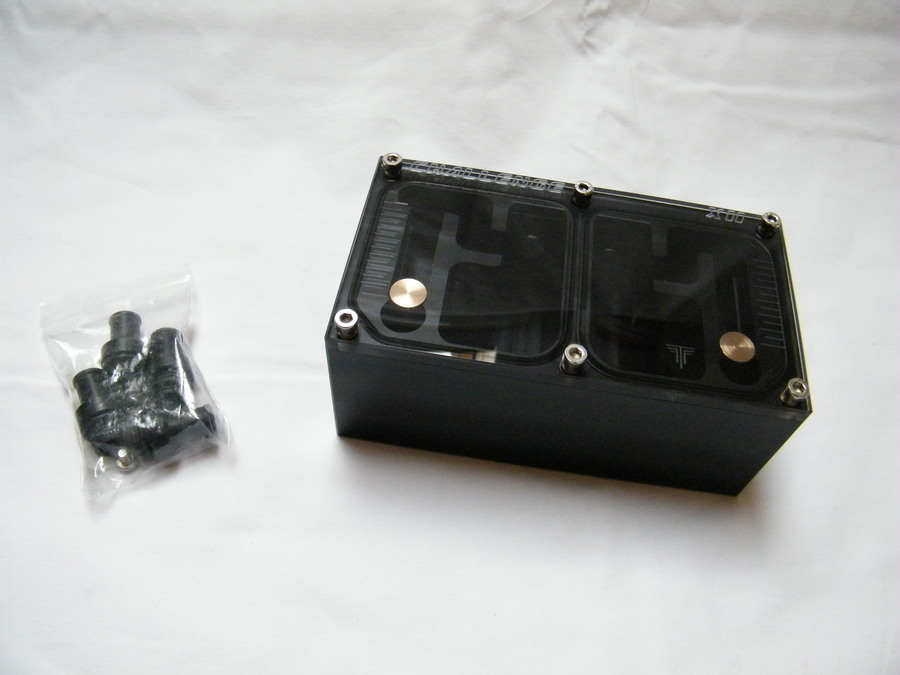
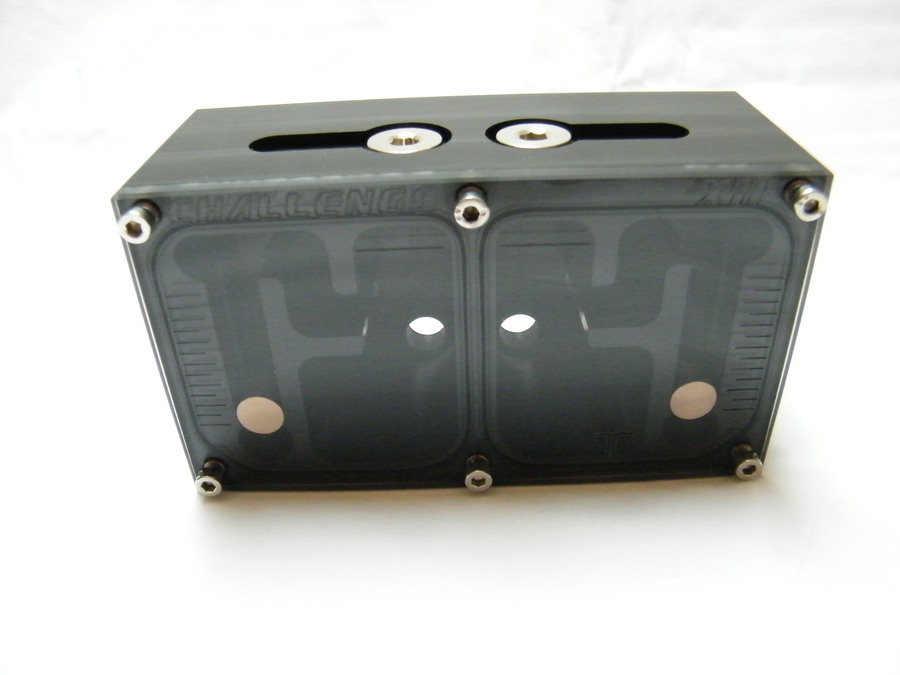
3.) and 4.) Last but not least there are the two last and newest candidates: the Challenge X1 and X2 for a maximum of two separate loops for two 5.25" slots each.
They also feature the flow indicator already seen on the Visual Flowmeter.
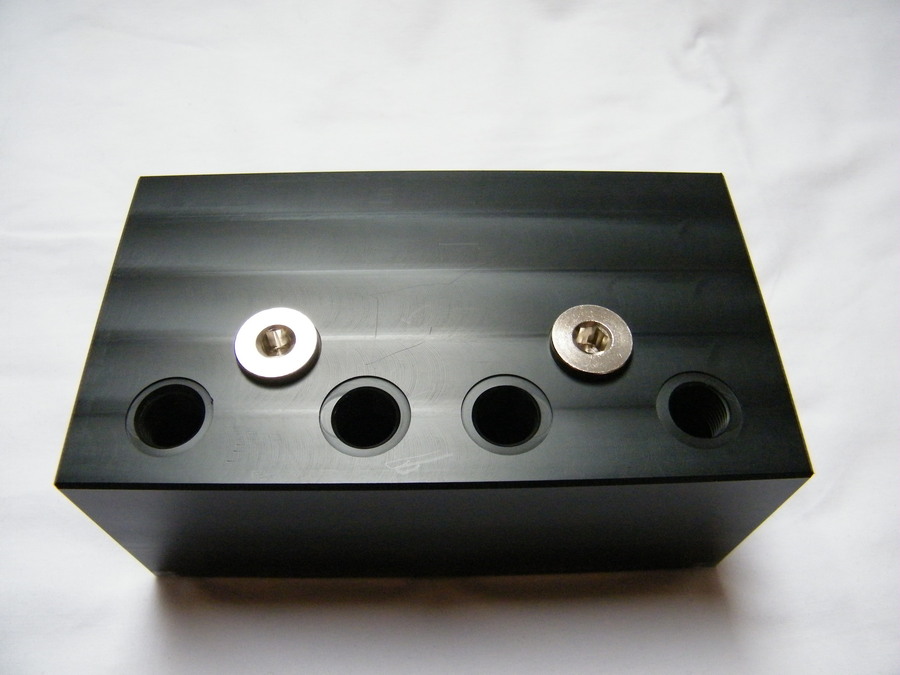
While the X1 is made for one loop, the X2 is designed for two, helping users who want to have separate loops for CPU+Board and VGA-cards, for example, while also showing the water levels of both loops at the same time. As the reservoirs are the same apart from this fact, I'll deal with both at the same time:
- 146 x 82 x 58 mm
- G 1/4" threads
- scope of delivery: two plastic barbed fittings (4 for the X2) for tubing with 10mm ID; mounting material
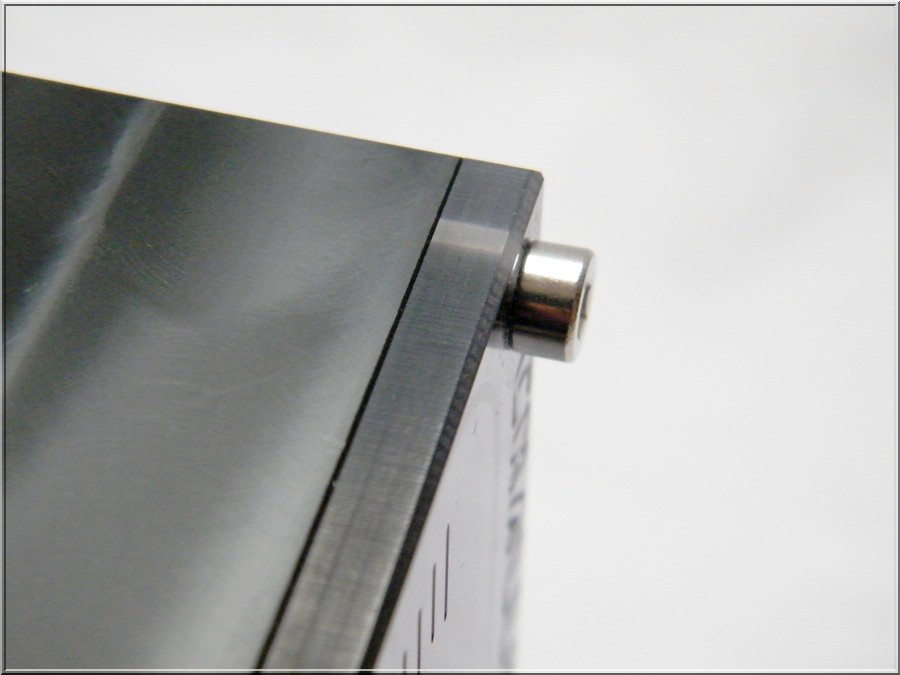
Mounting these reservoirs is pretty clever: in the side, there are little holes for the included nuts, in which they can be placed:
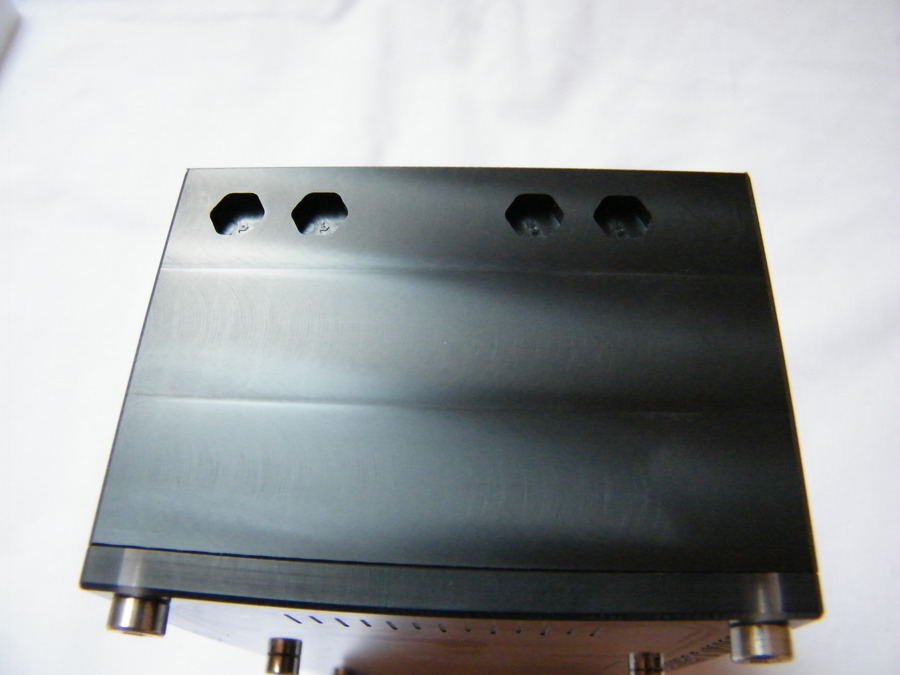
This helps to mount the reservoir securely in the slot with no pressure on the material and as there are no threads in the Delrin, there are no threads that can break - very useful!
As my benchtable didn't offer a possibility for this mounting mechanism at the time of testing, I fitted longer tubing to the reservoirs and just put them on the table.
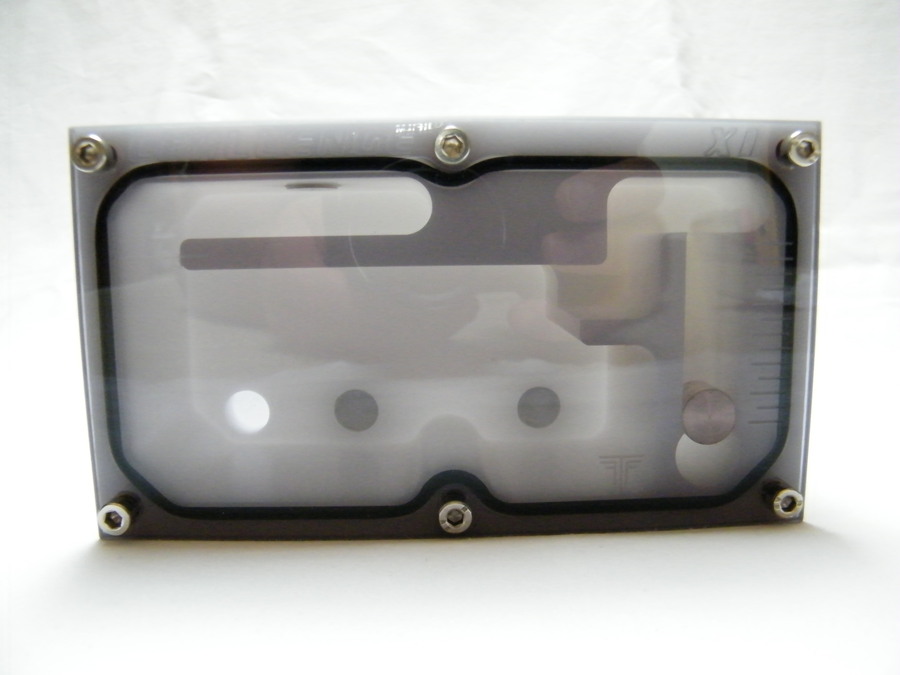
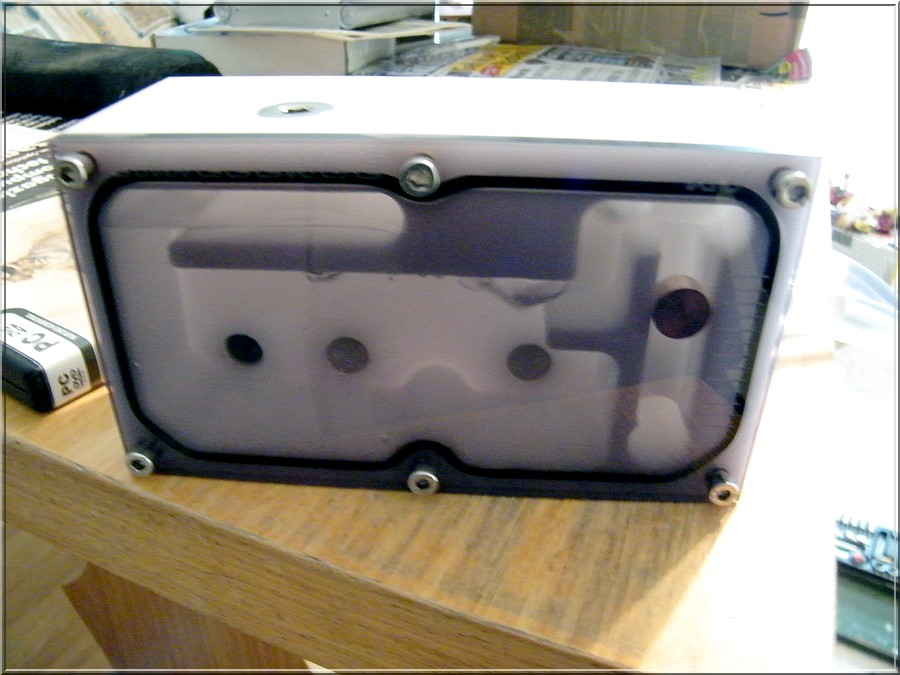
Even though I wasn't sure if the reservoirs would be able to get all the air out of the system, what the Visual Flowmeter couldn't achieve, I was pleasantly surprised:
Using the slightly different, more open structure, both reservoirs were able get suck all the air out of the loop featuring the powerful Sanso pump.
And, once again, a few impressions for you:


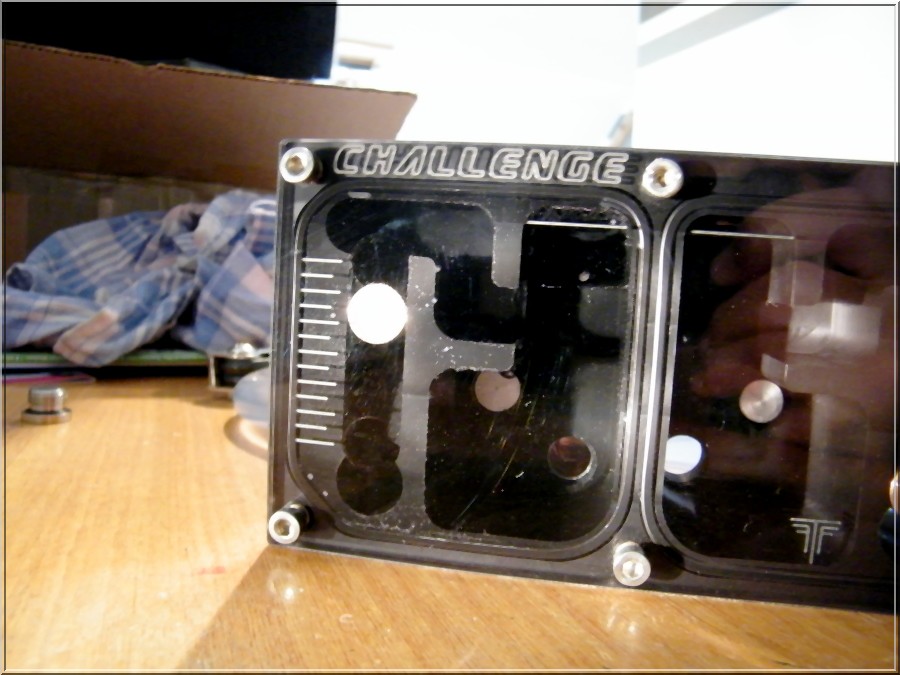
And a few more of the reservoirs in action:
The Challenge X1:
And the X2:
And, of course, another two videos, starting with the Challenge X1
And we mustn't forget the Challenge X2:
When it comes to flow rates, these two newcomers are pretty much the same as their colleagues - both reservoirs could offer a flow of 273l/h max.
Conclusion:
The company Tecnofront succeeded in creating both optically and technically appealing reservoirs, that don't have to hide from their strong rivals.
They offer pretty much everything and the prices are very acceptable for this kind of quality.
The prices:
1.) Tecnofront iTrap Reservoir - 45 €
2.) Tecnofront Visual Flowmeter Reservoir - 50 €
3.) Tecnofront Challenge X1 Reservoir - 65 €
4.) Tecnofront Challenge X2 Reservoir - 65 €
Concluding, here are all of the reservoirs in a pictured overview:


Tecnofront Reservoirs are available at Aquatuning.de , or performance-pcs.com in the USA..for example
Special thanks go out to Marco from Tecnofront.com for offering me these samples.
Also, I'd like to thank my assistant sonnyboy, who assisted me with this review!
-
 1
1
-
-
Thanks..yeah, it´s a nice product !
-
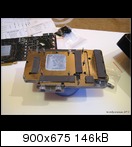
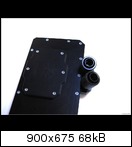
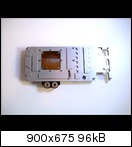
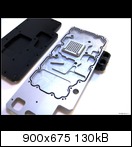
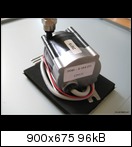
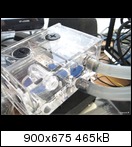
fits in xbox 360 slim :
-
Hey guys,
it's time for another roundup, this time about Laing tops and, as an added bonus, three XSPC Slot In 5,25" reservoirs for one or two Laing pumps. Older models as well as new ones will be featured in this overview.
As previous tests have shown, all Laing tops are very close when it comes to flowrates. In the results chart I'm going to display the highest rate achievement by every product in the setup "top in, front out", which is the only possibility for a few tops.
Event though they flowrates aren't too different, this can't be said about the noise: this is the reason why I want to present a small overview about it.
There aren't only the standard single Laing tops in this roundup, but also three Dual-Laing tops and even a Triple-Laing top! Also, because some users asked me to do it, there's also a comparison to two single tops.
As you can see, I did a lot to offer you a good roundup when it comes to Laing tops. There should be a top for everyone in here and I also added two older models, that aren't produced anymore, for comparison.
With all the tops in this review you should always check the correct mounting on the Laing pump, to avoid damage due to leaking water.
When removing the tops, I recommend to put the pump top down, so that no fluid can reach the pump itself when removing it.
Have fun with this roundup!
Testsystem:
Banchetto 101 Bench Station
Gigabyte GA EX58 Extreme
Mips Fusionblock Nickel
i7 920 @4GHz @1.41V (Bios setting)
Seasonic M12D-850
Patriot Viper DIMM Kit 6GB PC3-12800U CL8-8-8-24
Watercool HEATKILLER® CPU Rev3.0 1366 nickel plated
EVGA GTX 275 (not part of loop!)
ThermoChill PA140.3 - 420 Radiator + 3x YL D14SL Fans
Aquaero VFD
Laing DDC-1T+ or 2x Laing DDC 1T for dual tops!
Noise Destructor v1.1 pumpdecoupling
Alphacool HF 38 Cape Cyclone 250 reservoir
Aquacomputer flow meter "high flow" G1/4"
CPC Metall quick-release couplings
16/10 tubing + barbed fittings
3x water temperature sensors (2x T-Line, 1x in reservoir (G 1/4") )
1x dig. sensor in reservoir for calibrating
3x dig. thermometer for measuring room temperature
GELID GC Extreme
Feser UV Clear/Blue
ArctiClean
The tests of the three bay reservoirs by XSPC took place in a Lian Li V1010.
The candidates
Zern P12 top - available in two versions:


The two versions of the Zern P12 Laing top differ when it comes to the position of the fittings, as can be seen in the pictures above. Mounting is done by using the included screws, washers and plastic shells. With a low price of only 10.90? the Zern tops offer great value for money and are, when compared to others, silent when used. My test sample showed some traces of the milling which can't be seen in use and also don't affect the top's performance.
At an additional charge, you can also get a very useful mount out of stainless steel, offering decoupling and more ways of mounting at the same time - a good idea in my opinion!
The P12 tops are only available in a black POM version. They could fit a little bit better, but they still offer great value for money.
Koolance PMP-400
This Laing top initially showed up in our shops in two versions: one out of acrylic glass and the other one out of metal, which I did use for this roundup and which isn't available anymore, even though it cost around 40 EUR in German shops before. The version out of acrylic glass costs around 30 EUR. The tops come in a white retail box with the required mounting material and a thin, rubber-like mat, which is supposed to mount the pump in the case and also decouple it. The decoupling doesn't really work, though. Threads in the side of the top offer a variety of possibilities to mount the pump.
The tops also come with two low profile seals, because of the four threads for fittings the top features, so you can choose which ones to choose for both in and out.
The Koolance tops can convince with good flow and good looks, the mounting is easy and done quickly. Still, the price is rather high when compared with other tops in this roundup.
Aquacomputer Aquacover DDC
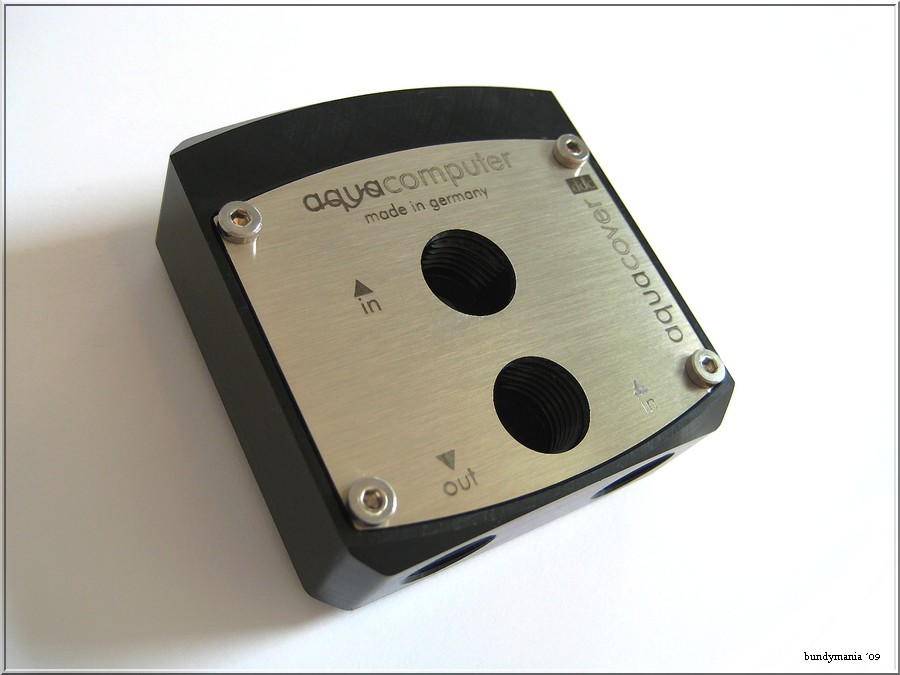

Aquacomputer.de presented me their first top for the popular Laing pumps. The top looks very classy with the mix of POM and stainless steel, making it easy for the top to blend in in most watercooling loops. It comes with screws for mounting and to sealing plugs. The writing on the top is exemplary, making it easy even for beginners to find the right threads, four of which are available.
On my pictures I also used a sealing plug from another manufacturer for illustration and used black screws as a little modification. The top is available for around 20 EUR in the usual shops.
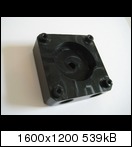
On the inside, there ware a lot of traces from the milling...other companies in this roundup show how it's done in a better way. A manufacturer, bragging with "Made in Germany", should maybe put more effort in this aspect.
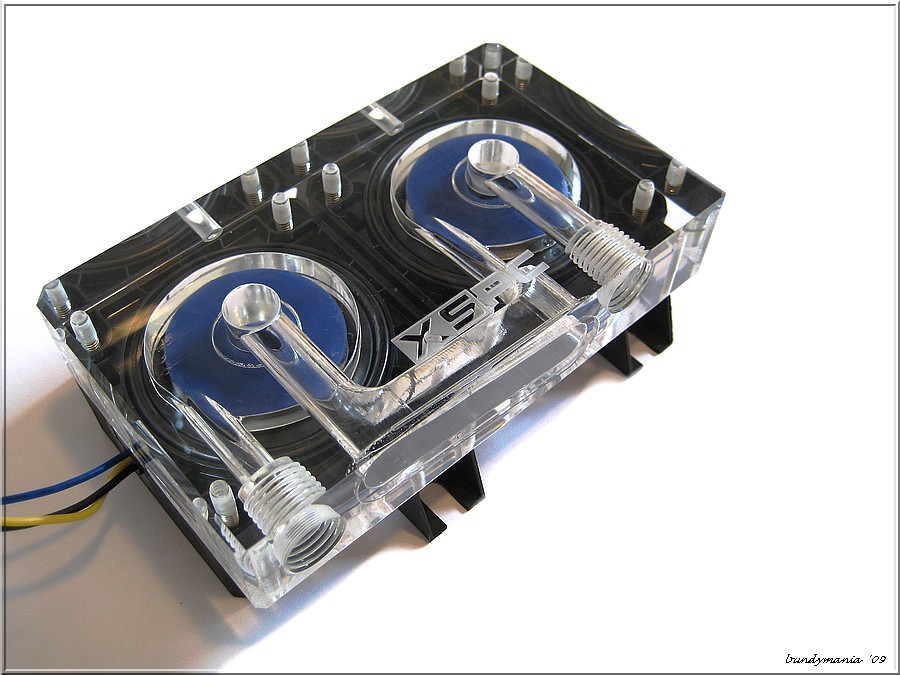
Aquacomputer Aquacover Dual DDC


This top for two pumps features the same aspects as the single top. The scope of delivery is also the same and the flow rate isn't bad, either. The noise it makes is around identical with the other dual tops in this roundup. Also, just like for all the other tops, I can only recommend the use with decoupling material to reduce the noise. The Aquacomputer dual top costs around 30?.
Watercool DDC Case LT & Dual Case LT


I got three tops by Watercool for this Roundup. There are two versions of the DDC Case LT: one out of acrylic glass and one out of POM. Then there's also the DDC Case Dual Top for higher flow. All three tops feature a top out of stainless steel and great craftsmanship, showing in a good fitting accuracy. While the POM version showed some traces of the milling process, the version in acrylic glass also offers a small hole for LEDs, which sadly is placed on the top, making understated wiring hard - this is also the fact on the dual top.
The DDC Case LT top costs around 20 EUR, the dual top around 35 EUR
When it came to noise, the single tops couldn't convince me at all: the difference to the best models in this category is easily hearable. To make sure I didn't just get a faulty top, I also used the other top, too - with the same result. The dual top doesn't have this problem, it sounds around the same as the other dual tops.
Overall, the Watercool tops performed well.
2x Watercool DDC Case LT serial vs. Watercool DDC Case Dual

Some users in an US forum asked me to do this test. The result shows that a dual top from the same manufacturer offers better flow rates.
Alphacool Laing top
As far as I know, this top isn't available anymore separately and is only available in a bundles with Laing pumps anymore. It's also part of this roundup because a lot of users still use this top. For the price of around 20 EUR you get a well crafted product, also featuring a hole for LEDs in the front and threads in the side to mount it in a 3.5"-cage. Also, several reservoir additions are available separately. The top has been available for some years but it still performs well: the flow rates are good and the noise is quite low.
XSPC Single, Dual & Triple tops
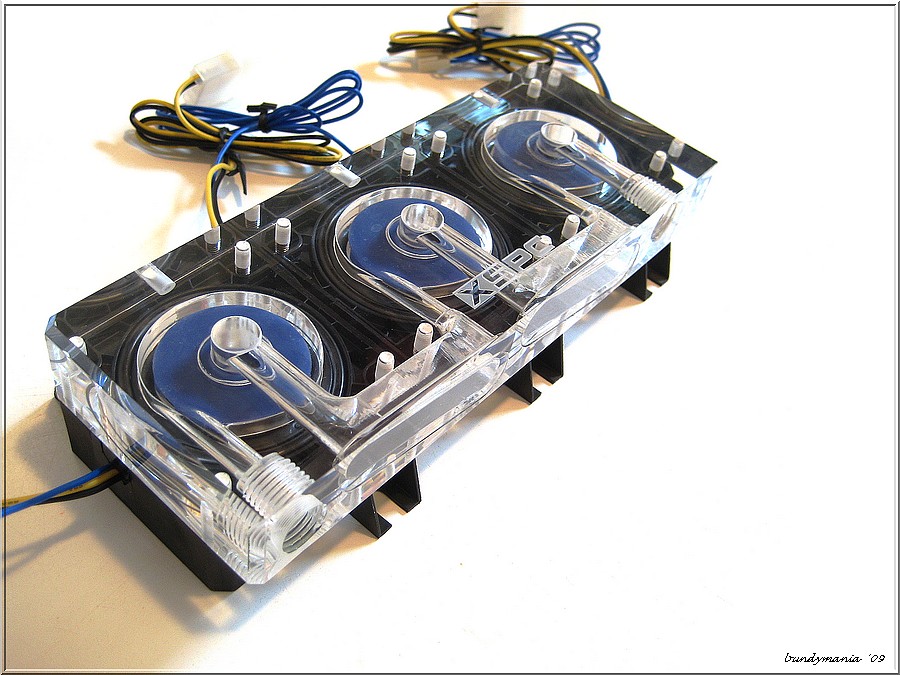

The English company XSPC also offers a large selection of reservoirs and Laing tops, so it's almost normal that I had six different tops and reservoirs for this review. I'll start with these three: a single, dual and triple top for the Laing pumps, costing 17, 26 and 35 EUR respectively.
The build quality can be called flawless and all the required mounting material is, of course, included. Fortunately, the LED holes are on the back of the tops. Of course, a single Laing DDC-1T is usually more than enough to provide more than enough flow for all loops, but just as in any other hobby, there're watercooling enthusiasts, that just want to have this plus on performance. This is where dual tops come in or even this triple top, which offered more than 300l/h in my test!
By the way, the single top is also available in black.
The XSPC triple top in use - two videos for illustration:
YouTube - Kanal von hwluxxbundymania
YouTube - Kanal von hwluxxbundymania
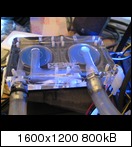
EK Water Blocks EK-DDC X-Top Laing DDC V2
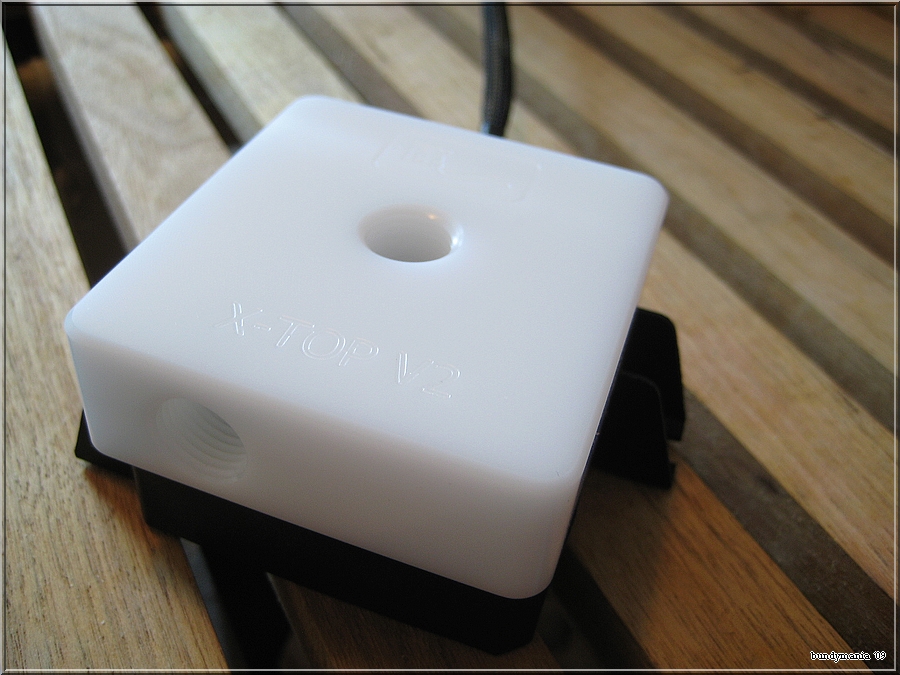
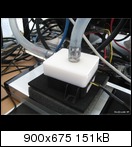
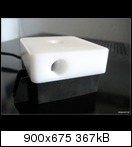
The world-famous company EK Waterblocks is, of course, also in this roundup with a Laing top and so I got this current version in the rare white color. It's also available in clear and white. It comes in a retail box with all the required screws. The version out of acrylic glass also offers holes for LEDs on the back of the top. Overall, the product makes a good impression: the build quality is good, it fits very well and the price is all right: around 20 EUR.
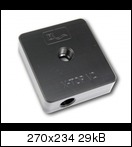
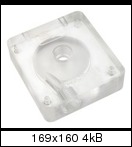
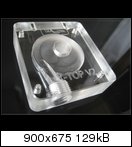
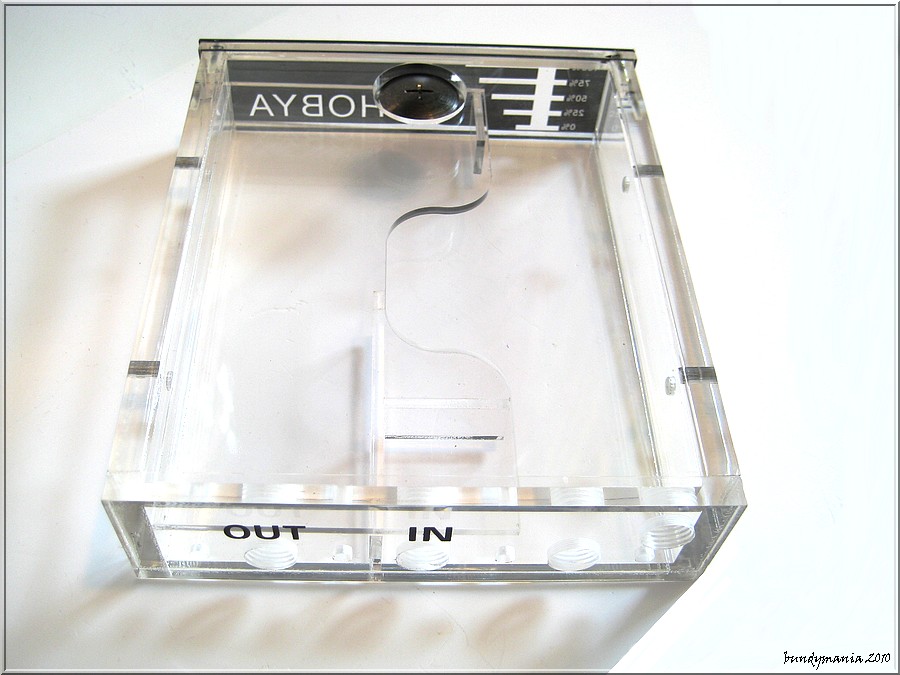
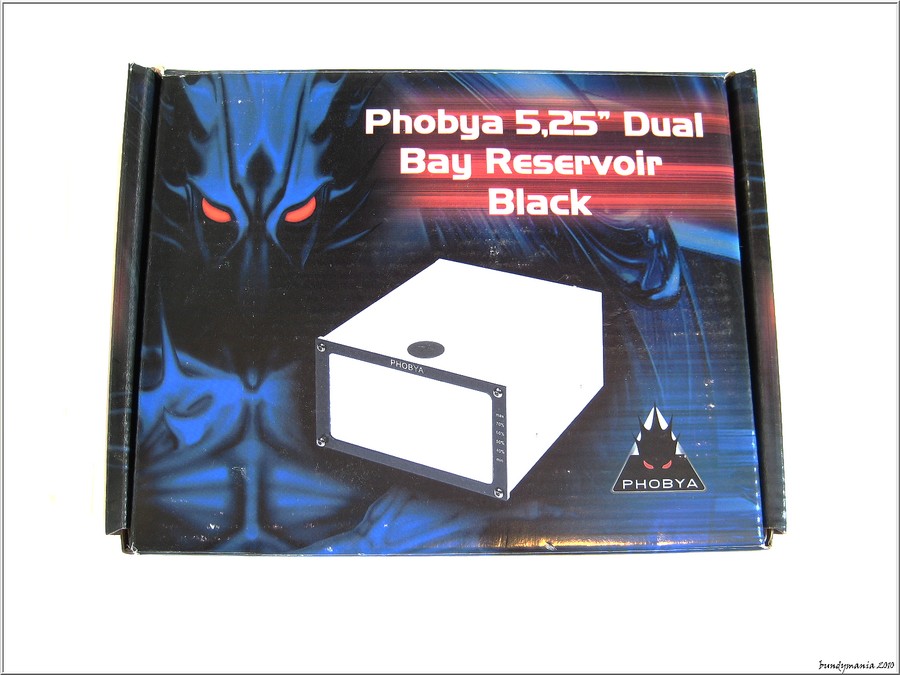
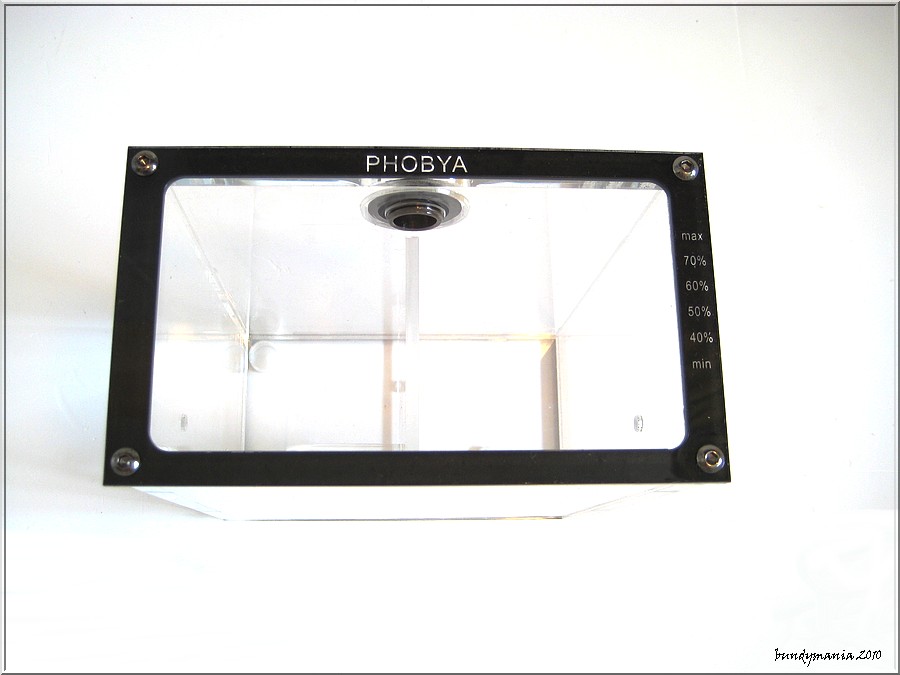
XSPC Dual Bay Reservoir One & Two & Bayres (Version with Plastic Frontplate = EOL)
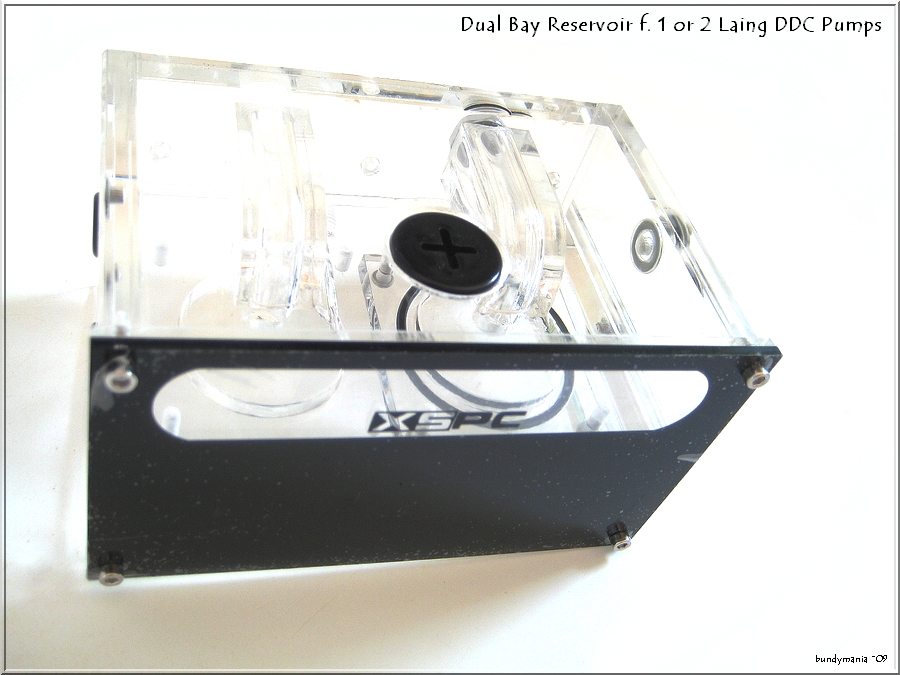


These three XSPC reservoirs make a little exception in this roundup with their mountability in two 5.25"-cages. Up to two Laing DDC-1T pumps can be mounted directly in the reservoirs and be run in two unused drive cages. The Bayres with black acryl front plate is a version, which has been around for some time and is being replaced by the other two, but is still available in some shops. The Bayres One and Two come with two replaceable front plates each, especially creating good looks in combination with aluminum cases.
You should always try to keep the fill level over 3/4 to keep the noise level low and the air bubbles out of the loop. You fill the reservoirs over an opening in the top that closes with an included sealing plug and an O-ring. There is also a metal adapter available at additional charge that can be used to create another G1/4" thread instead of the filling hole.
Apart from the countless screws, an Allen key is also included for changing the front plates and a blue 5mm LED. The craftsmanship is once again flawless.
While the two pumps share one large reservoir in the older EOL-product, the new version (Bayres Two) features a wall in the middle, creating two separate reservoirs with a separate filling hole each. The old version also features a plate to use the reservoir with only one pump. To reduce the noise it makes, the reservoirs are fitted with two rubber bands, helping to reduce the amount of vibrations sent to the case.
This works pretty well, but I still recommend reducing the pump's performance for those on the lookout for a silent system, even though the mass of the reservoir helps to reduce the vibrations.
Theses three products really show no weaknesses. The pumps have to be mounted in a 90° angle because of the mounting holes on the Laings, but this can easily be solved with a saw or any other tool.
The XSPC Bay Res. are available for around 45-50 EUR
The test procedure:
For measuring the flow rates I used the system presented above with an Aquaero/Aquasuite and a flowmeter by Aquacomputer. After switching the pump's top, I let the system run for three hours to get rid of any air that might be trapped in the loop. I measured the highest flow rates after one hour of full load, independent of the way of mounting of the fittings. Some tops feature both threads on the front and on the top, but the inlet on the top always offered best flow rates, but only barely better than the other way, so I'll not incur this in the charts.
When using the XSPC reservoirs, you should always take note of the minimum fill amount of 3/4, so that they don't suck in air.
Results:
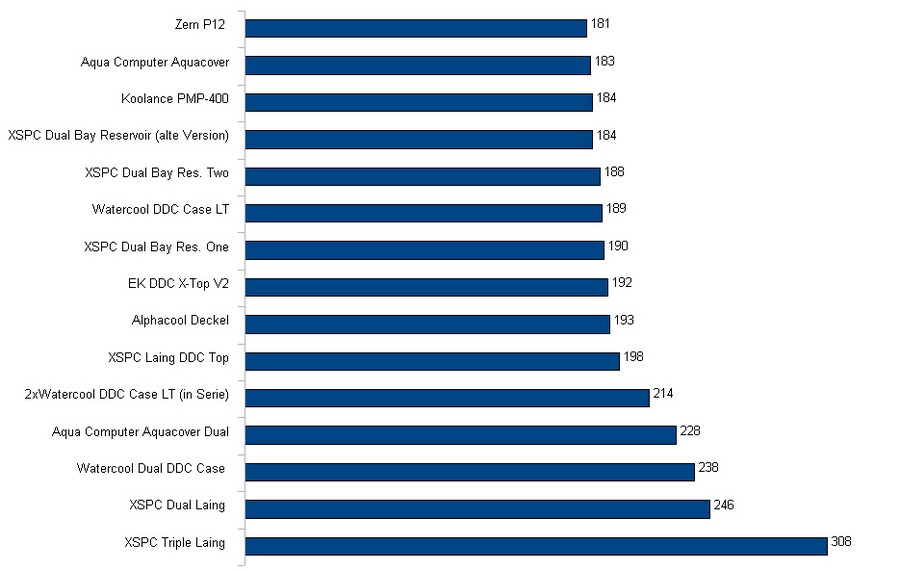
Flow rates: Liter/hour

Noise, my subjective impression from 60cm distance - smaller value is better
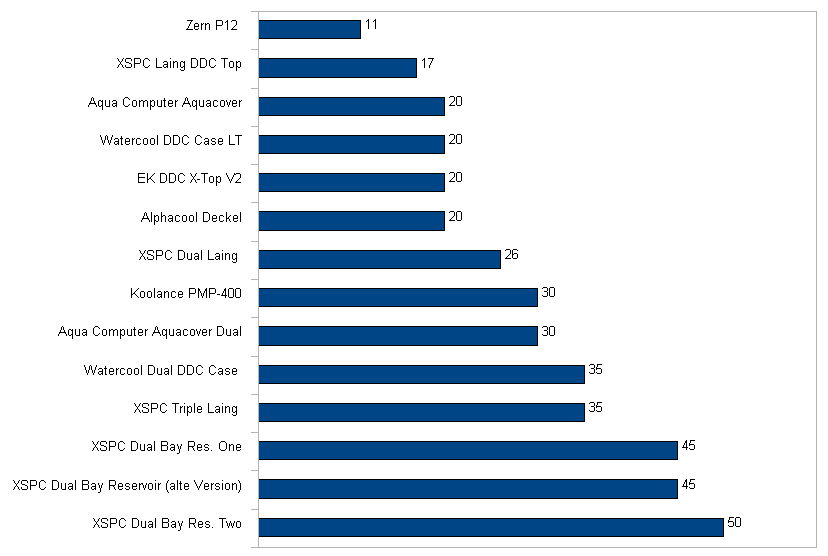
Price in Euro
This roundup should have offered the right top for every user. You shouldn't just buy the top because of the best flow, but have a look at the product in general.
When it comes to single tops, I was pleasantly surprised by the Zern P12 top, offering great value for money, while getting to number one on the noise-chart. This chart shouldn't be too important, as every person has a different impression of noise, but I'm sure that even a person with hearing disabilities will be able to hear a difference between the first and the last place.
I couldn't see many differences in the midfield, even though the Watercool top did disappoint me a bit.
I really like XSPC's idea to combine reservoirs and Laing tops, that can easily be mounted in unused drive cages.
Thanks: I'd like to thank the following companies for the support of this roundup:
http://www.a-c-shop.de , http://www.aquatuning.de , http://www.alphacool.de , http://www.ekwaterblocks.com , http://www.watercool.de , http://www.aqua-computer.de , http://www.xspc.biz , http://www.gelidsolutions.com , http://www.zern.at , http://www.koolance.com , http://www.highflow.nl , http://www.thermochill.com , http://www.mips-computer.de , http://www.laing.de
-
What are you doing with such a massive collection of hard drives, or is each hdd only 300MB big??
-
Who is the new owner ?
-
Hey guys,
today I want to introduce you to some new variants of tubing, some of which haven't been out too long.
This roundup is mainly about the popular sizes (in europe) 13/10mm (3/8") and 16/10mm (5/8"). While you were pretty much stuck with only a few choices for these sizes in the past, there's now a range of different brands and colors available to choose from.
When choosing the size of the tubing, it's important to know which requirements the product should meet and you shouldn't just pick one that's fashionable at the time. Even though the 16/10 (5/8") tubing can outperform the 13/10mm (3/8") when it comes to the bending radius, it's not always the best choice because of its sausage-style looks. Overall, the radii of high quality 13/10mm tubing are usually more than enough for most users, anyway. 13/10 tubing by Primochill and Koolance can, for example, achieve radii a lot smaller than those of Masterkleer tubing.
When taking a look at the larger 16/10mm tubing, the difference in radii are only minor, so the more important aspects are the color and the price. A long time there was no way around Tygon tubing, because of the awesome bending radius and its clear looks, even though you paid 10€/meter for it. Luckily, there are now several other competitors available that can take on the Tygon in both these aspects.
Last but not least, there's also the 19/13mm royalty, which appears to take the same route the 16/10 took: except for a few exemptions the only differences are, once again, in the color and the price.
Also, before buying your favorite tubing, be sure to think about what case it's supposed to be used in. When, for example, using 11/8mm tubing (which offers great bending radii), it'll almost look lost in a Big Tower case, which wouldn't be the case when using 16/10mm. On the other hand, 11/8mm can be the best choice in tiny cases, like those used for HTPC´s, to avoid having to use angled fittings or anti-kink-springs.
Also, there's the choice of colors: a lof of the new tubing is UV reactive, making it easier to create some accents in a watercooling-loop in the dark when using a UV light. Of course, this isn't everybody's style and some of the UV tubing has the disadvantage of a slight blue color, that can be very visible on black, clear or white tubing. Those who don't want this effect should try to look out for tubing that's not UV reactive.
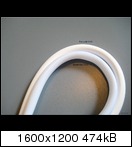
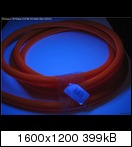
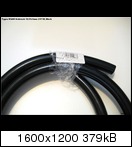
So let's get to the most important part, comparing pictures. I'll start with the 13/10mm (3/8") tubing.
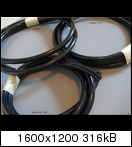
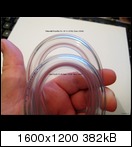
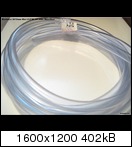
The white versions of Masterkleer and Primochill tubing are first:

(Please excuse the stains on some of the UV pictures, coming from some faulty 19/13mm tubing, that marked off on the rest)
Masterkleer: 3.99 Euro / per meter
Primochill: 5.99 €/m
Here's a three-way-comparison between Koolancetubing 13/10mm (uv reactive), Primochill Primoflex Pro 13/10mm and Tygon 12.7/9.5mm tubing

As you can see, the expensive Tygon scores best when it comes to transparency.
Tygon: 6.99€/m
Primochill: 5.99€/m
Koolance: 4.49€/m
Also, there's Masterkleer tubing in this size for only 2.69€/m, but it also offers very poor bending radii when compared to these three rivals.
Here's a picture comparing Primochill in 13/10mm and 16/10mm with Masterkleer in 13/10mm (3/8")
Still, to be frank, even the cheapest Masterkleer tubing is sufficient for most uses.
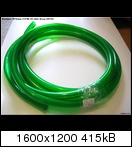
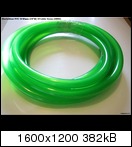
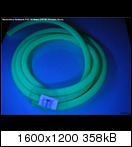
Next one is a comparison between green Masterkleer, Primochill and Koolance in 13/10mm.
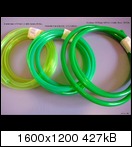
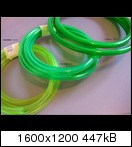
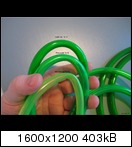
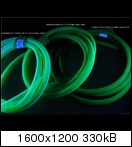
Masterkleer: 3.99€/m
Primochill: 5.99€/m
Koolance: 4.49€/m
The Koolance and Primochill tubing are about the same when it comes to bending radius, though the one by Kuukluxtubing is a bit stiffer, resulting in more pressure on the waterblocks.
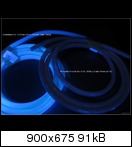
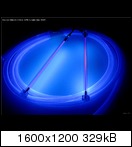
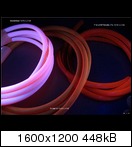
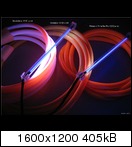
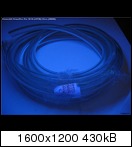
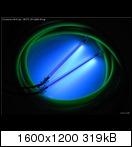
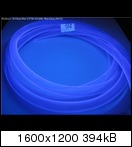
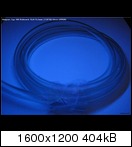
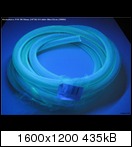
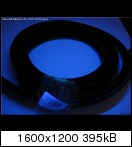
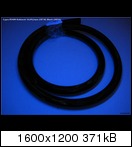
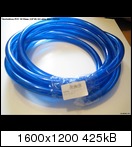
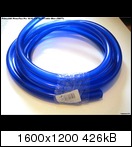
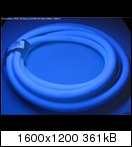
Let's get to the very popular color blue! Prices are the same as the other colors by those companies in this size.
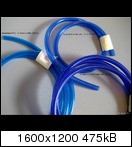
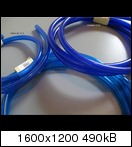

As you can see, the Primochill tubing isn't UV reactive.
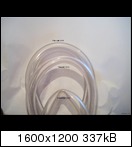
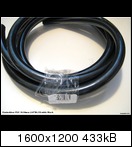
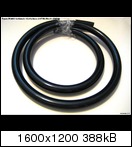
Next is the black 13/10mm tubing. Once again, the variants by Koolance and Primochill aren't UV reactive, avoiding the blue sheen seen on the Masterkleer, which is a result of the UV particles.

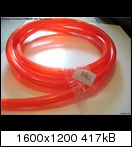
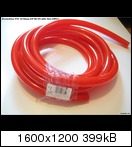
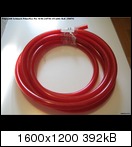
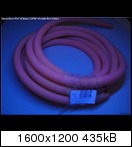
Now it's the turn of red Masterkleer, Primochill and Koolance tubing, looking like this in daylight and UV light:
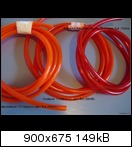
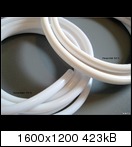
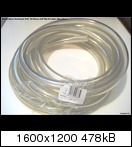
So let's get to 16/10mm (5/8") tubing. As said before, there aren't any big differences concerning the radii.
I especially like the Primochill, offering very tight bending radii and very clear looks at 6.29€/m.

Comparison between Primochill 16/10mm and Clearflex 15.9/9.5mm:
Koolance also offers large tubing, but sadly only in 16/13mm variants, that kink a lot earlier than 16/10mm because of the thinner walls.
This is what Koolance offers in 16/13mm:

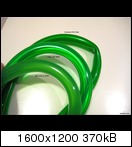


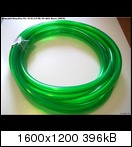
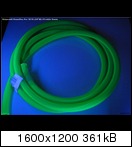
Priced at 5.99€/m, you can see a huge difference to the 16/10mm tubing in the pictures of the green variants.
Coming up is a comparison between the popular Masterkleer 16/10, an XSPC 15.9/9.5mm tubing and the almost unknown Nalgene 15.9/11.1mm.
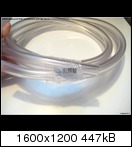


The Nalgene scores best when it comes to bending radius, closely followed by the Masterkleer and XSPC.
Nalgene 5.99€/m
Masterkleer 4.99€/m
XSPC 2.79€/m
One thing I didn't like about the Nalgene tubing is the continuous writing on the walls, so I'd probably choose a competitor.
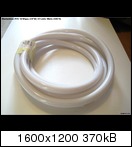
Black tubing also gets more and more popular so here are the most commonly used variants in 16/10mm (5/8") :


It starts with Masterkleer 16/10mm for 4.99€/m, followed by Tygon 15.9/9.5mm for 9.99€/m and ends with Primochill 16/10mm for 6.29€/m.
Only the Masterkleer tubing in this comparison is UV reactive and the Tygon offers the best bending radius.
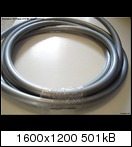
Next up is a larger comparison of Masterkleer and Primochill in 16/10mm (5/8") - get your own impression of the colors blue, red, green, white and silver!


I'll close with a bending comparions of rather unknown, but very good tubing: Nalgene 19/13mm (1/2"):

I hope that my little overview could be of some help when choosing the right tubing.
This roundup will probably soon be expanded with other variants, but for now I can't see any more tubing in this amount or I'll get nightmares.
Until the next review,
the Bastelorakel.
Thanks go out to the company Aquatuning.de for providing the samples and my girlfriend for her patience until 80 meters of tubing were stored away after days of taking pictures.


Det kalde galleriet - OPPDATERTE REGLER
i Kjøling - Vann og ekstrem
Skrevet